 |
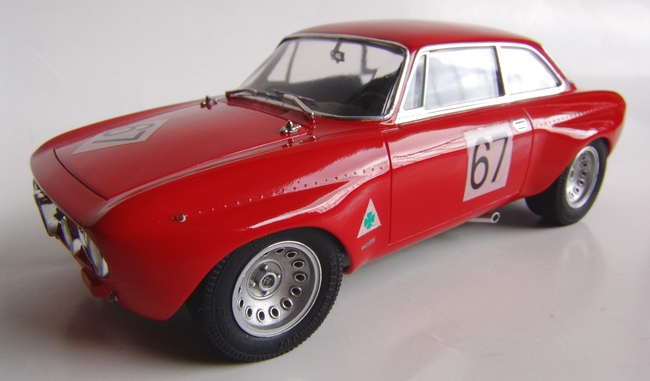
This is
a very simple, but very finely detailed kit. Once the body was assembled,
I sprayed light coat of primer and 3 mist coats of Tamiya TS-8 Italian
Red straight from the can.
|
 |
The rear axle is a one piece, and it was painted with Testors aluminum
metalizer and detailed with black wash. You just slide a metal rod through
it to
attach rear wheels. There is no brake detail provided in the kit.
|
 |
After mist coats were dry, I continued with
two more "wet" coats. It is true that red paint looks good on almost all
Italian cars!
|
 |
It is a
curbside model, the engine details are molded on the underside. Exhaust
headers and muffler are separate pieces though, and have very good
fit. I painted them with Testors Burnt Metal.
|
 |
Body was polished with 3M compound, waxed with Last Detail wax, foiled with Bare Metal Foil
and decaled. Window trim has a very tricky shape, and it took a long time to apply BMF without tearing it.
|
 |
All
interior parts are made from vinyl, and a bit tricky to handle. It is hard
to sand vinyl parts, and they flex all the time. I left the seat
unpainted, but flocked the package shelf with DM black flocking.
|
 |
In fact, I had
to scrap my BMF job 3 times before I got it right. Finally I installed
grille, headlights, and glass. Another shot of completed, BMF-ed, decaled,
and polished body.
|
 |
This is the picture of completed chassis. It is missing only the exhaust tip. Very
simple, but looks good.
|
 |
Dashboard was cleaned, primed and sprayed with
flat black. I tried to create "crackle black" finish by spraying paint
from the distance, and it turned quite good.
|
 |
Finally, I glued front and rear seats to the
chassis, and fitted door panels, decorated with window cranks and door
handles. Then I installed the shifter and a hand brake and interior was
done.
|
 |
The dashboard is very simple in this kit, but again, it was very simple in
the real car too. Visible insides were painted with Testors Aluminum metalizer
to simulate aluminum body. You can also see mesh pieces that I added to
the grille openings.
|
 |
Tires were put on the rims and wheels attached
to the chassis. All four wheels lined up perfectly and "rolling" chassis
was ready to be installed into the body.
|
 |
Chrome plating on the wheels was too shiny, so I sprayed them with Testors
aluminum metalizer, and weathered with black wash (no weathering applied
in the picture).
|
 |
This is
the underside of the model. The exhaust tip was supplied as a
chromed part, but it was too thick so I replaced it with a polished aluminum tube.
|
 |
The chassis
is also very simple, but has
good details. I painted it satin black and applied some black Detail
Master flocking on the floor.
|
 |
Assembled front suspension does look good, even though a bit simplified. Note the fat racing
tires. They are molded in very soft rubber, and were tricky to sand for that
"worn" look.
|

