F e r r a r i 250 GTO Road Car
|
|
See Also: Gunze Sangyo 1/24 Ferrari 250 GTO Click on the picture to enter full buildup and gallery.
|
|
|
See Also: Gunze Sangyo 1/24 Ferrari 250 GTO Competition Tourist Trophy, Goodwood 1963, Graham Hill. Finished 1st. Click on the picture to enter full buildup and gallery. |
 |
 |
 |
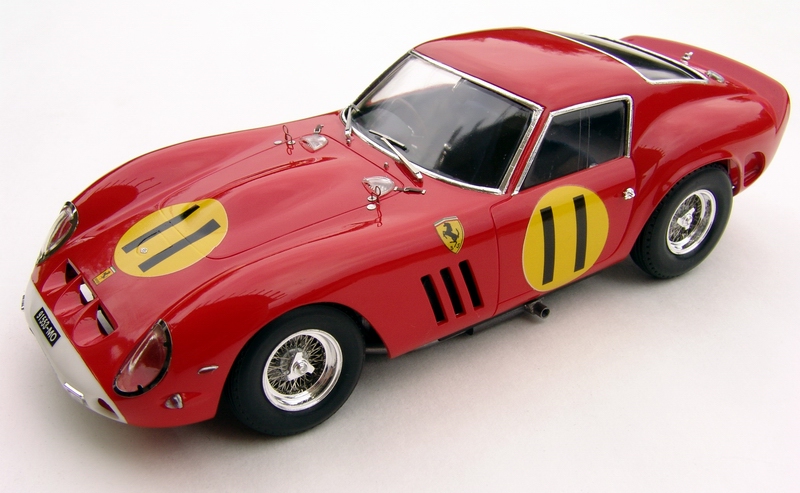
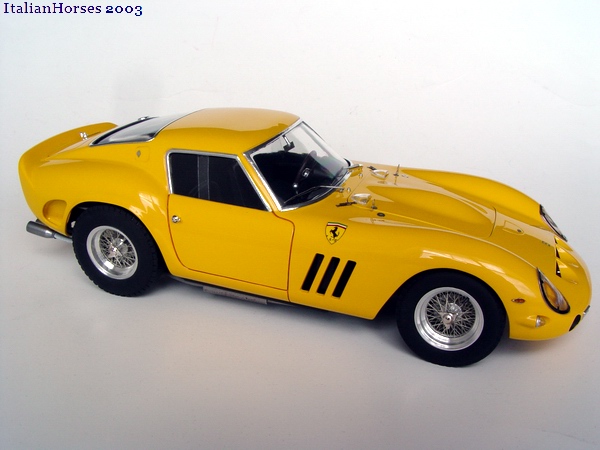
Kit: Gunze Sangyo Ferrari 250 GTO With V12 Engine, G-513 Pros: Great detail. Incredible number of parts allows to build a very detailed replica of the one of the best performing cars in motor racing. Very good body proportions, great photoetched parts, excellent chrome tree, excellent white metal engine, turned parts, many metal parts give a solid feel to completed model. Cons: Glass is too thick, incorrect tires, parts fit sometimes very bad. Quality of metal castings is very low, and takes a while to clean. All metal parts require CA glue which makes assembly more complicated. Instruction sheet gives only basic color guide, assembly directions are not clear and misguiding. Verdict: This is a very complicated model, but represents the car well. Despite its drawbacks the finished kit looks amazing, however not exactly correct. I would not recommend this kit to somebody just starting building models. Save it till you put together at least 20-30 models - it requires a lot of skill and some tools that you might not have in your toolbox, if you a beginner modeler.
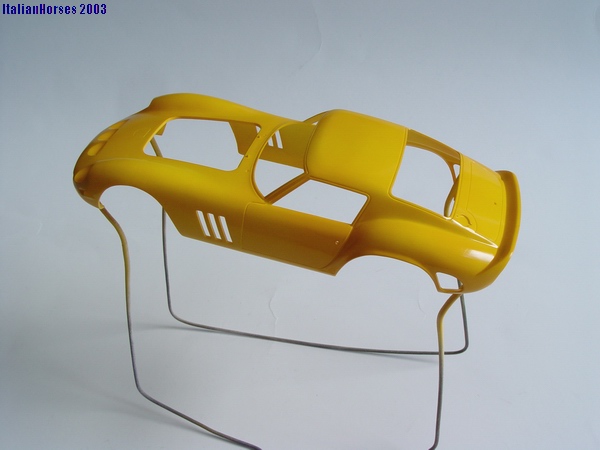
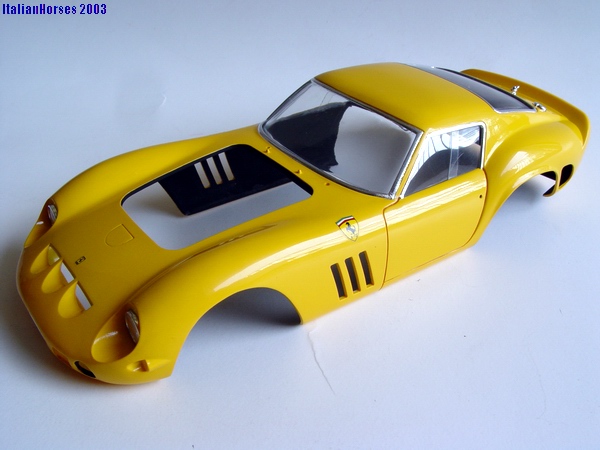
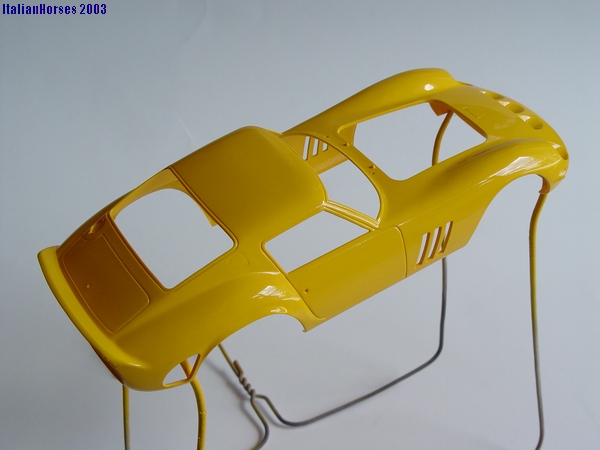
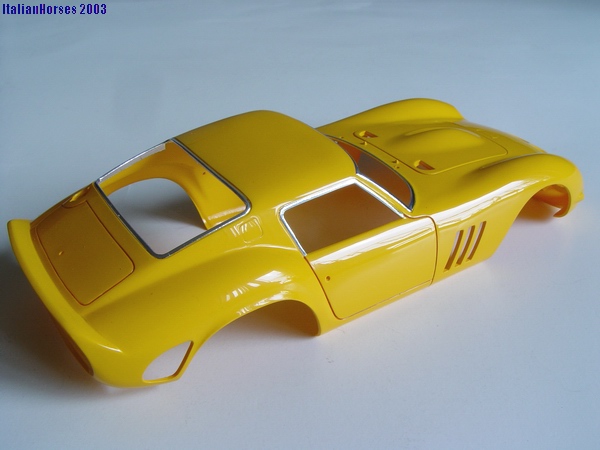
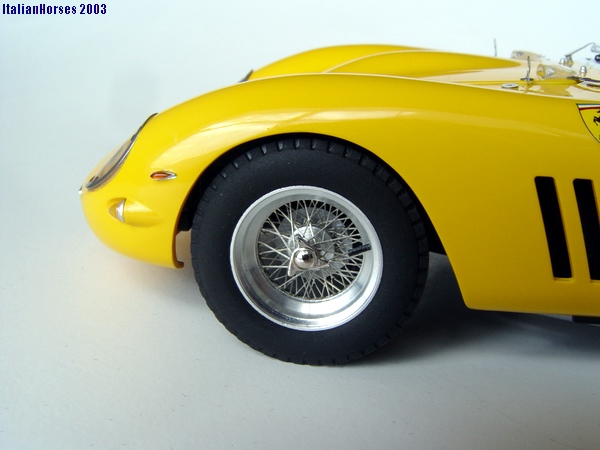
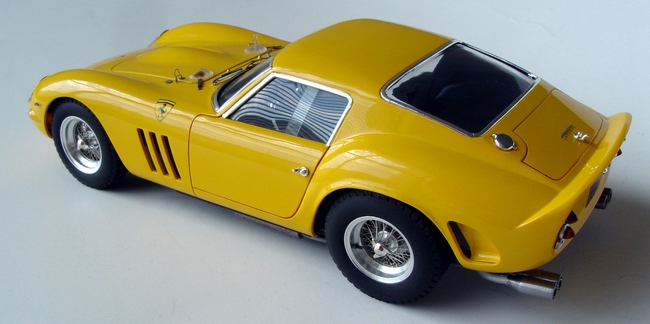
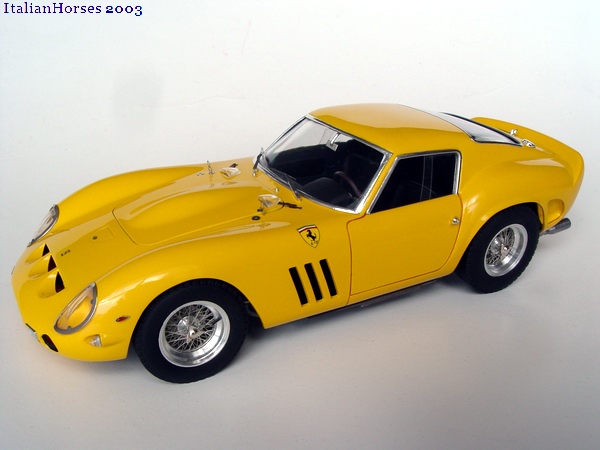
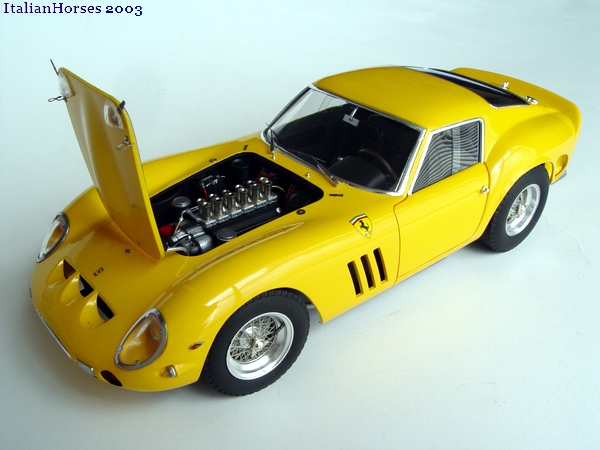
This particular model was built as a road car in Ferrari Fly Yellow - the color that never existed on a real car. Interior was finished in black, and many aftermarket and scratchbuilt details were added to the model (see list below). Wheels and tires are from Tecnomodel. |
 |
 |
 |
|
 |
 |
 |
Buildup
|
|
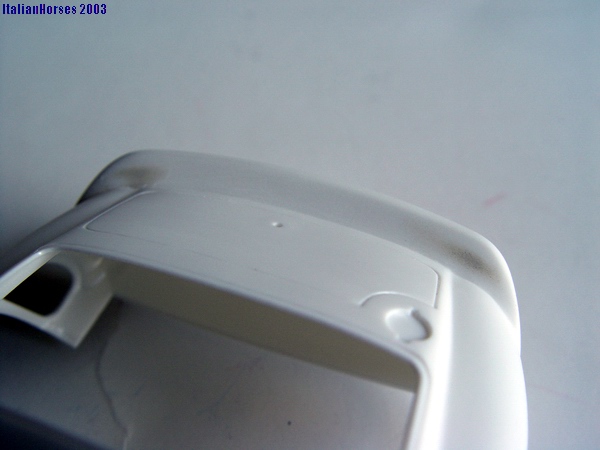
Before first primer coat was applied, I cleaned all mold lines and small imperfections, and filled all known sink marks - rear spoiler, around blinkers in the front, and along the windshield top. |
|
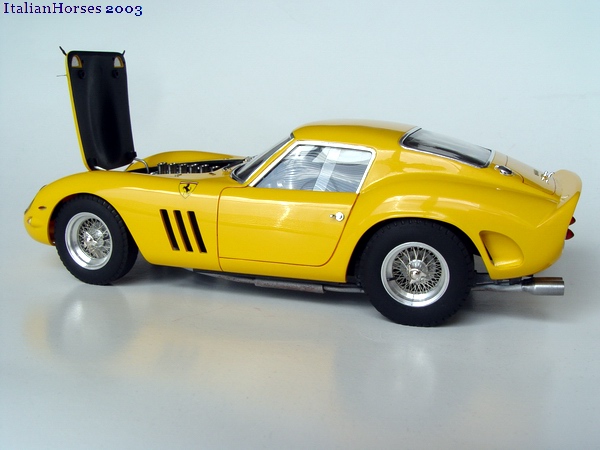
Metal hinge was fabricated from a thin metal wire to allow hood to open and close. Construction of the hinge will make hood removable at all times. |
|
|
After putty has dried, I sanded everything smooth, re-puttied some areas, sanded smooth again, and sprayed thin coat of gray primer to check for flaws. The surface was good, so I sprayed a coat of white primer. Both primers were from Tamiya. |
|
Bodyshell was painted flat black from inside. I used thinned Tamiya acrylics applied with a wide brush. After paint has dried, I slightly buffed it with cotton cloth to blend brush marks. |
|
|
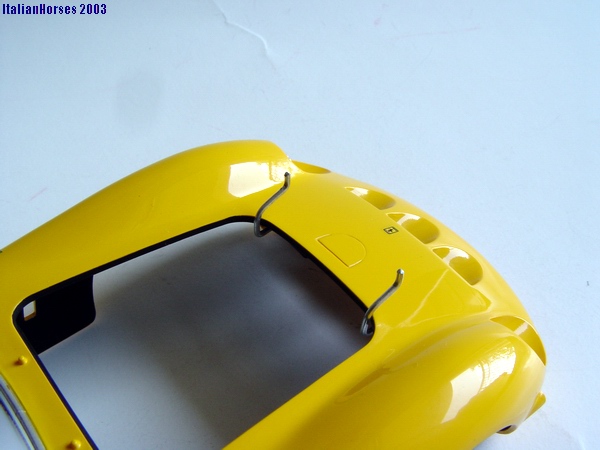
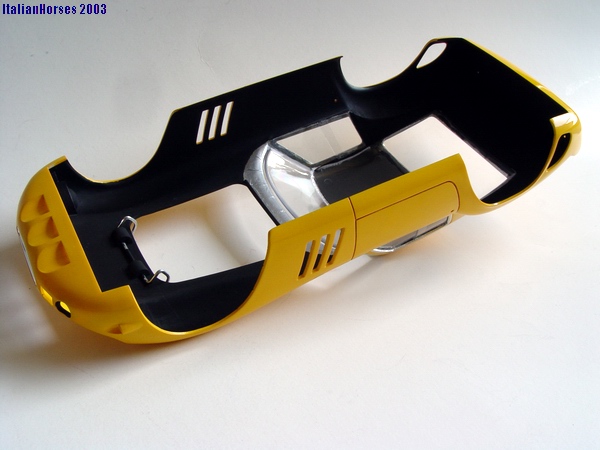
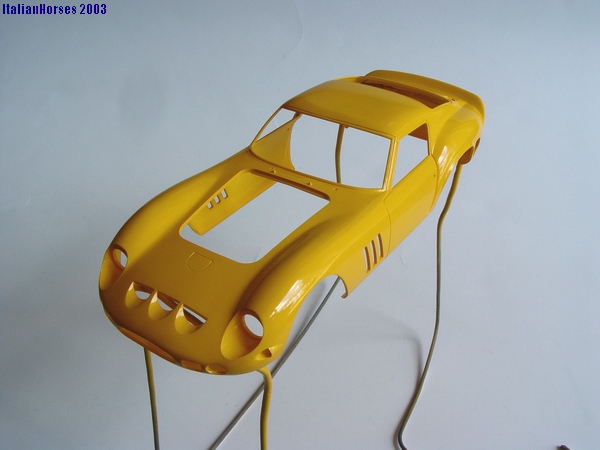
When primer was dry, I sprayed first mist coat - Tamiya Camel Yellow. The actual color would be Tamiya Chrome yellow, but it looks very good when undercoated with slightly darker Camel Yellow. |
|
Small details were added to the body: decals, headlights, gas cap, trunk handle, etc. |
|
|
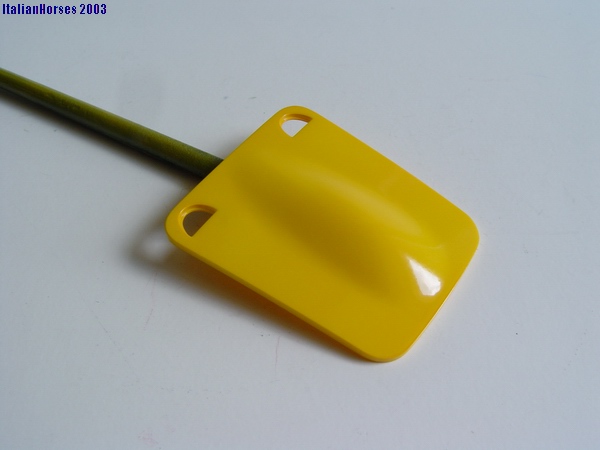
Same things were done to minor body parts, such as bonnet and rear cooling ducts. Here you can see the bonnet after first Chrome Yellow coat. |
|
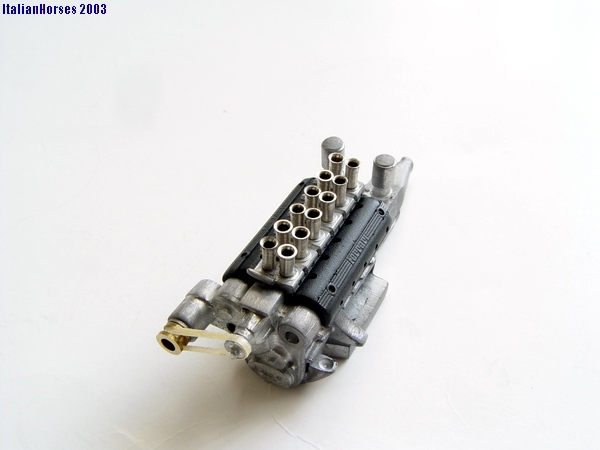
Engine was wired, fitted with oil breather tubes and fuel lines. I used old acoustic guitar string to replicate the fuel lines. |
|
|
Second mist coat of Chrome Yellow was sprayed on the body and all body parts, and after it was dry, I lightly sanded it to remove slight orange peel and couple of small debris. |
|
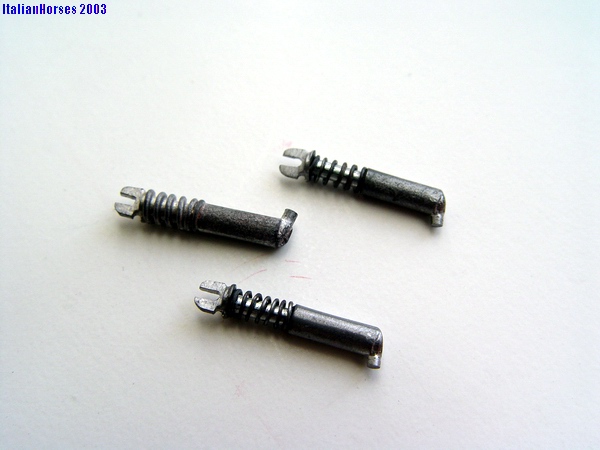
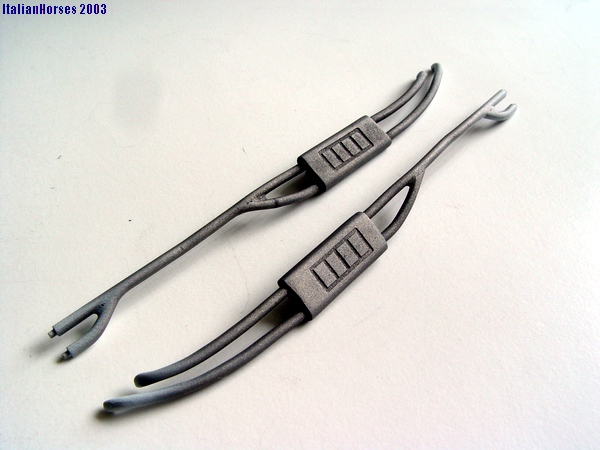
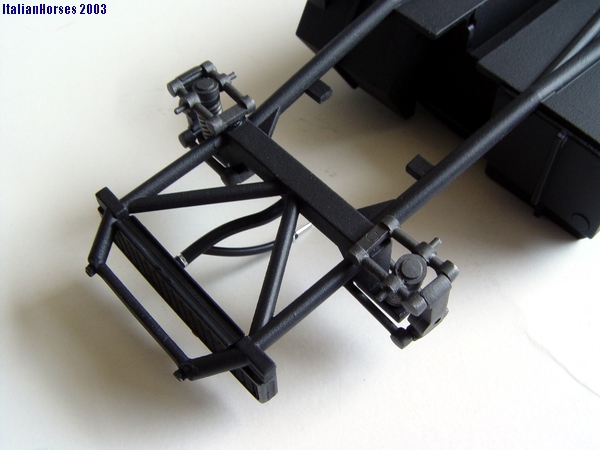
Front shocks were re-worked. I removed the part of the shock with the coil, and substituted it with fine aluminum tubing. Coil was made from a paperclip wrapped around same aluminum tube. Now shocks look much better (original kit part is in the middle). |
|
|
Finally, two wet coats of Tamiya Chrome Yellow were sprayed. When paint completely gassed out (about 5 days) I polished the body with 3M polishing compound and waxed it with Treatment Last Detail wax. |
|
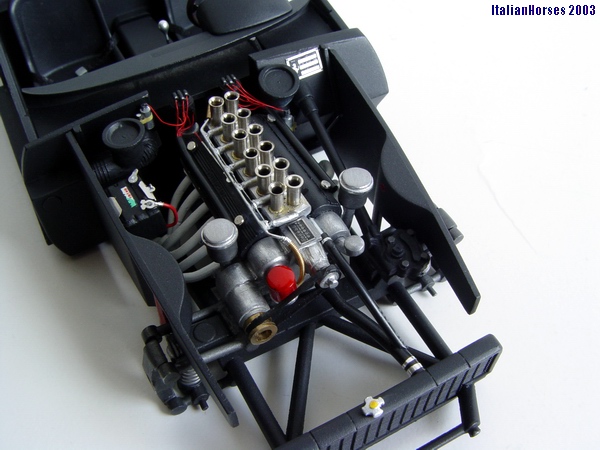
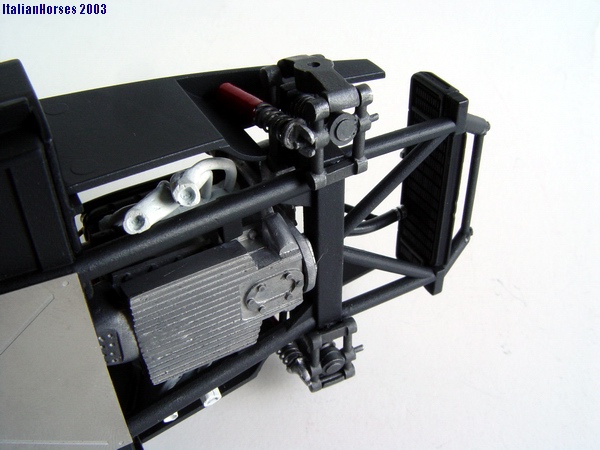
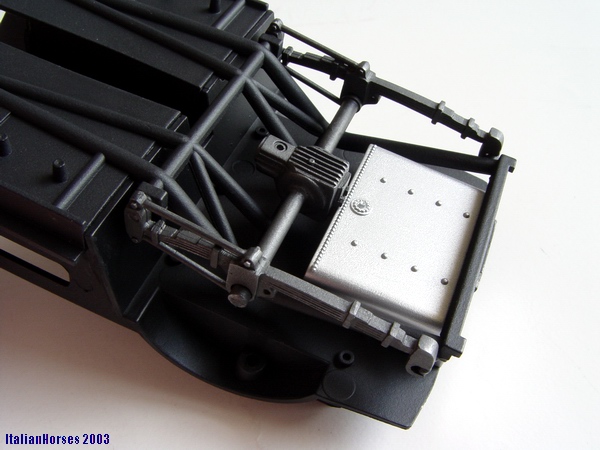
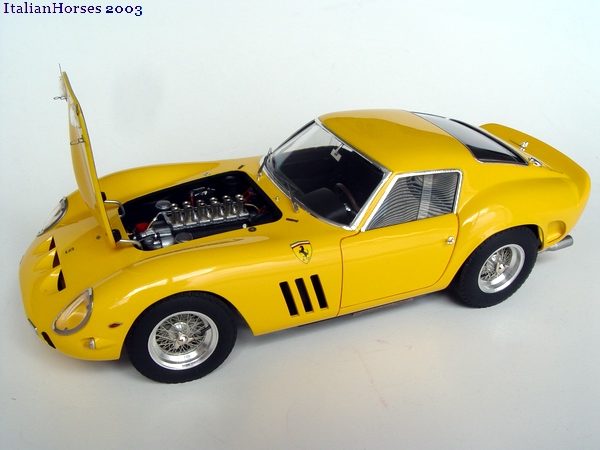
Finally I installed the engine in the chassis and accessorized engine bay - exhaust manifolds, new battery with DM battery wiring set, belt, oil filter, PE chassis and firing order plate, distributor coils, steering links, etc. Radiator hoses were connected to the engine. |
|
|
All panel lines were treated to a custom-mix wash of Tamiya acrylics, and window trim was foiled with BMF. |
|
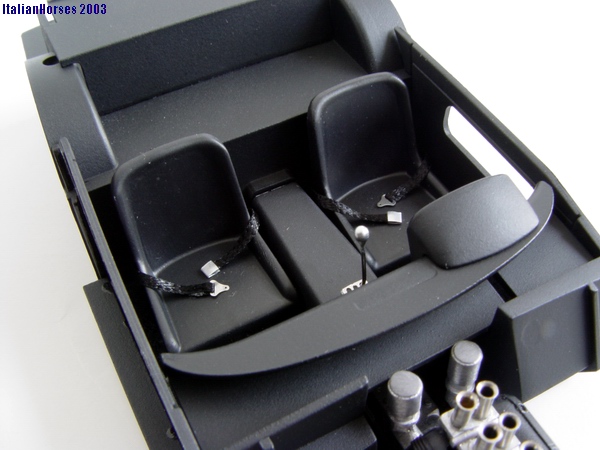
Interior received its steering wheel with new blinker arm made from thin wire, hand brake, and shifter with photoetched gate. |
|
|
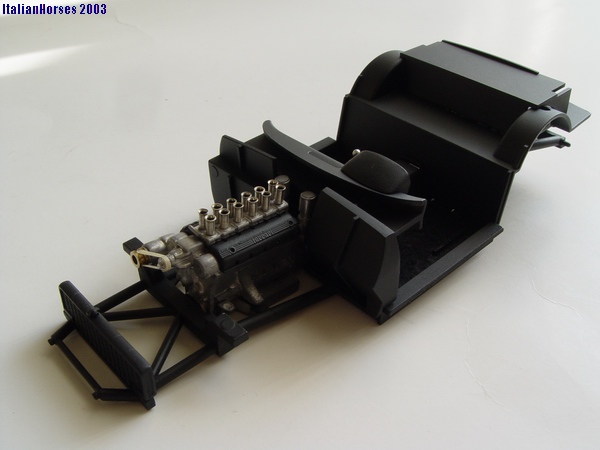
Then I moved to the chassis. Base was cleaned from flash and painted flat black. I flocked interior floor, and painted all chassis and interior components - radiator, inner fenders, bulkhead, firewall, door panels, dashboard, etc. |
|
Another view of the completed engine - Gunze kit is detailed enough, and with small additions that engine looks like with a turn of the key, it will come to life.... It is not the most detailed engine of the 250 series I've seen, but it still looks very good. |
|
|
Gas tank was sprayed with Testors Aluminum metalizer and attached to the bulkhead. |
|
View of the engine from the underside - I installed front shocks, mudguard plate, and aligned exhaust manifolds to accept exhausts. |
|
|
All major engine parts were cleaned, and polished with metal polish to bring out the shine. Then I painted previously assembled cam covers, and replaced kit pulleys with heads from acoustic guitar strings. Velocity stacks were glued to the carburetors and everything assembled together. |
|
Rear shocks were also installed and all parts of the rear suspension slightly weathered with black wash. |
|
|
Everything was test-fitted and then glued to the chassis. The engine was not installed to the chassis yet, but its a good idea to check how it fits at this time. |
|
Exhausts were primed, painted white, and then sprayed with some Testors Burnt Metal metalizer. I left both ends white, and blended metalizer into white, to make exhausts look like they were white, but became stained with time. |
|
|
Seats were primed and painted with mixture of flat and gloss black to replicate black leather, and equipped with a set of lap belts with Detail Master photoetched hardware. |
|
Everything was assembled together, and little details added: PE rearview mirror, Detail Master PE wipers, hood straps and catches. |
|
|
Then I started assembling suspension components. All suspension parts were cleaned, primed with Tamiya Metal Primer, and sprayed with Testors Gun Metal buffing metalizer, then lightly buffed after about 30 minutes. Buffing partly exposed metal on raised areas and suspension parts became very realistic. |
|
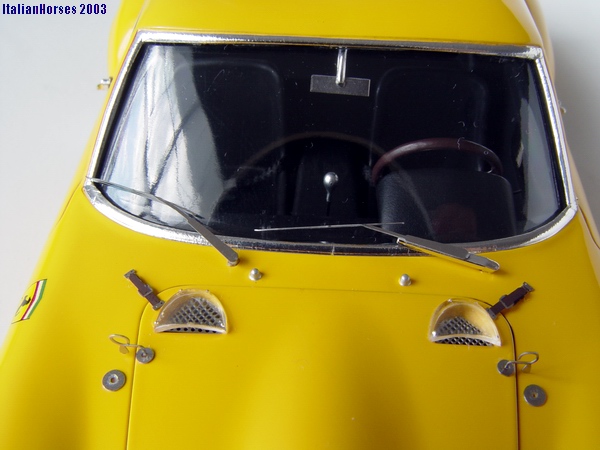
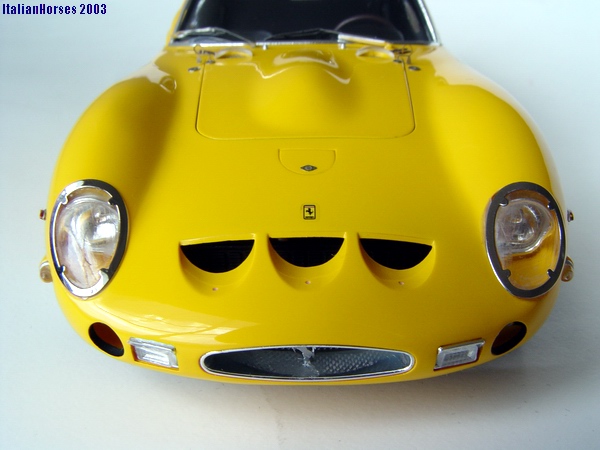
Then I installed headlight covers with PE surrounds, grille with tiny PE Cavallino, fog lights, and Dzus fastener on radiator flap. Finally, I drilled 3 tiny holes in places where Dzuds from other flaps would go. |
|
|
Then I drilled small hole in the radiator for the upper coolant hose. I used Detail Master hoses and BMF to simulate hose clamps. |
|
Kit wheels and tires were replaced with a set from Tecnomodel - they are much superior wheels and enhance this model immensely. I also made a set of tire valves for all four wheels. |
|
|
Rear suspension was assembled and driveshaft connected to the engine. Make sure you drill holes in the rear axle for wheel axles before you install it - I didn't and it posed a big problem later. |
|
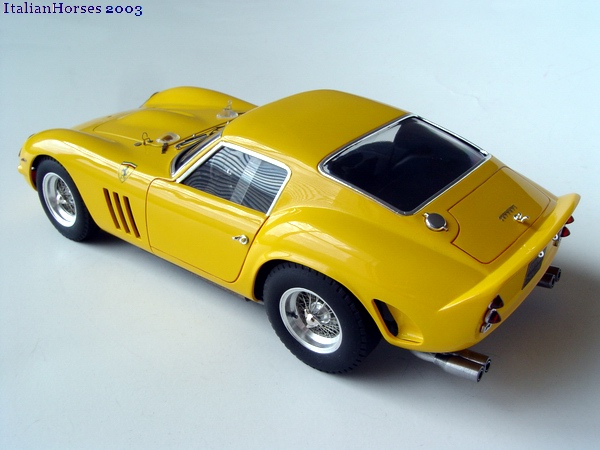
Boot lid was topped with "Ferrari" badge, and I also installed additional pipes in exhaust tips. Then I added taillights, and license plate and its lights. |
|
|
Two-piece side windows were replicated with thin clear styrene. You must be extremely careful when you remove side windows from kit part - it is very fragile! New windows were glued with superglue. I waxed clear styrene before gluing to avoid super glue haze. |
|
The model was slightly waxed to remove all fingerprints, photographed, and sealed in display case. Even though the mighty GTO never wore a yellow paint - it looks great in this color! |
List of Additional Details:
Body:
New side windows (from thin clear styrene sheet)
Photoetched “Ferrari” badge
Detail Master photoetched wipers (instead of kit wipers)
Ferrari Emblem, horn button, and Scuderia Shield decals
Dzus fasteners (1 on oil filler flap, and 1 on radiator refill flap)
Interior:
Photoetched rearview mirror
Wire blinker arm with handle
Metal shifter
Drilled photoetched pedals
Cloth (ribbon) lap belts with photoetched hardware
Flocked Interior
Chassis/Suspension/Wheels
Aluminum exhaust tips inserts
Real metal front suspension coilover springs
Tire valves
Brake lines
Engine Bay:
New battery
Battery wiring kit (2 clamps, wires, 2 connectors, 1 decal)
Radiator hoses with BMF clamps
Distributor Coils
Fan belt
Copyright 2003 Alex Kustov. No copying or reproduction in any shape or form without written permission of the author.