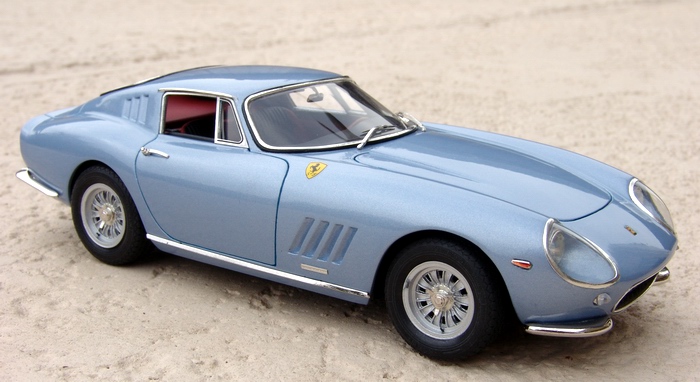
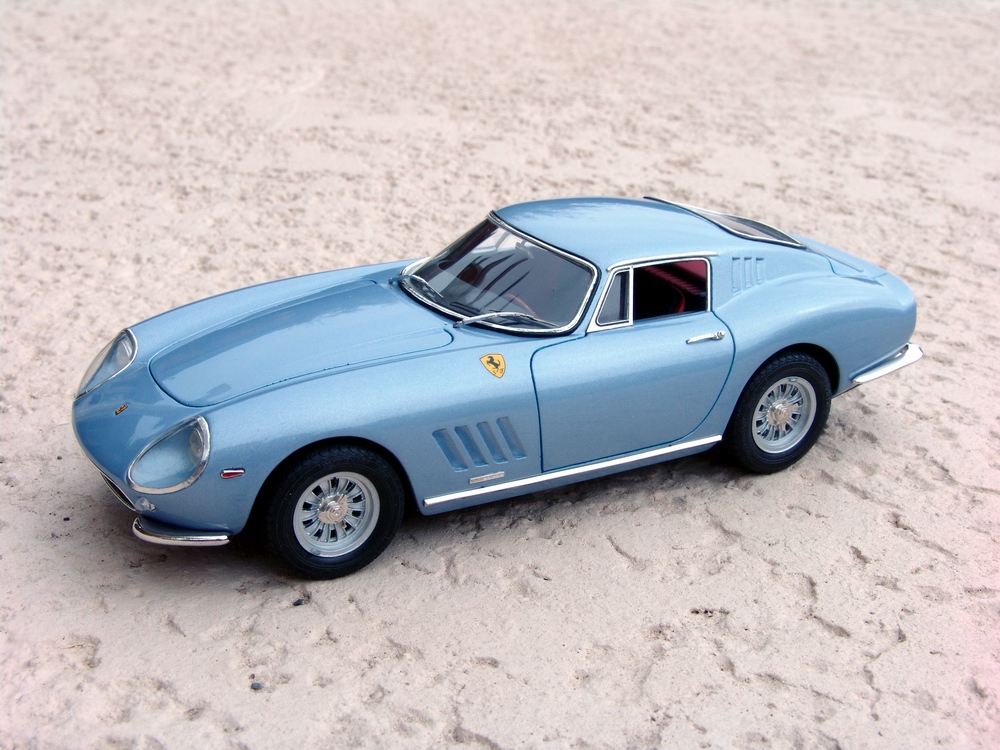
F e r r a r i 275 GTB/2 Snort Nose
 |
 |
 |
Kit: 1/24 EX Models Ferrari 275 GTB/2 Short Nose Pros: This kit is the only 275 GTB/2 Short Nose model ever made in 1/24 scale by any manufacturer - quite unique subject. Body proportions are good, decent interior detail, good photoetch, unique wheels, simple construction, mostly good parts fit. Since I was restoring a kit that was already built, its hard to figure out the initial quality of the parts! Cons:. Resin quality is not up to modern standards - lots of bubbles and flaws in the cast, but other than that a good quality overall. Tires are no-name vinyl skinnies, white metal parts are not clean, chrome plating is flawed in places. Glass parts didn't fit right. No decals, no headlight surrounds provided in the kit. Almost non-existent chassis detail, curbside. Verdict: Since it was a restoration of a built kit that was produced in a very limited quantities, I don't know whether I should even make a recommendation - I have no idea about the kit's quality when it was new, and the chances of finding one in mint condition are almost equal to zero. its a very unique model, and I'm glad I could add it to my collection. It was rather simple build, but completed model looks great and represents a very important car in Ferrari history. |
 |
 |
 |
|
 |
 |
 |
Buildup
 |
It all started when I saw this wreck on eBay! It was built from a rare EX Models kit, and the car itself was 275 GTB/2 Short Nose not dome by any other manufacturer. Unbuilt kits are rarer than hens teeth, so I jumped on this opportunity and purchased the kit. |
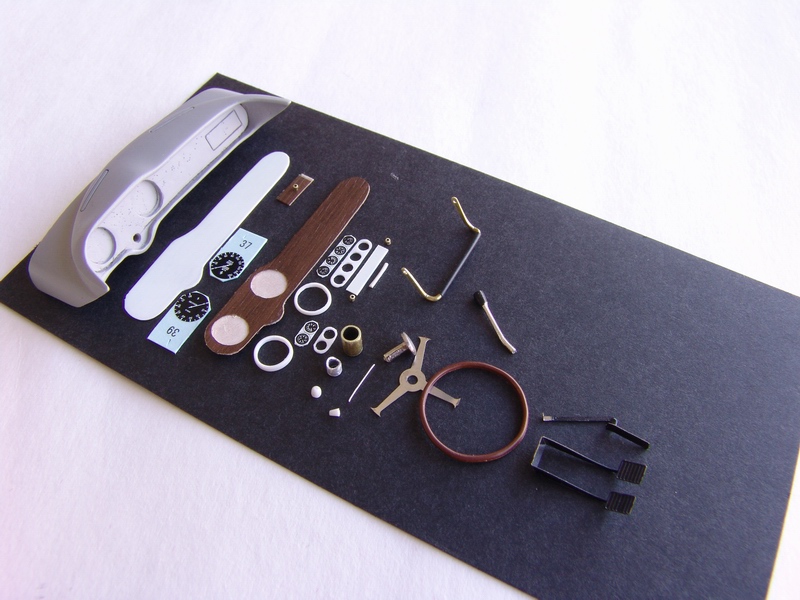 |
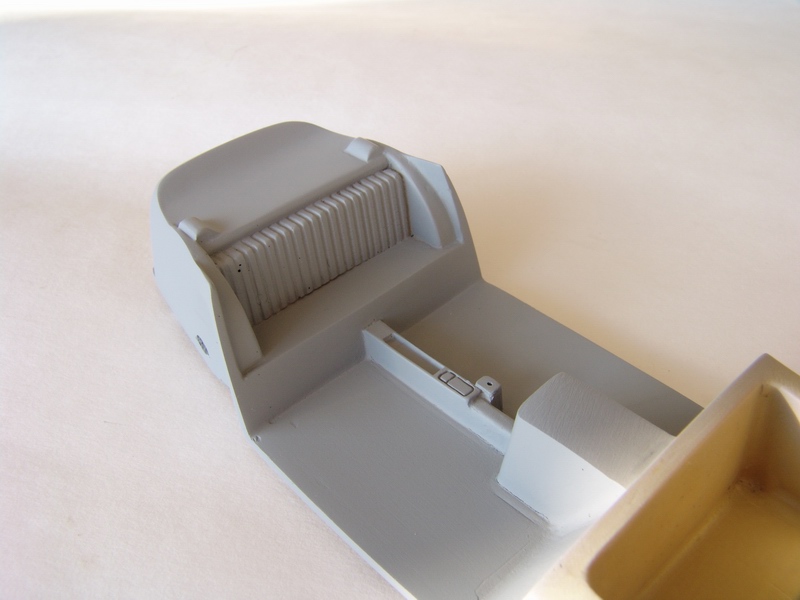
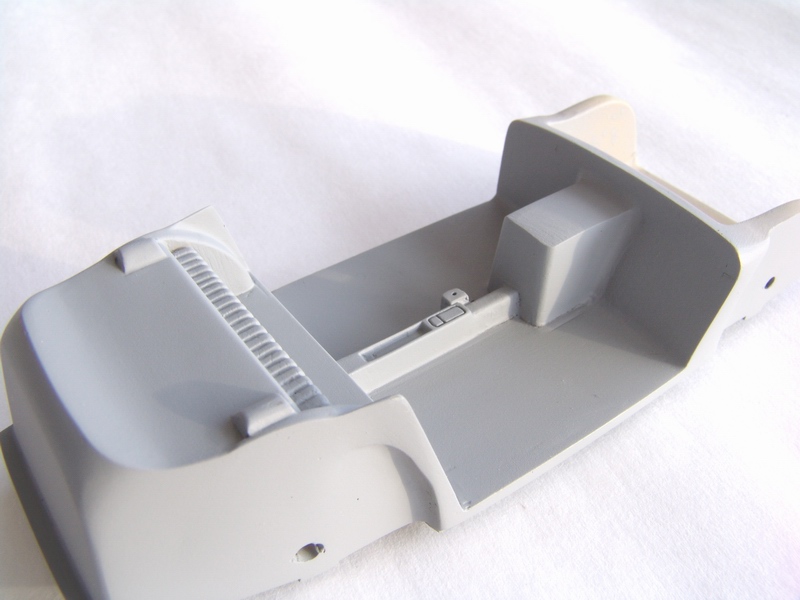
Now it was dashboard's turn. Since I have shaved everything I had to made all the instruments, knobs, radio, steering column, stalks, etc, etc from scratch. Different size plastic and metal tubing, wire, adhesive wood simulation film, sheet styrene, some photoetch - all went to build the new dash. |
 |
Couple of weeks later the kit has arrived from France. It was in various stages of disrepair. Luckily for me, all important parts were there. I decide to do a full restoration - adding and improving several things in the process. Everything was disassembled and stripped in brake fluid. |
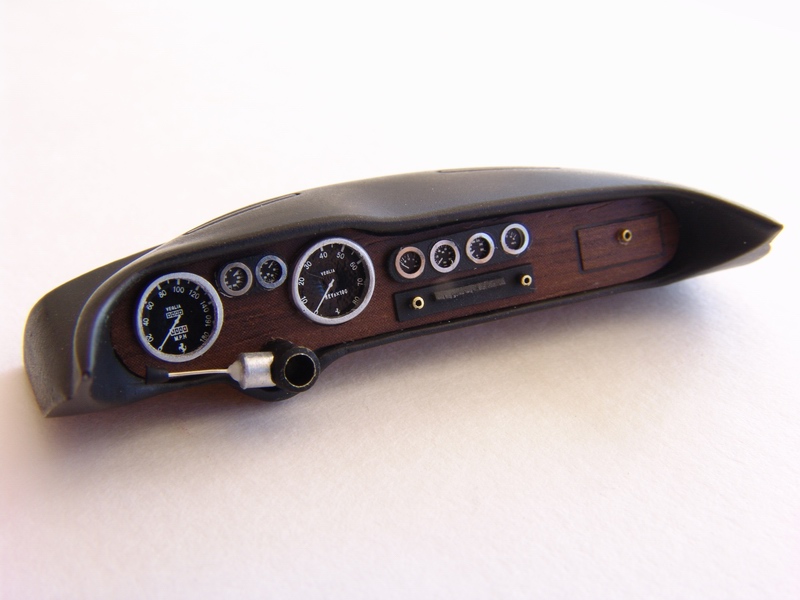 |
The result was worth it and new dashboard looks a lot better than original one, with crisp detail and no awful bubbles and flaws. |
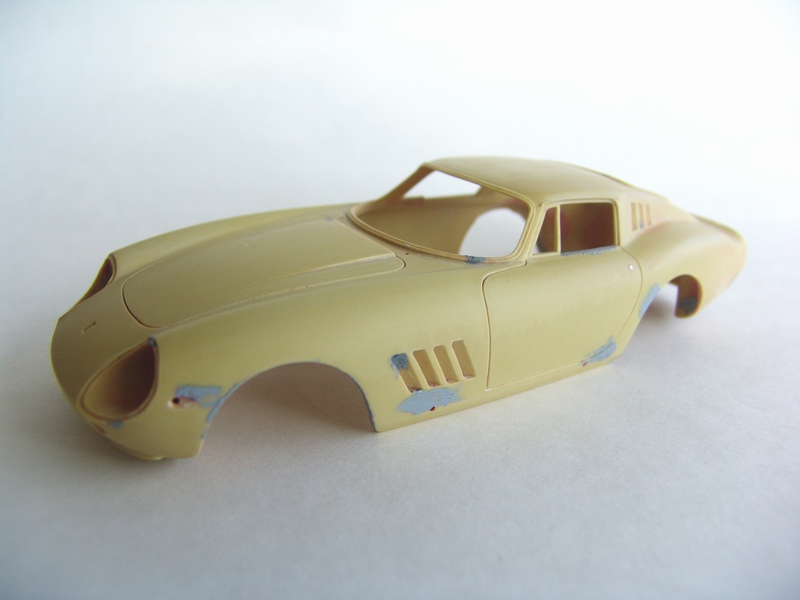 |
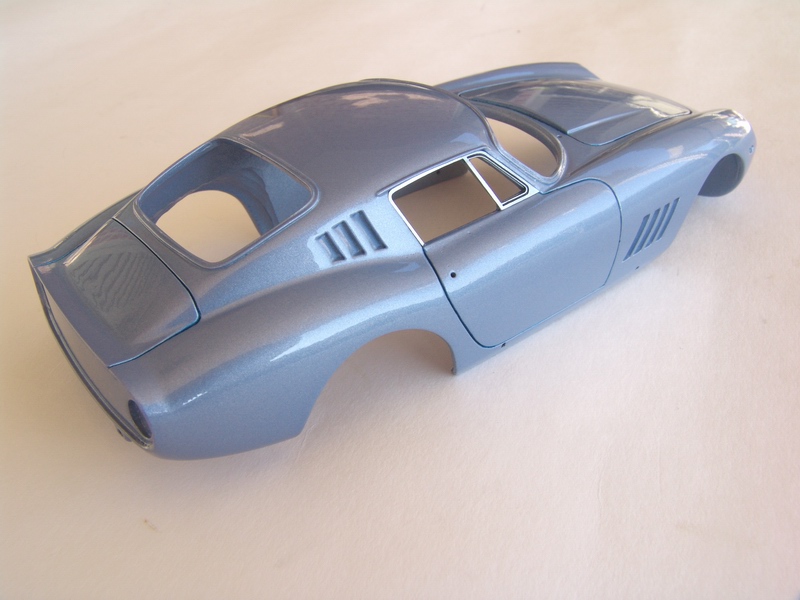
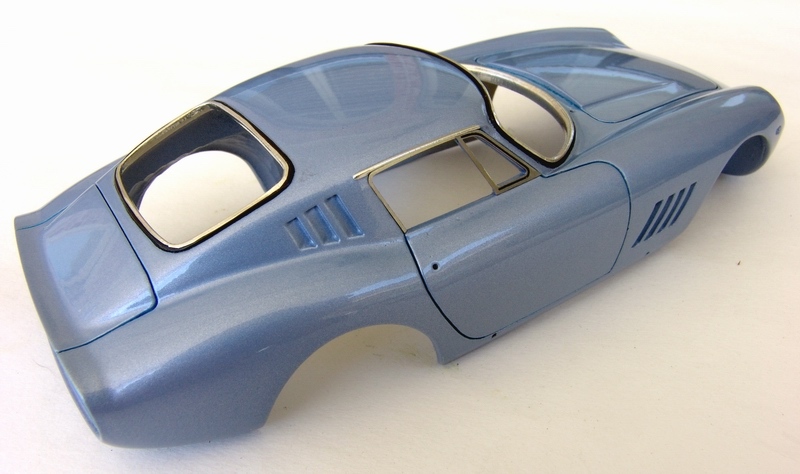
The body was...in bad shape. Not so much the actual casting, but resin quality showed its age (1989). Lots of small bubbles and imperfections in resin. I started with carefully drilling out and filling all flaws, again, and again... |
 |
Here is another picture with the steering wheel (topped off with Hiro adhesive Cavallino button) and photoetched kit pedals. I waited till the dash was glued in to attach these so I could align them right. |
 |
After several filling/sanding sessions it was more or less smooth and straight. I have also corrected some missing trim details, vents, and minor things like that. |
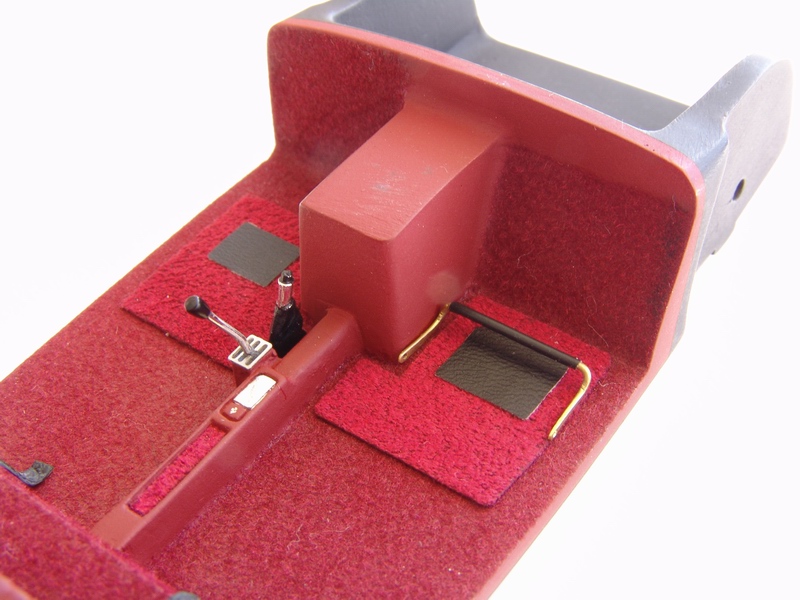 |
I used Model Factory Hiro adhesive red (its actually red with black specks) cloth to make floor mats, and MHF black leather to make heel pads for the mats. I also made passenger footrest from a piece of brass wire and slipped some black wire insulation on it to simulate rubber cover. |
 |
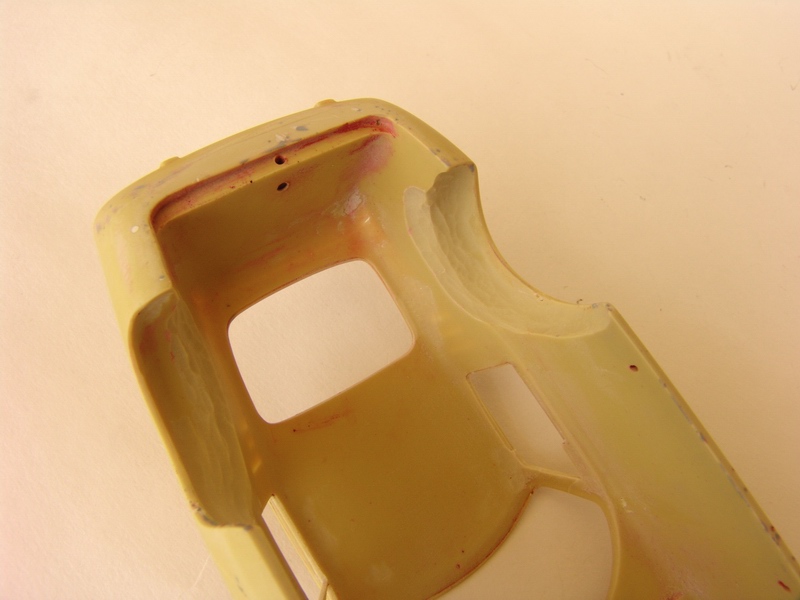
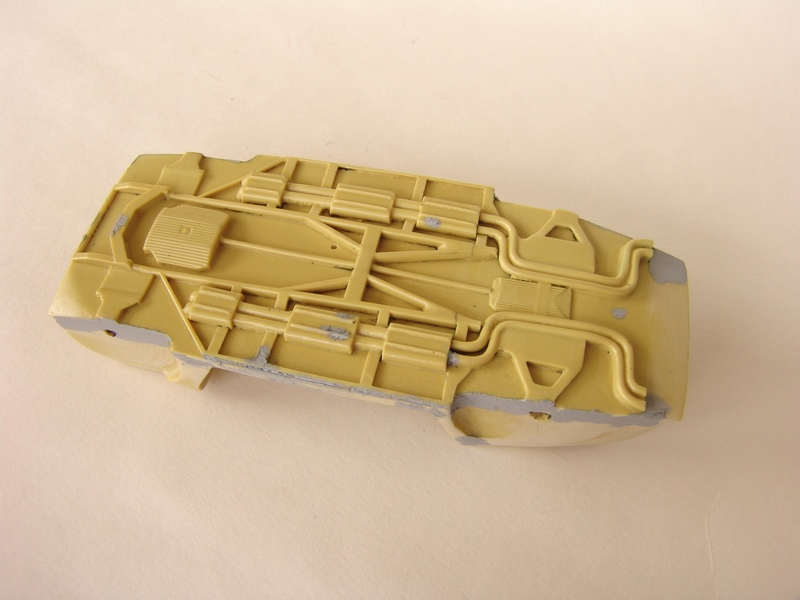
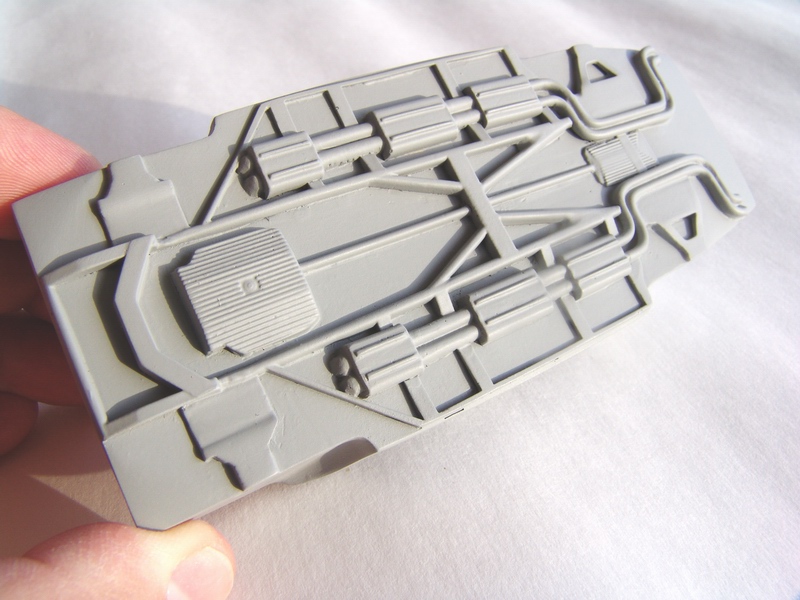
As you can see, underside was all plagued with little bubbles and holes that had to be filled and sanded. I decided not to bother with all of them and filled only the ones that could be seen on completed model. |
 |
Interior was ready to be assembled. |
 |
From the beginning I was planning on using aftermarket tires, since kit tires were too skinny and with time, vinyl hardened and cracked. The tires I found were a bit bigger and fatter, and I enlarged rear wheel wells with my Dremel so wheels could fit. |
 |
Instead of spending hours on detailing mediocre chassis, I just used Testors metalizer paints to paint and drybrush engine and transaxle and exhausts/mufflers. |
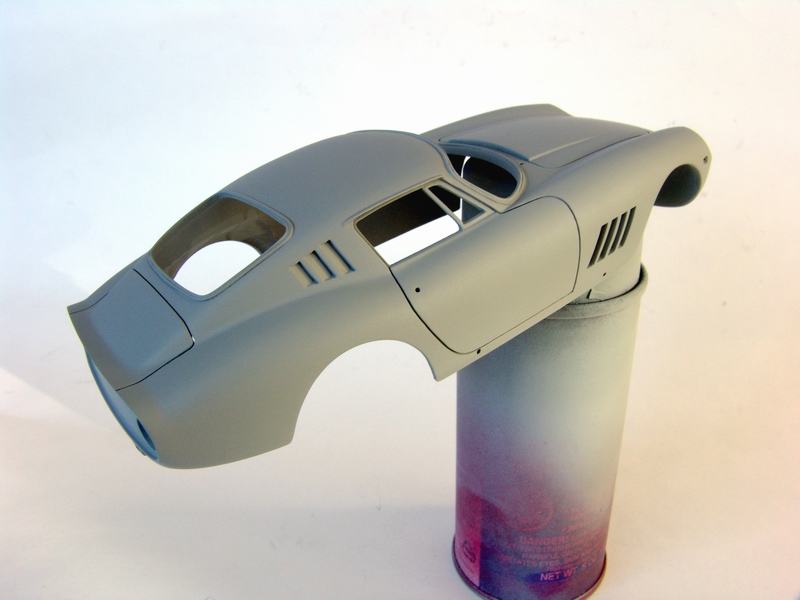 |
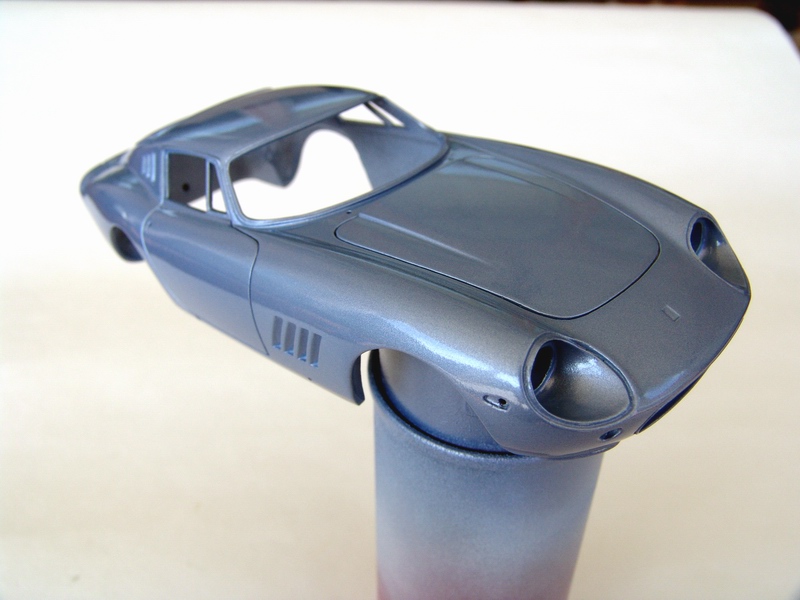
After several more hours of block sanding, filling and fixing little detail the body was ready, cleaned, washed, dried, and sprayed with Tamiya gray sandable fine primer straight from the can. The body was once again looking great! |
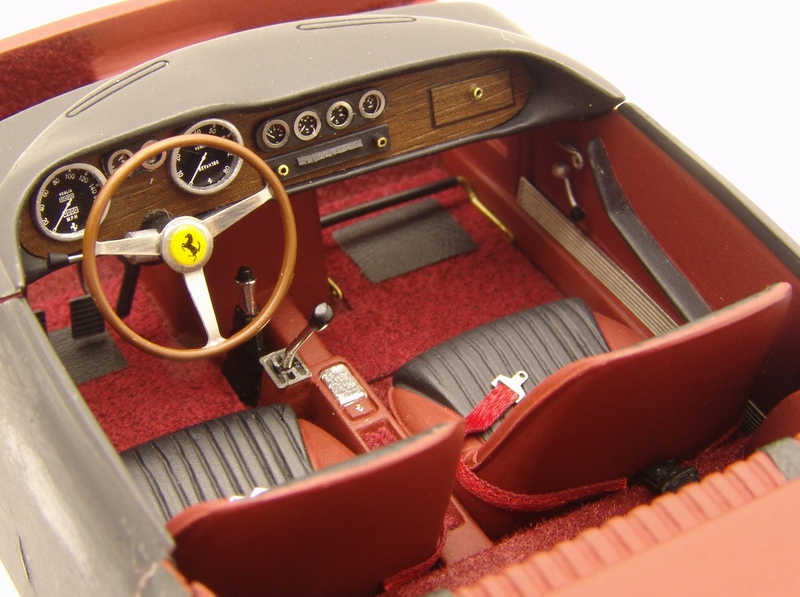 |
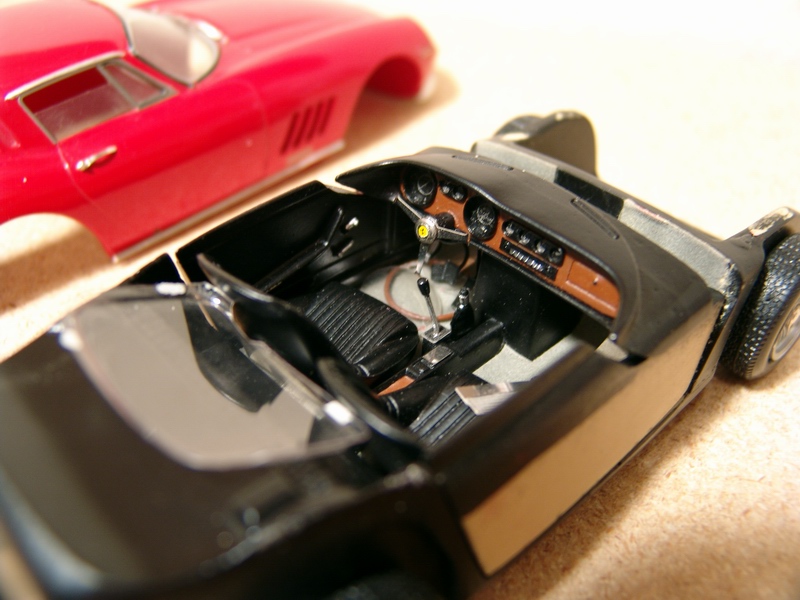
Finally, I have installed the seats, door panels, steering wheel, pedals, and dashboard. Dashboard fit was tricky, and it kept interfering with the windshield, but I have figured it out after several tries. |
 |
While primer was drying on the body, I started fixing interior/chassis part. It was in bad shape! The casting itself was a lot worse than the body, with lots of bubbles and flaws in resin casting. Most were drilled out and filled, some just filled and sanded, but the was no end in sight! |
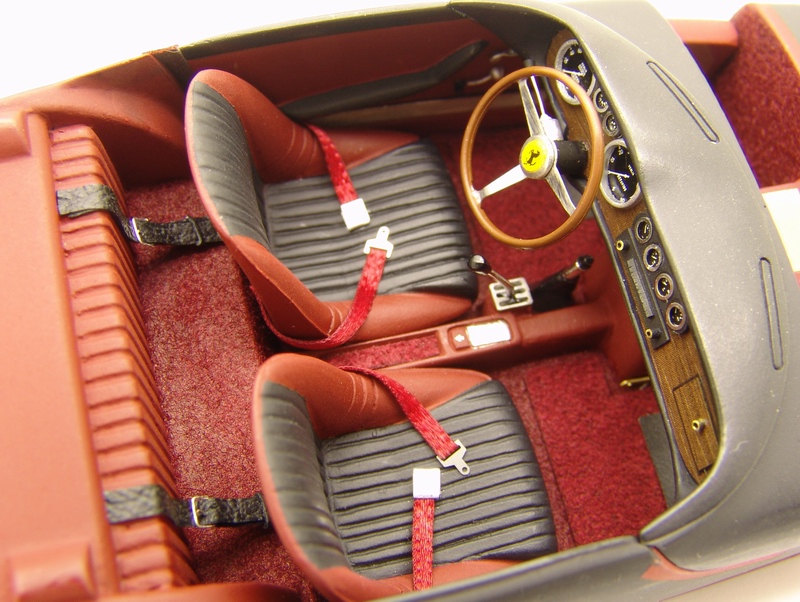 |
Another pictures of completed interior. |
 |
Chassis "side" was no better. The detail is very mediocre at best, but I decided to preserve it because of the rarity of the kit, and just fix whatever was there. More putty and sanding! |
 |
When all work on interior and chassis was completed, it was time to go back to the body. By that time clear coat has completely cured, so I have polished it with Tamiya polishing compounds and waxes with Last Detail's Treatment model wax. |
 |
Again, after hours of filling and sanding, I sprayed a test coat of gray primer. Still lots of small holes and other imperfections. Back to work. |
 |
After the paint was rubbed out and waxed, I started adding little details to the body - side window trim, headlights, and other pieces that were already assembled by the previous builder (I didn't disassemble the good ones). I have also did panel lines with semi-gloss dark blue wash. |
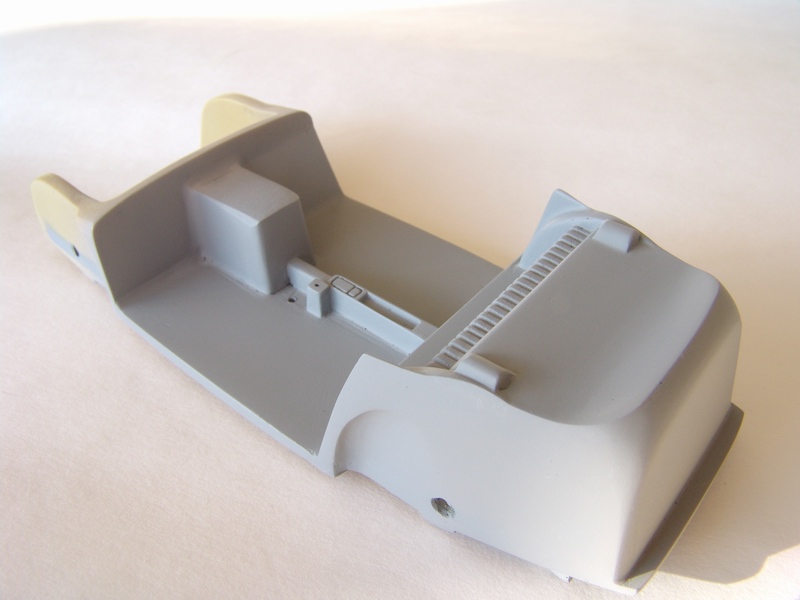 |
More filling and sanding.... This time, I think i got most of it, and the chassis finally started to look more or less decent. |
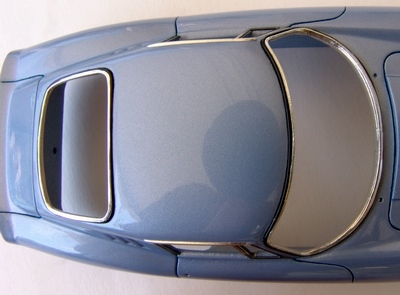 |
Front and rear window's trim was masked off and sprayed with Tamiya semi-gloss black, and then carefully highlighted with BMF. the goal was to leave a little bit of black trim so it would look like rubber insulation under chrome trim. |
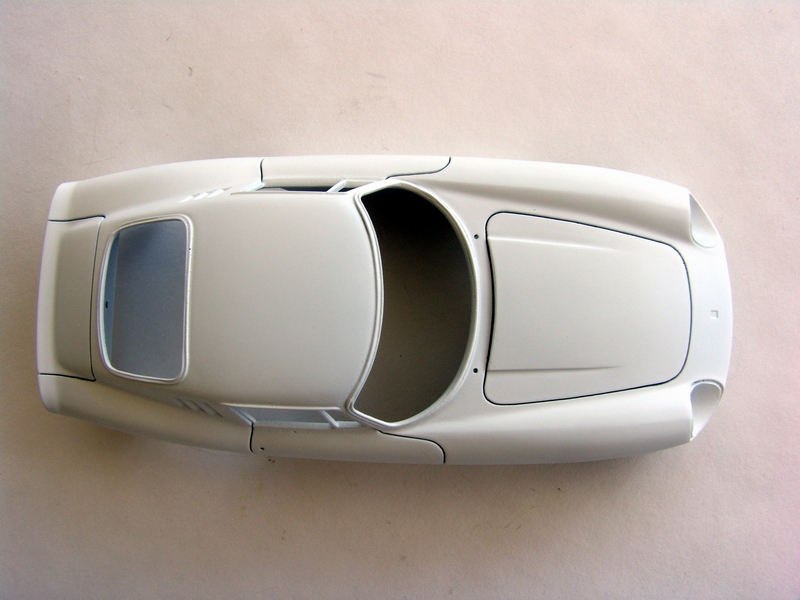 |
Meanwhile I was deciding on the color for the car. I really liked red ones, but I found a picture of stunning Azzurro Metallic short nose car, and decided to paint mine that same color. Body was primed white. |
 |
It turned out quite good, although not completely perfect in places. Overall, I was very satisfied with the result and I think I will use this technique on future models. |
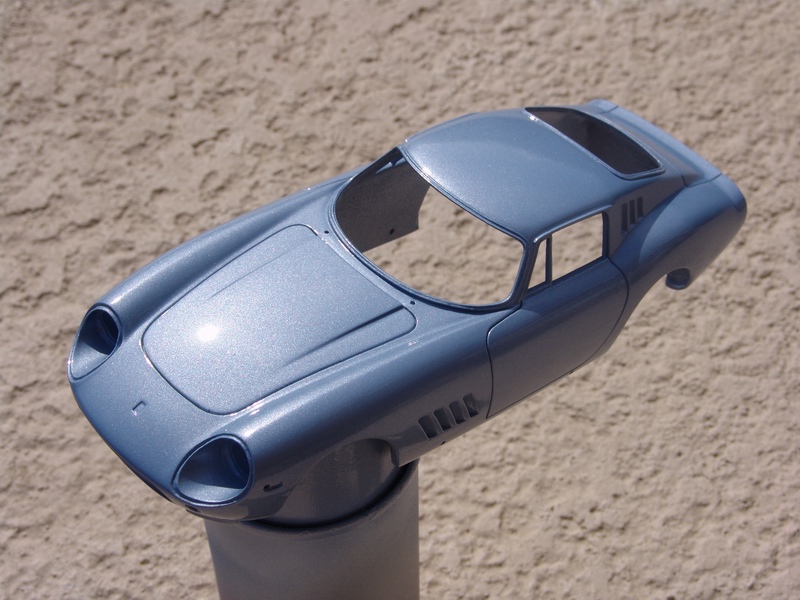 |
Then my paint guy at local body shop mixed the paint using paint catalogues. I sprayed several light coats, but it looked slightly different from the paint on the pictures... I decided that I still liked it and proceeded to clear coat the paint. |
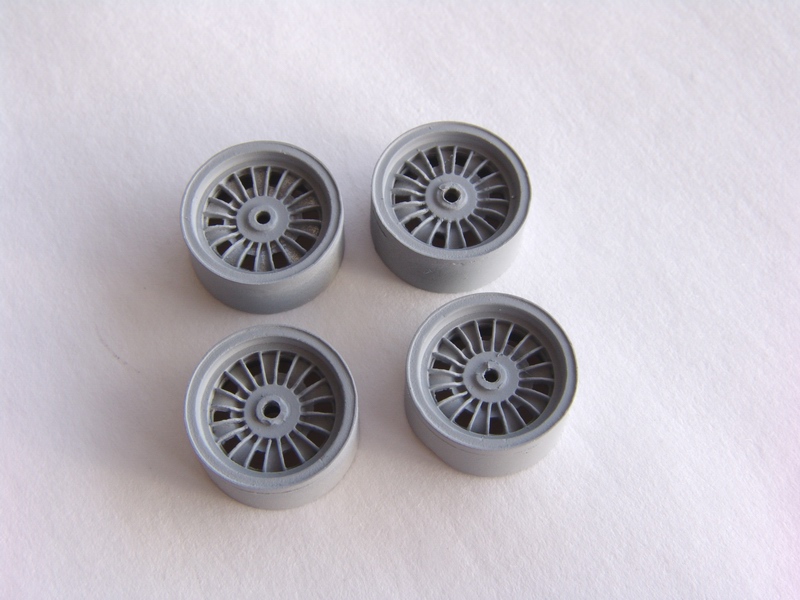 |
White metal rims in this kit are quite unique - a Star Campagnolo alloys. I have not seen these rims in any other kit. They were pretty beat, and required a lot of straightening and filling/sanding to look good. After restoration, they were sprayed with metal primer followed by Tamiya gray primer. |
 |
After several coats of clear, paint started to sparkle real nice! I decided to add one more wet coat to make sure I have enough protection for polishing. |
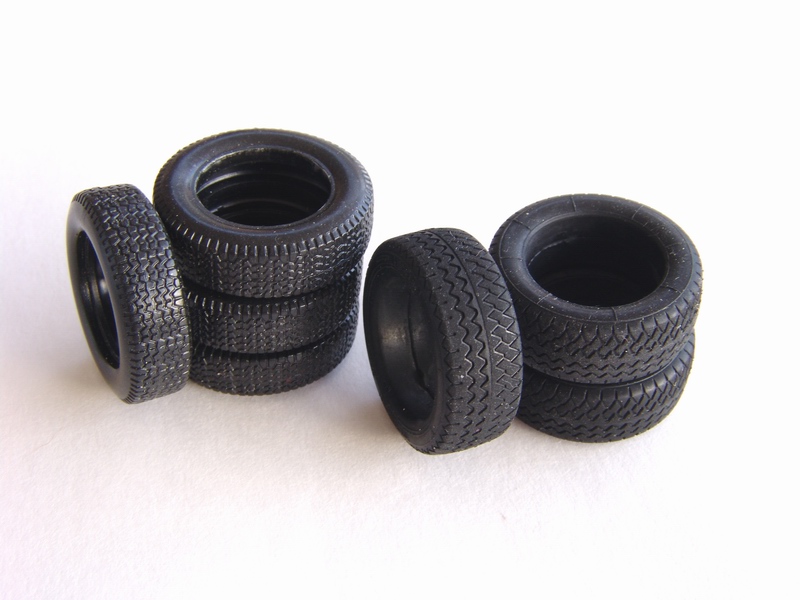 |
Stock tires were pretty bad by modern standards, so I have replaced them by period correct Michelins from my parts box. I don't even know where they come from, but they were better by leaps and bounds than stock tires. |
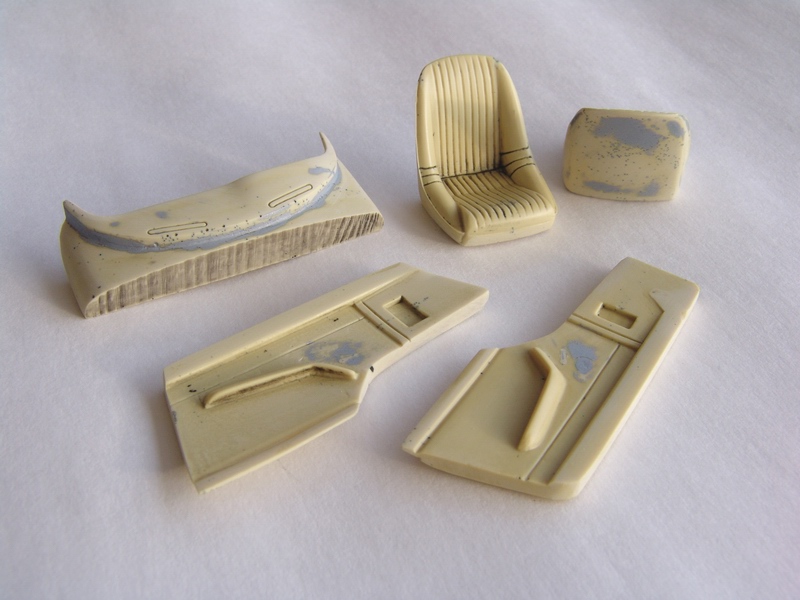 |
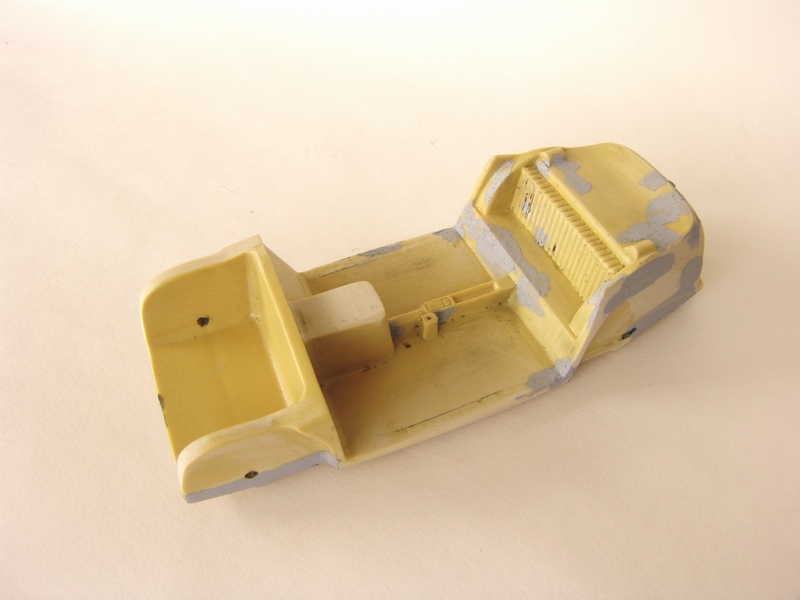
While paint was drying I turned my attention to the rest of resin parts - interior. As you can see from the picture - they were in really poor condition. Door panels were warped, seats and dash pitted with small bubbles. |
 |
Here is a picture showing two different tires - not only new tires fit the rims better, but they are wider and look more at home on the car. |
 |
After looking at the dashboard I decided that none of the detail there should be saved. I shaved it completely clean and decided to make everything from scratch. See the pitting - that is how deep the bubbles were - even after taking off about 1mm of resin they were still visible! |
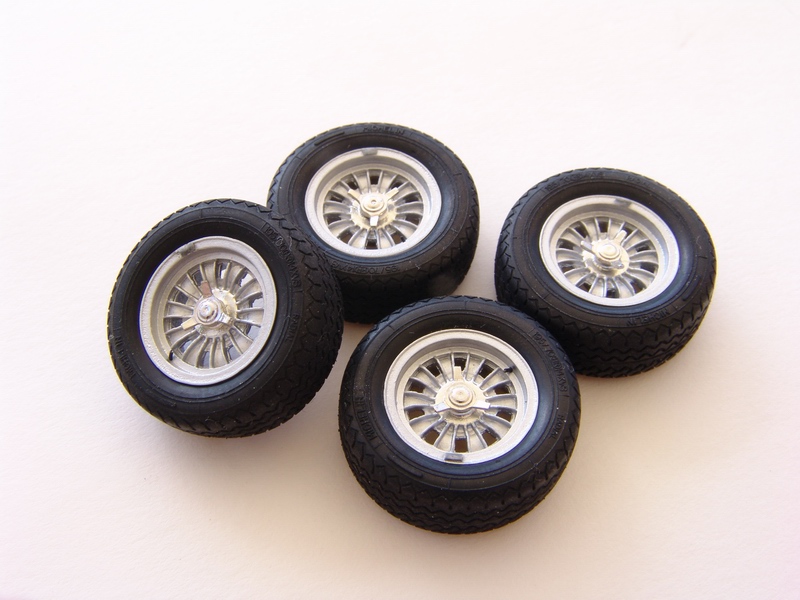 |
Finally, rims were painted with Testors Aluminum metalizer, and fitted with valve stems made from thin wire and wheel weights made from gray plastic tree. Centers were detailed with BMF and kit-supplied knock-offs. Completed wheels were lightly sprayed with clear to protect aluminum finish. |
 |
After straightening door panels, hours of filling and sanding of the seats and dashboard, I have finally sprayed some gray primer on the parts. They were looking good enough to proceed with the paint. |
 |
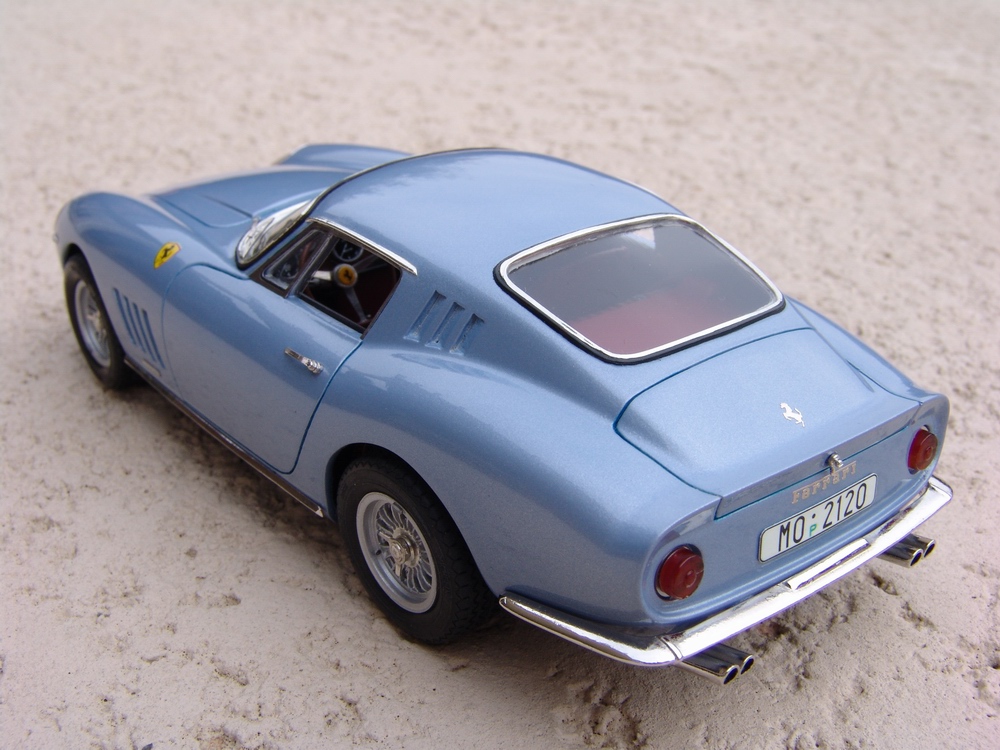
Inside surface of the body shell was painted flat black, windows installed (had to make rear window from scratch). I also fabricated roof headliner from medical tape, and trim from Model Factory Hiro adhesive black leather. |
 |
Meanwhile, I filled last imperfections in the chassis/interior, and sprayed few last coats of gray primer. |
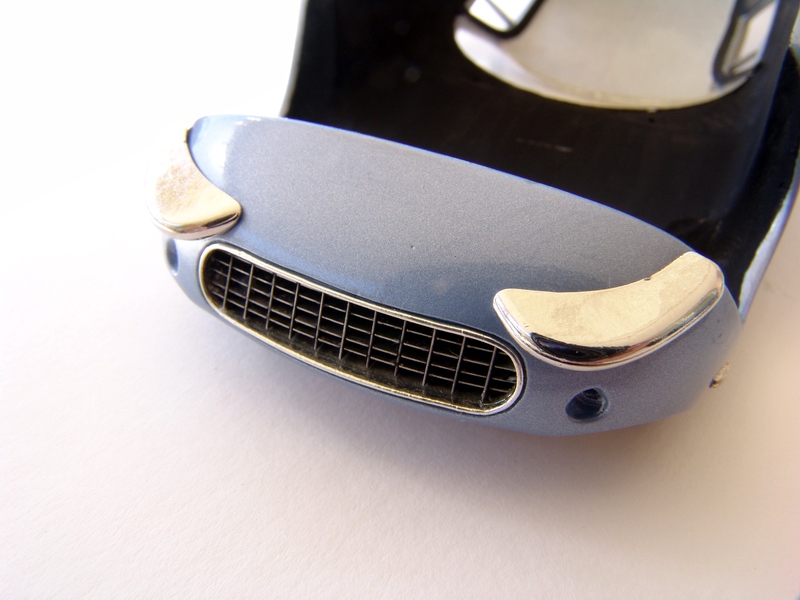 |
Then I started to add bits and pieces to the body. Photoetched grille was assembled together and glued into previously BMF'ed grille opening. Black wash was applied to bring out the depth. I also fitted front bumperettes and rear bumper. |
 |
Both sides looked a lot better now. There were still some small imperfections on the chassis, but I decided that black paint will cover that. |
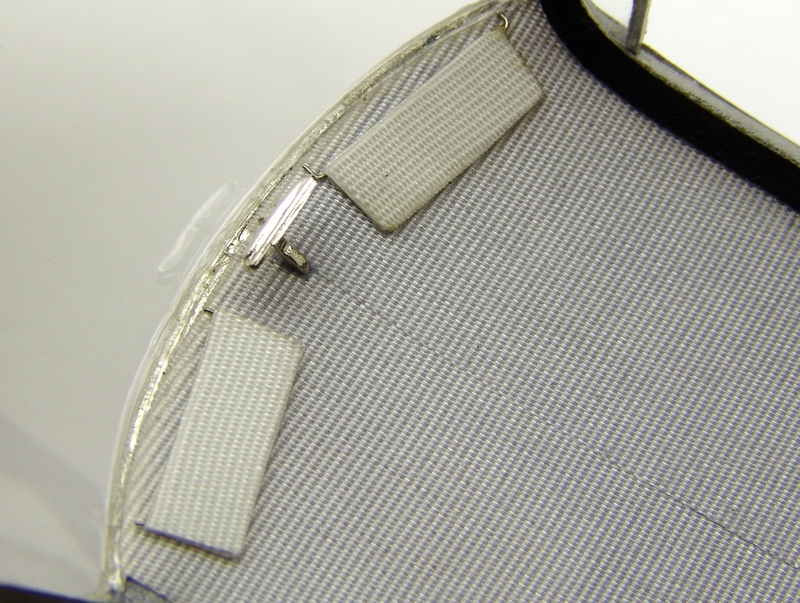 |
Sun visors were made from sheet styrene and wrapped in medical tape. I also made the arms that attach them to the roof from thin steel wire and glued in kit-supplied rearview mirror. |
 |
And I was right - most flaws just disappeared after painting chassis black. Chassis was looking significantly better. |
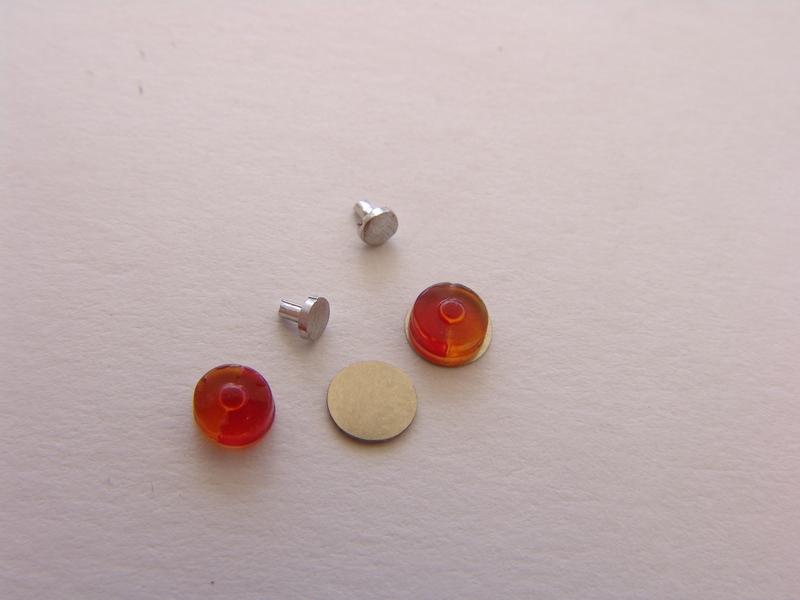 |
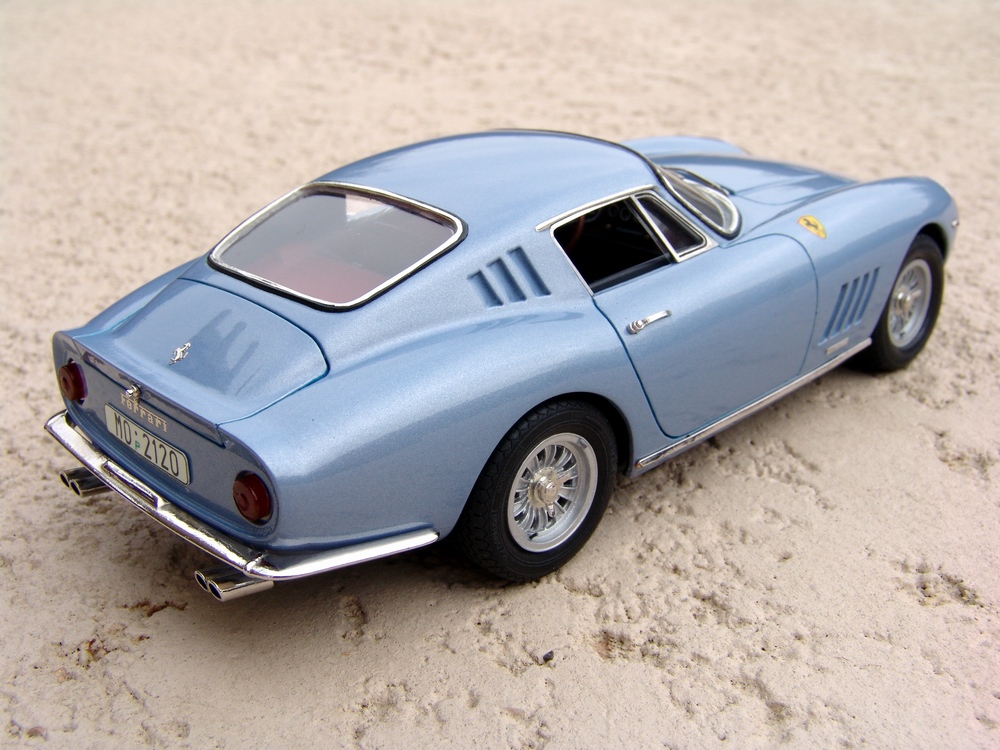
Kit tail lights had "chrome" surround, but they were made out of clear epoxy, and it was all jagged and looked bad. I cut it off, and replaced it with slightly bigger photoetched circle which served both as a reflective base and chrome surround! I also sanded off front blinkers to use as a base for clear parts. |
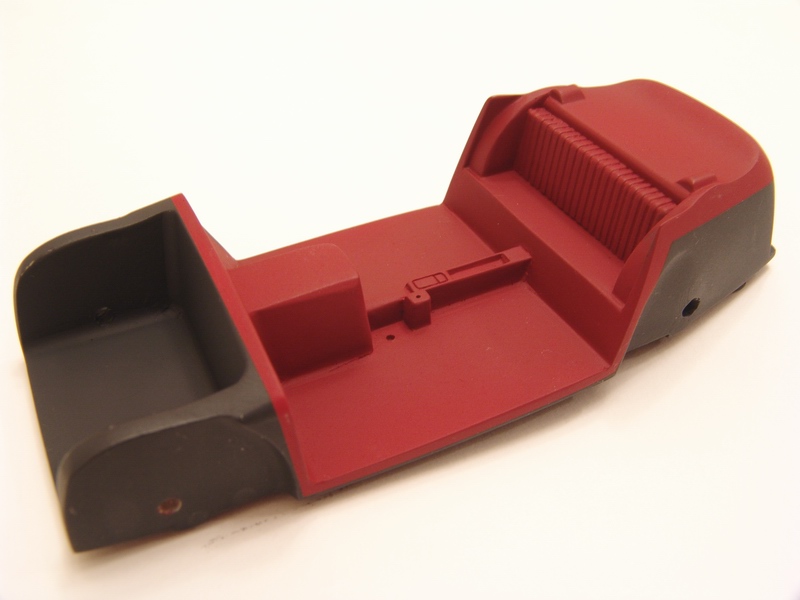 |
I sprayed interior with the mixture of Tamiya flat red and gloss red, with few drops of flat black and flat blue over gray primer - which resulted in this deep maroon-ish color. |
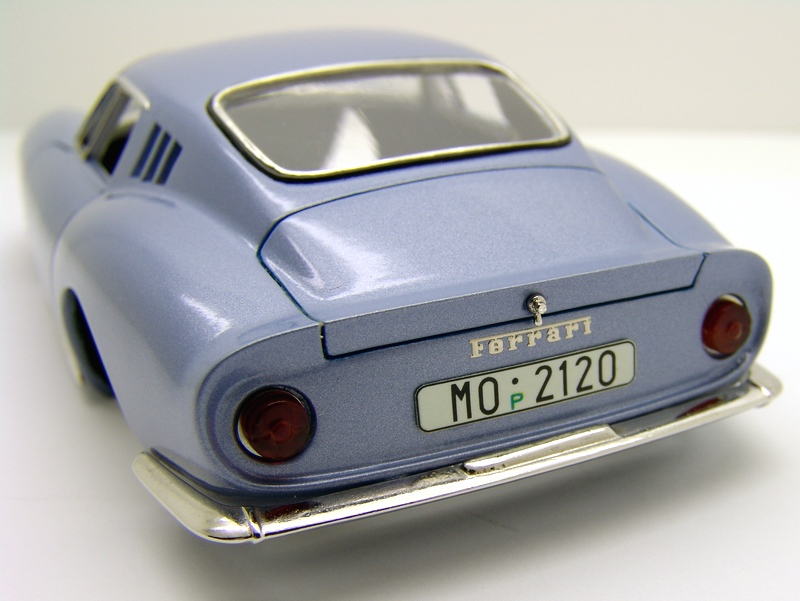 |
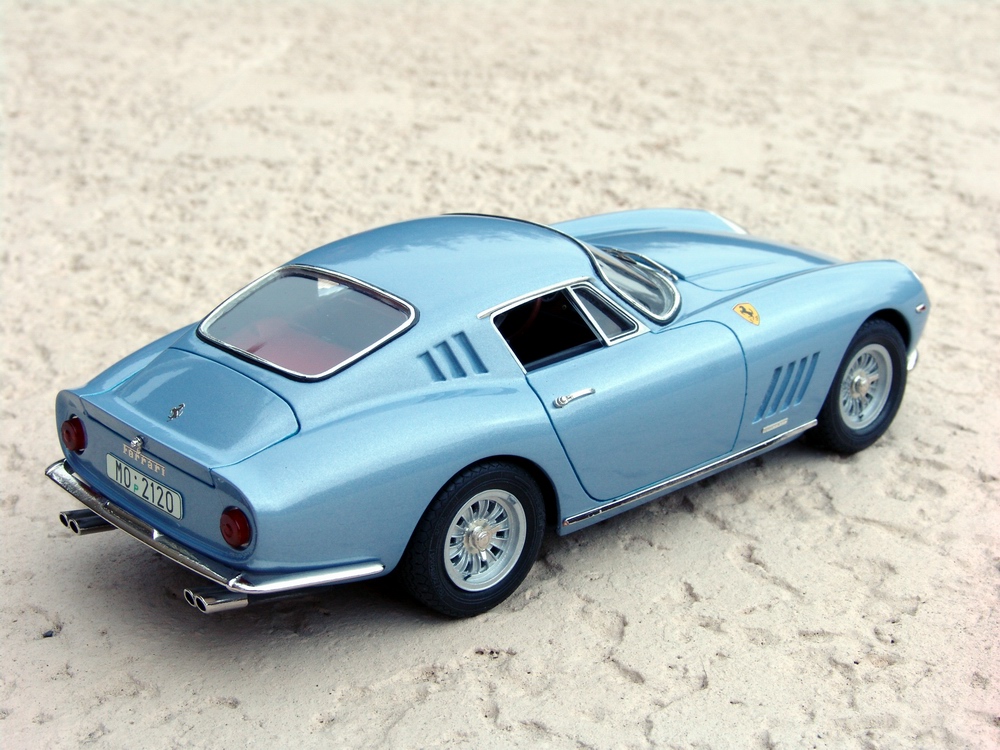
Rear end was put together, taillights painted with Tamiya's clear red and orange, trunk handle glued in, and then topped off with Crazy Modeler Ferrari badge and license plate. |
 |
Door panels and seats were sprayed with the same mix, and after the paint cured, I masked one seat to see If two-tone scheme would work - it looked great! |
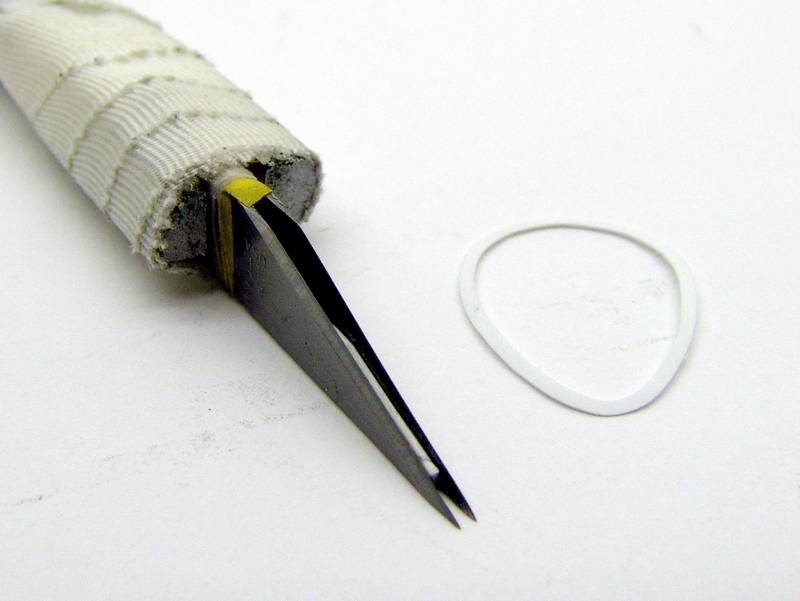 |
The biggest challenge presented itself in the form of headlight surrounds - they were simply absent from the kit. I decided to make them from thin sheet styrene, but had to fashion a special cutting tool to ensure that the width of the surround is the same all around. |
 |
I carefully masked door panels and sprayed them satin black. Masks were removed before paint has completely dried to smooth the edges - seems to work very well every time. |
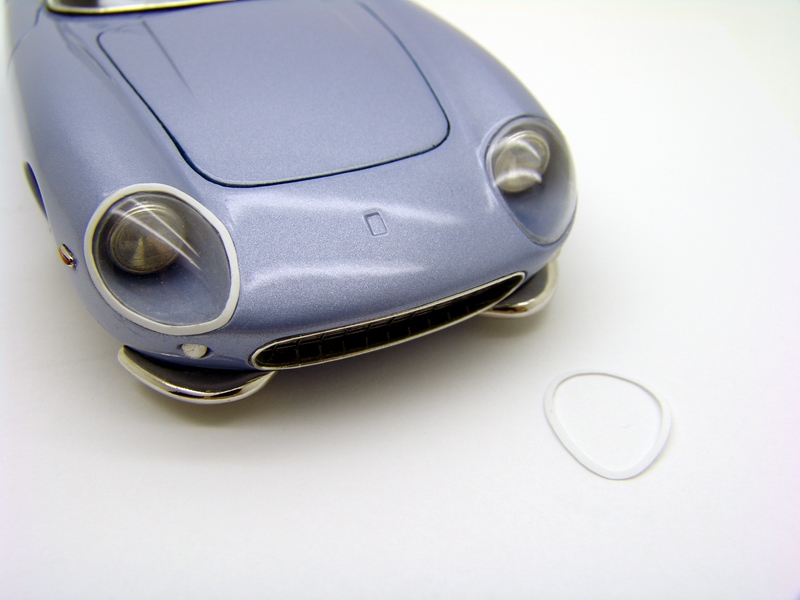 |
Surround shape was traced to a piece of paper, then to plastic, and then carefully cut with my new cutting tool - double blade knife! Then I refined the surrounds and glued them to the headlights with superglue. |
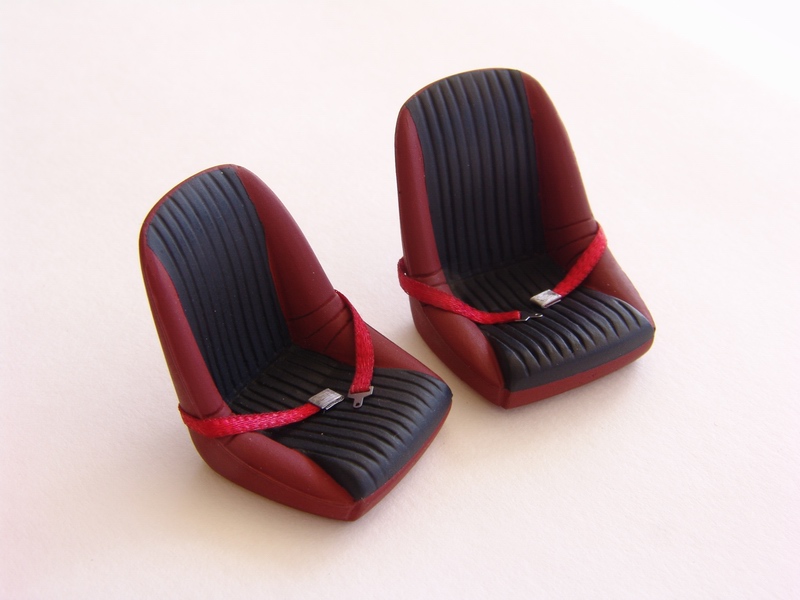 |
Seats were masked, painted and detailed with lap belts made from thin ribbon and Acu-STion photoetched hardware. |
 |
Then surrounds were carefully covered with Bare Metal Foil, which I burnished real well. Then I carefully cut the foil from both sides using fresh #11 blade. Repeated on the other surround. |
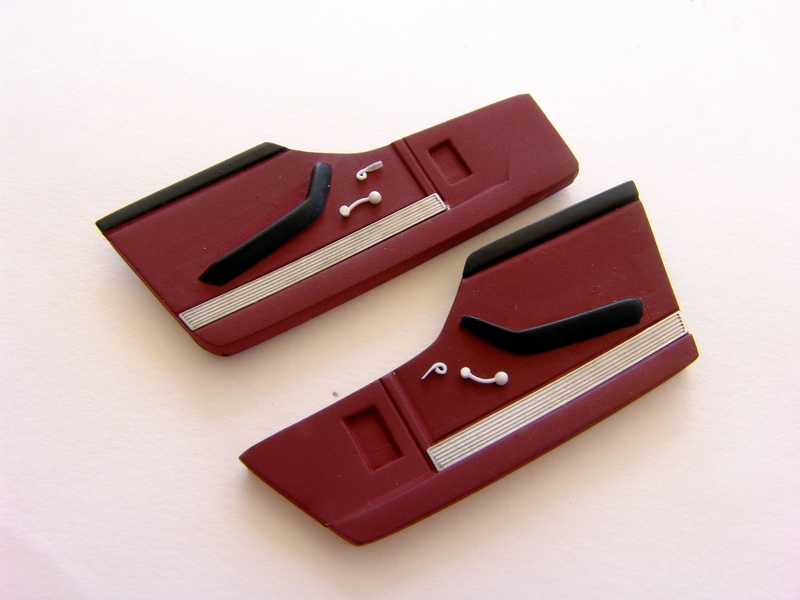 |
Door panels were also detailed with some photoetched panels that came with the kit, and scratch built cranks and door handles - I have shaved the original cranks and handles off - they were not very good. (Cranks and handles are not painted on this picture) |
 |
And to my surprise it turned out quite well! Surrounds were looking very close to the real car. I also added Ferrari emblem from MFH set, and clear blinkers from Gunze GTO kit. |
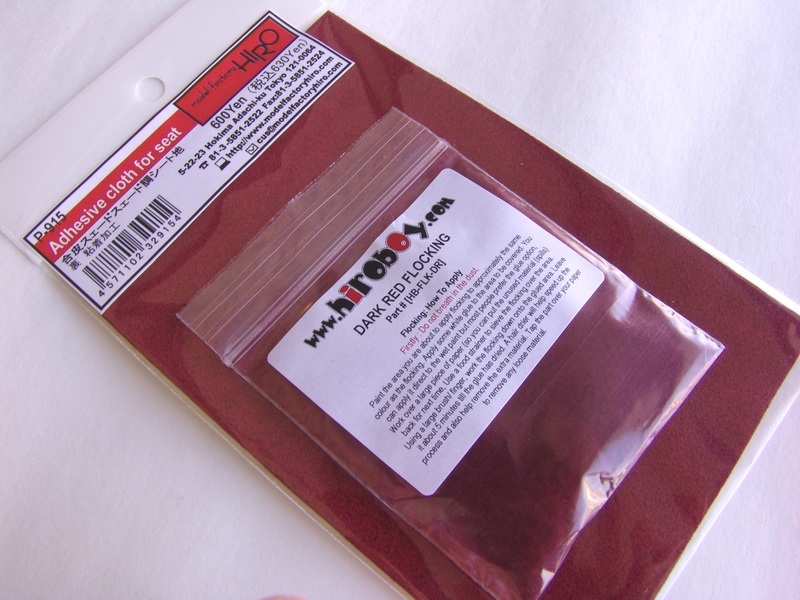 |
I have purchased some very nice dark red flocking and Model Factory Hiro adhesive cloth material from Hiroboy.com. their flocking is one of the best I have used recently - very high quality stuff. Hiro adhesive cloth sheets are also top notch. |
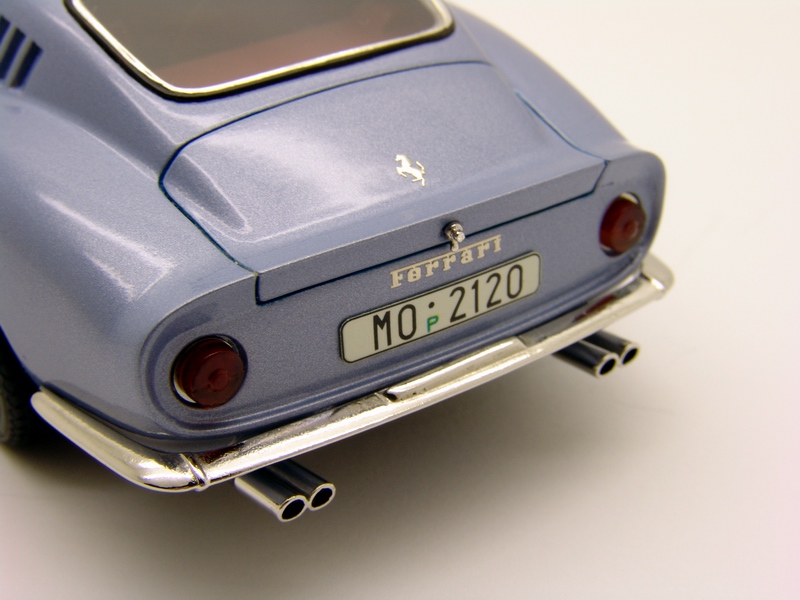 |
Rear end received exhaust tips and Crazy Modeler metal transfer Cavallino emblem on the trunk lid. |
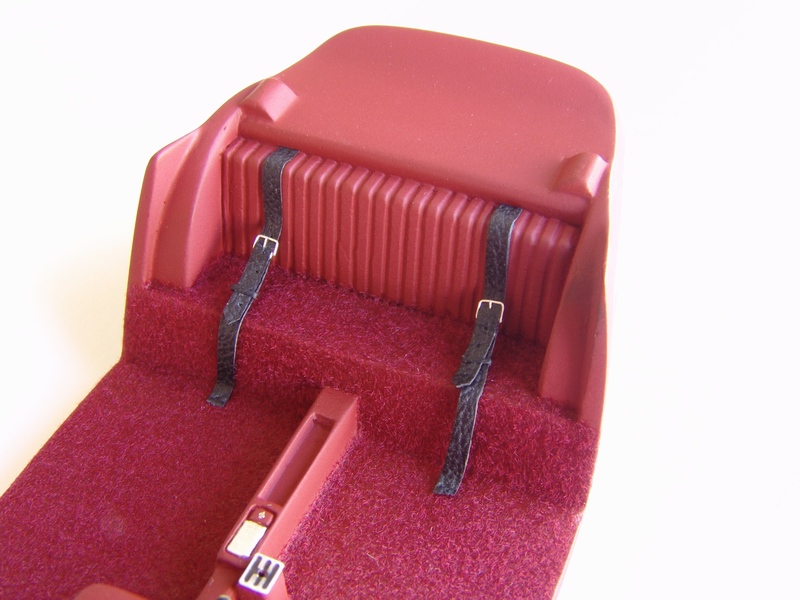 |
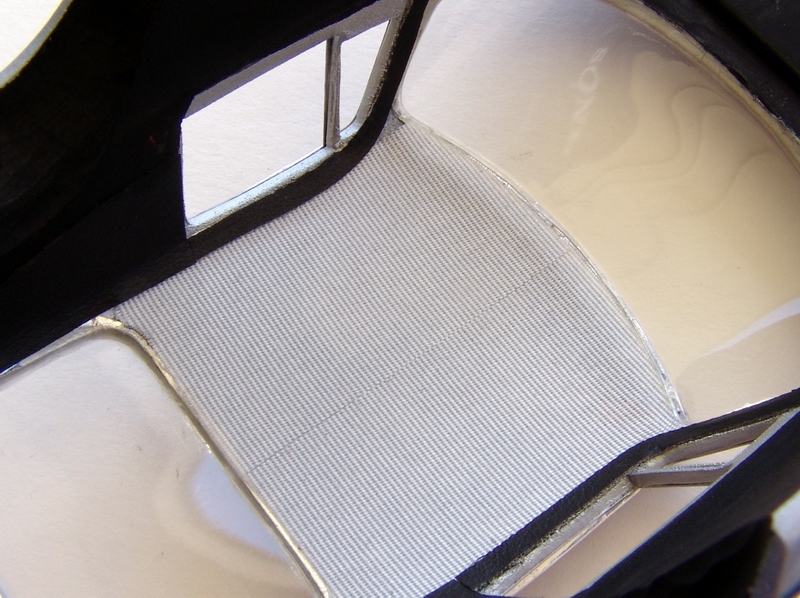
Interior floor was flocked using my flocking method, and luggage straps from real leather were added to the interior. I have also made little buckles for the straps from thin wire. |
 |
I also attached Crazy Modeler's Cavallino on the front grille, and replaced kit wiper blades with photoetched variety. Finally, front license plate was attached to the lower body. |
 |
Then I have added kit-supplied photoetched shifter gate, hand brake handle, and detailed ashtray with Bare Metal Foil, and oddments cover with Crazy Modeler tiny Cavallino metal transfer. |
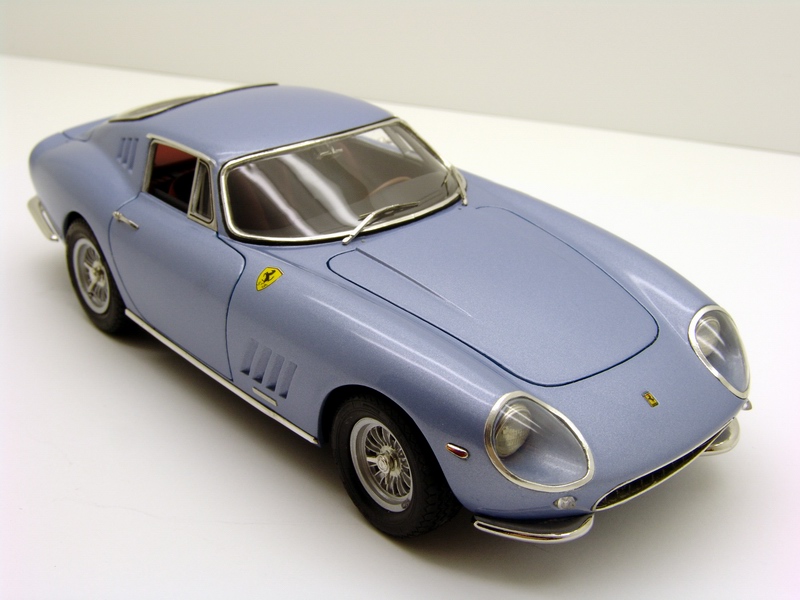 |
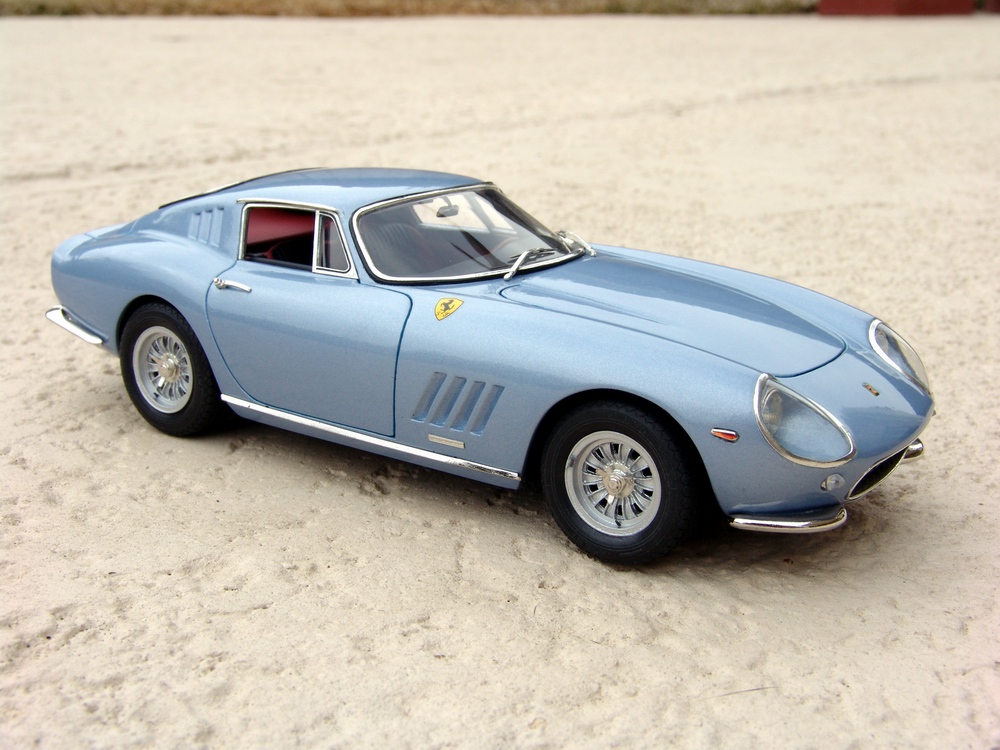
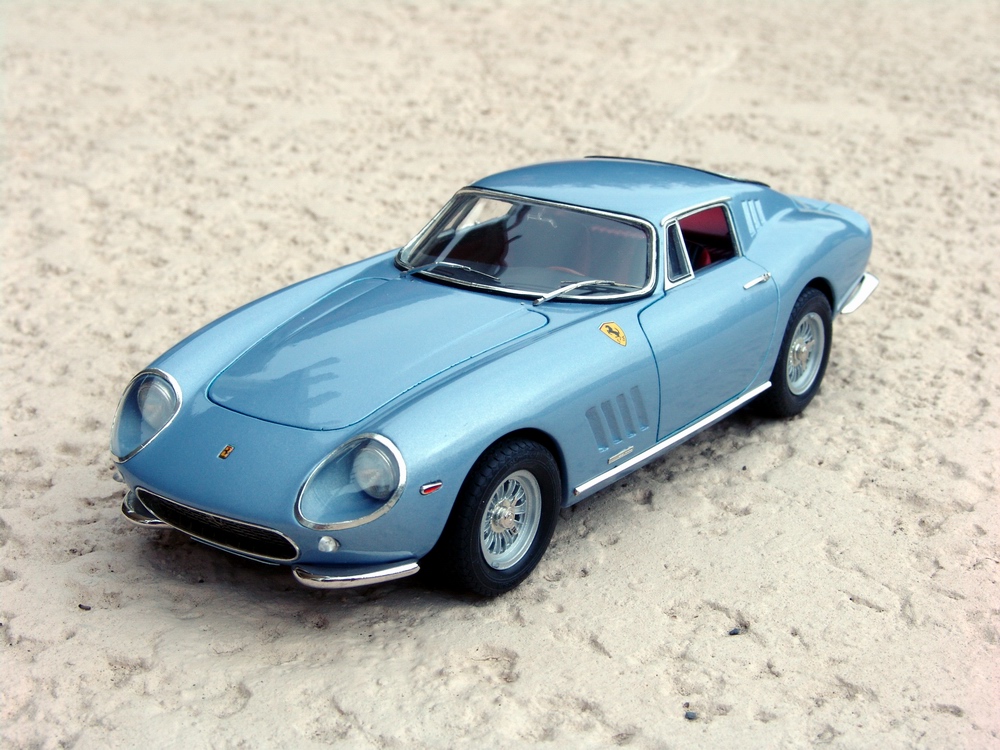
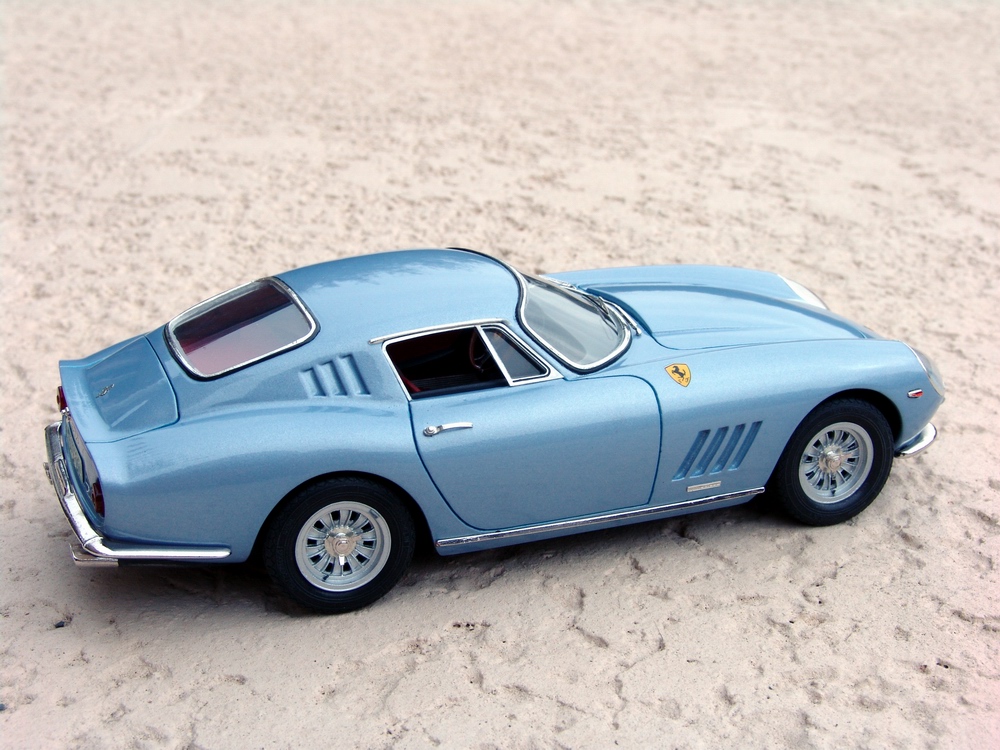
Everything was assembled together, cleaned, waxed, dusted, aligned, and completed model photographed. Restoration complete! This was my first, but I would definitely do another one if I ever come around some poor Ferrari in need of a restoration! |
Copyright 2007 Alex Kustov. No copying or reproduction in any shape or form without written permission of the author.