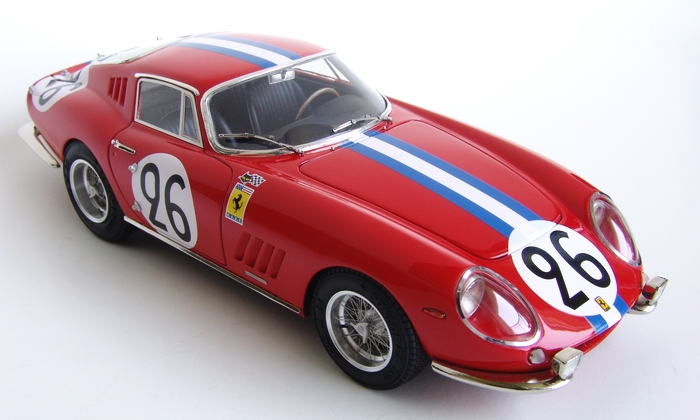
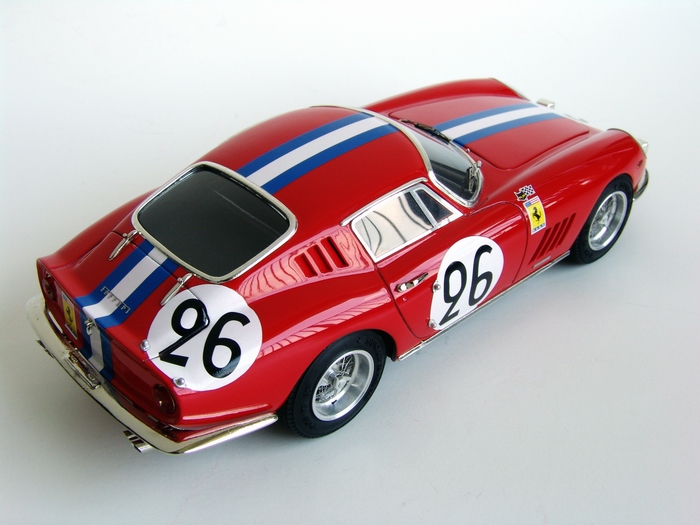
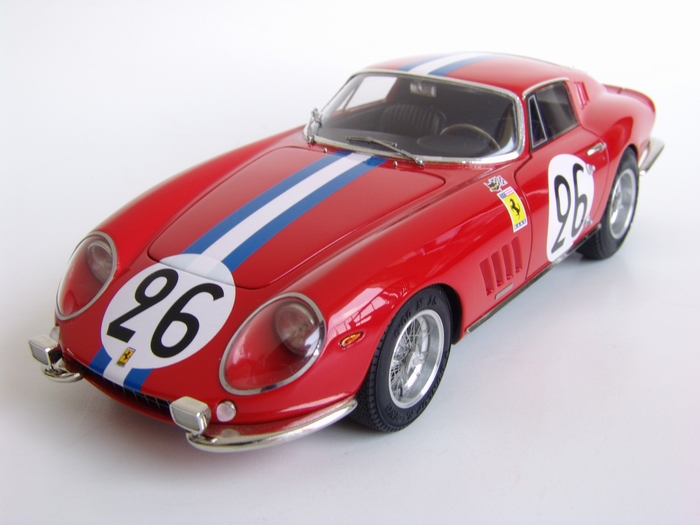
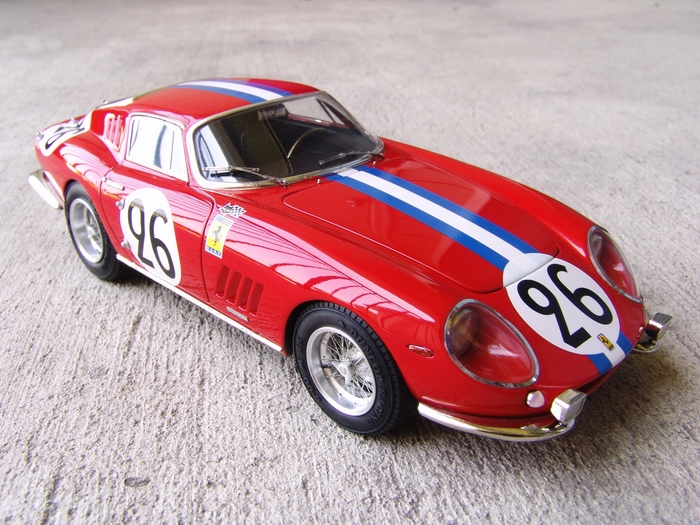
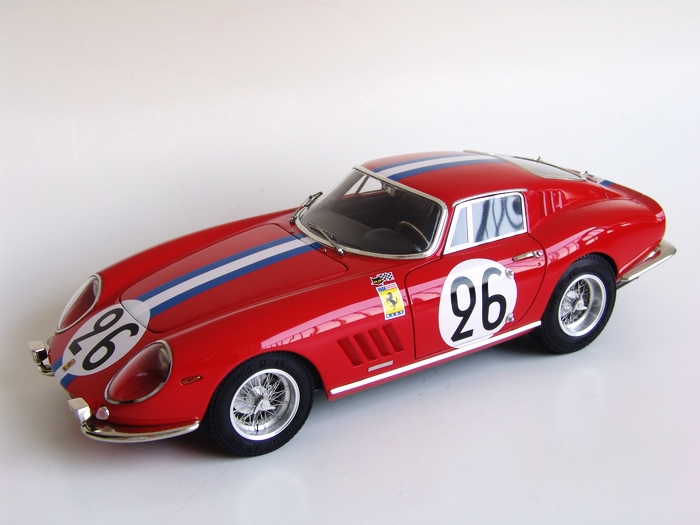
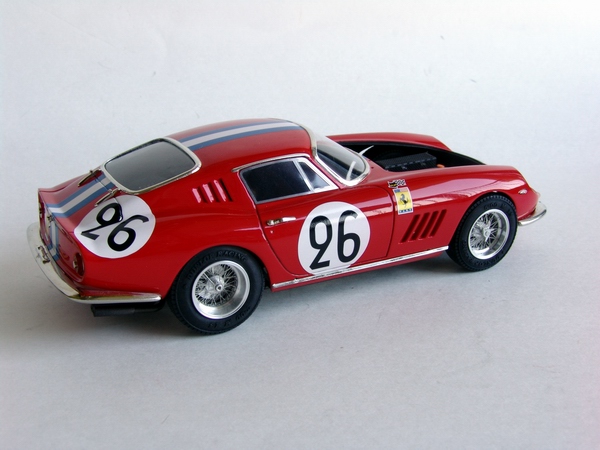
F e r r a r i 275 GTB/C, Le Mans 1966
S/N 9015GT, #26 Gianpiero Biscaldi/Michel De Bourbon Parme
 |
 |
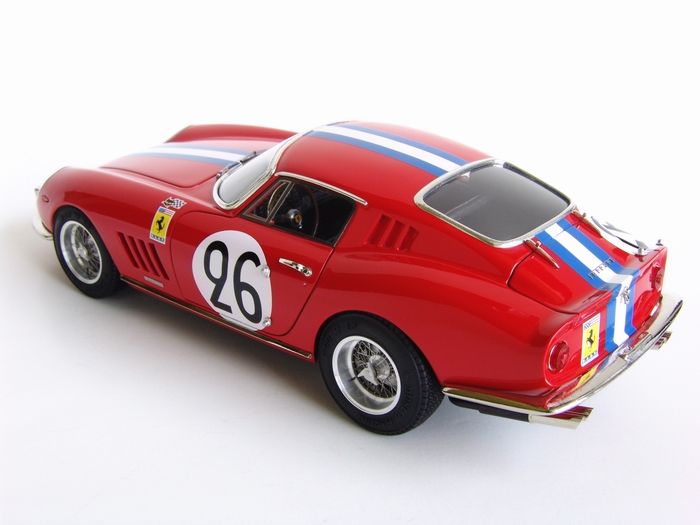 |
Kit: 1/24 Model Factory Hiro Ferrari 275 GTB/C, S/N 9015GT Pros: Nicely cast and accurate resin body, great multi-piece P/E and turned metal wire wheels. Soft rubber-like tires, with accurate and authentic thread detail and sidewall markings. Accurate and complete decal sheet made by Cartograf. Decals are very opaque and work great with setting solutions (I used Microsol). Full chassis and engine detail. Lots of rubber-backed P/E parts to replicate many small details on the model. Precisely machined (turned) metal parts that include brake disks, headlight bezels, exhaust tips, lever and handles. Thanks to many white metal (WM) parts, assembled model fells really heavy. Good instruction sheet with mostly correct colors and excellent decal placement guide. Cons: There are two big problems with this kit - WM and parts' fit. WM is very hard to clean and Hiro's castings are not the best to begin with - mold lines on delicate parts, casting defects or small details on flat surfaces. In addition, fit of these metal parts is quite bad - I had problems on all stages of assembly. Many parts had to be modified, bent or otherwise altered to fit. Most holes were not drilled or too small. Plating on "chrome" parts is not the best quality, no hinge for the hood. High price. Verdict: Definitely not a kit for a beginner, and even an experienced builder will face many problems during assembly. However, if built right - model looks great! |
 |
 |
 |
|
 |
 |
 |
Buildup
 |
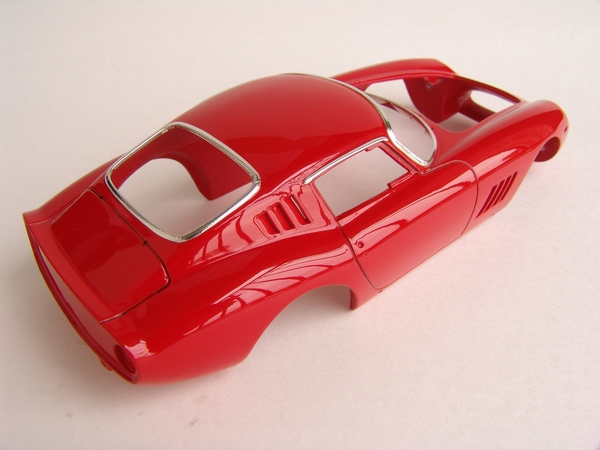
Resin body required some cleanup, then it was wet-sanded with high-grit sandpaper. After cleanup, a coat of gray Tamiya primer was sprayed, followed by a coat of white primer. White primer was smoothed a little bit with toothpaste, carefully washed, and re-coated with white primer. |
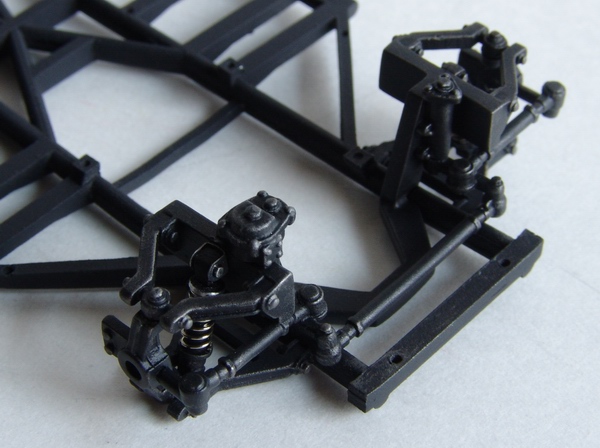 |
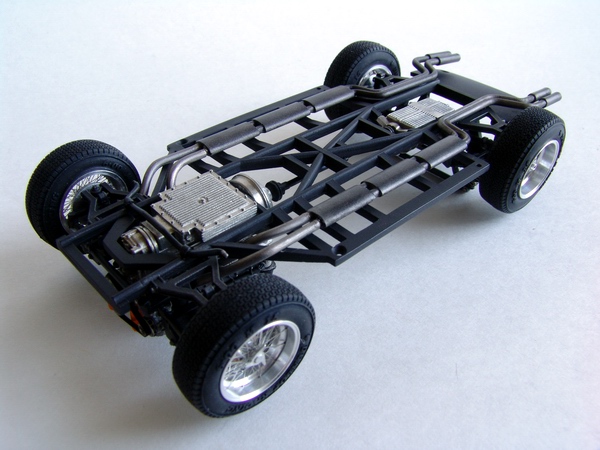
Front suspension was painted with Tamiya semi-gloss black and fitted to the chassis. Then I tried to install the shock absorbers, but they were too long, and had to be disassembled, shortened (I cut the springs and shock rod) and re-installed. |
 |
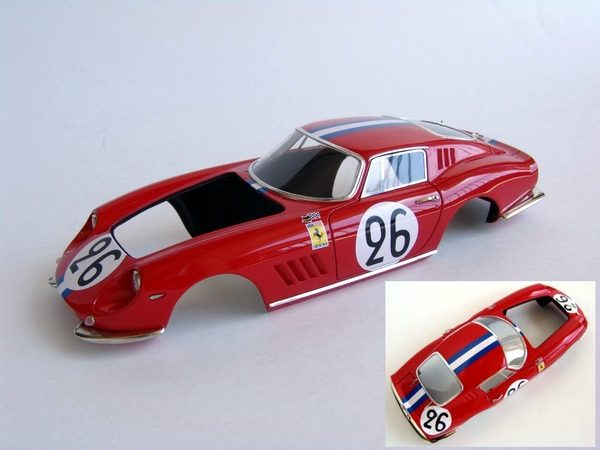
After the primer was completely dry, I sprayed 2 mist coats of Tamiya TS-8 Italian Red. When the paint was dry, I sprayed two wet coats and left the body to dry for a few days. |
 |
After the shocks were installed, I weathered (dry brushed) suspension parts with Model Master Burnt Metal metalizer using wide brush. |
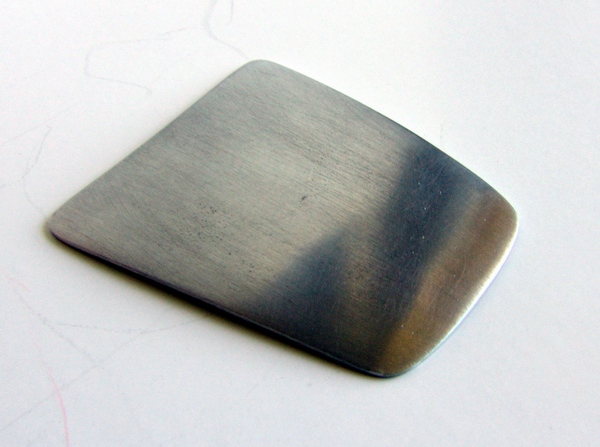 |
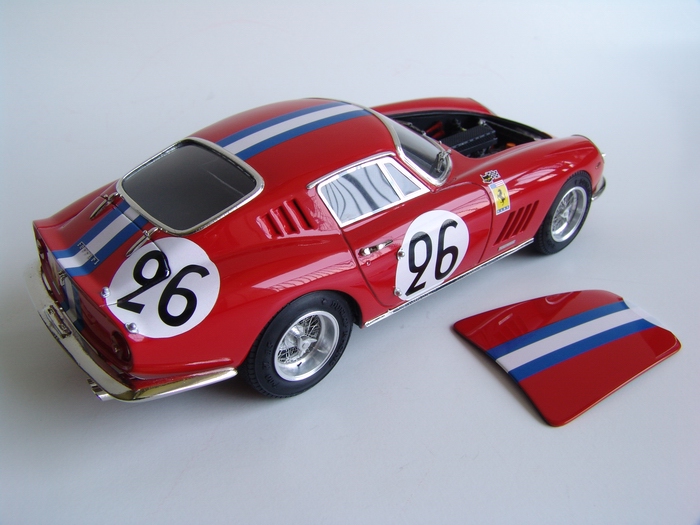
White metal hood was really rough and thick (to represent sheet metal!) and I seriously thought about replacing it with brass hood, but after I sanded it down a bit, it looked good. |
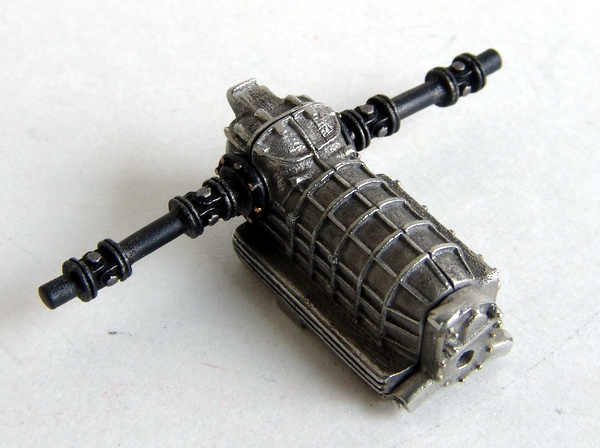 |
Transaxle was put together, cleaned up, and weathered with black wash. I also attached drive shafts painted semi-gloss black and dry brushed with Burnt Metal. |
 |
I test-fitted the hood to make sure it sat flush with the body, and was the right size and shape. I also made sure primer and paint layers on the hood won't interfere with the body - by sanding its sides a bit more. |
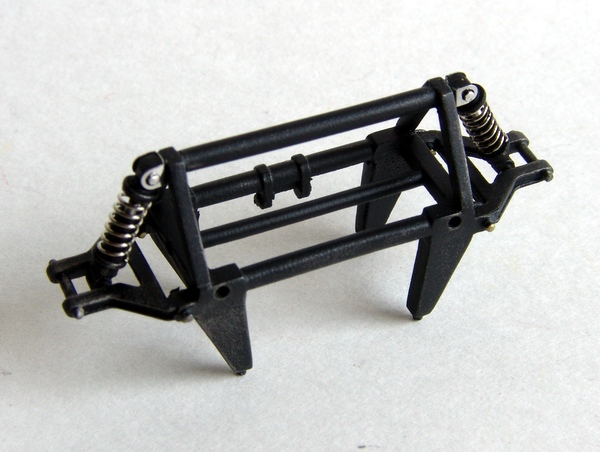 |
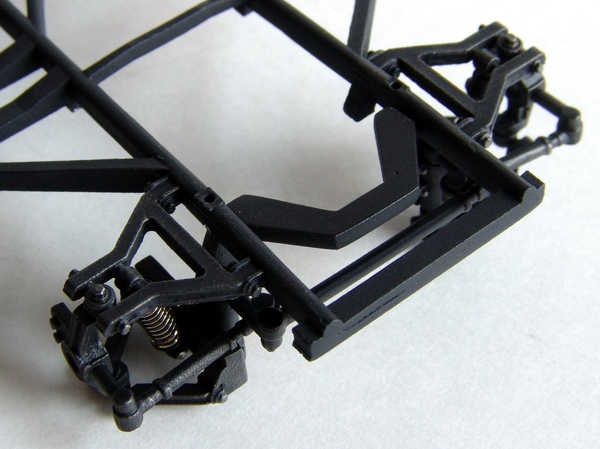
Rear suspension parts were painted black and assembled together, then fitted with shock absorbers (which I had to shorten, like the front shocks), and dry-brushed with Burnt Metal. |
 |
After paint on the body was completely dry, I polished the paint with progressively higher grits of Tamiya polishing compounds, and followed by Treatment model wax. The paint became really deep, shiny, and smooth like a glass. |
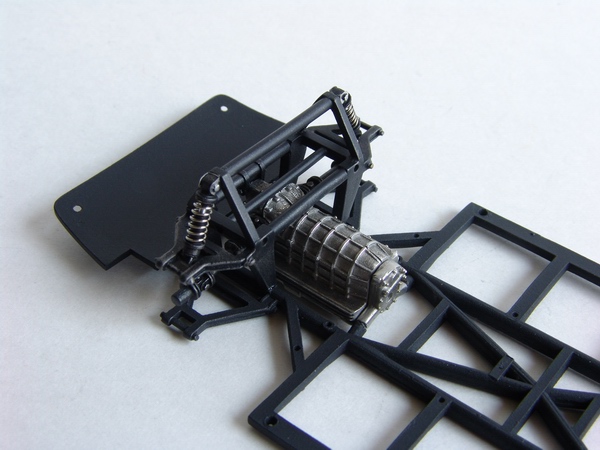 |
The transaxle was installed to the chassis and fitted with the rear suspension assembly. |
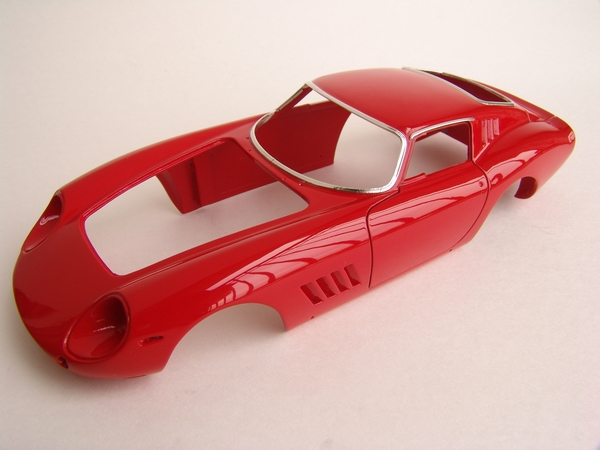 |
Finally, panel lines were filled with a wash (mixture of gloss red and flat brown Tamiya acrylic paints), and window trim foiled with chrome Bare Metal Foil (BMF). |
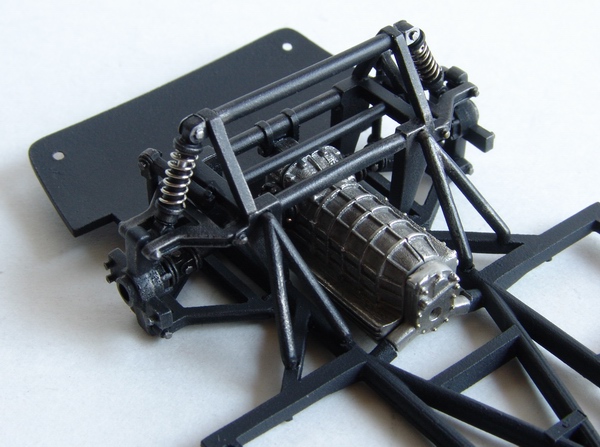 |
Then I installed the stabilizer arms, sub-frame, and wheel hubs all painted semi-gloss black and dry-brushed with Burnt Metal. |
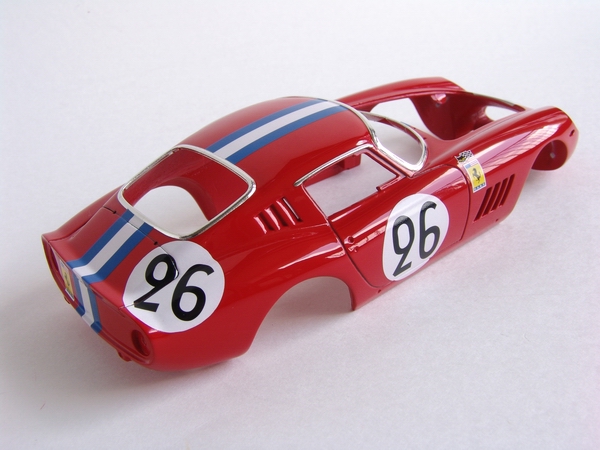 |
Body was carefully washed, and decaled with excellent Cartograf decals. They went on without a hint of a problem, with some Microsol setting solution to help them to conform to the curves. Decals were very thin and had very little clear film around the edges - pure joy to work with! |
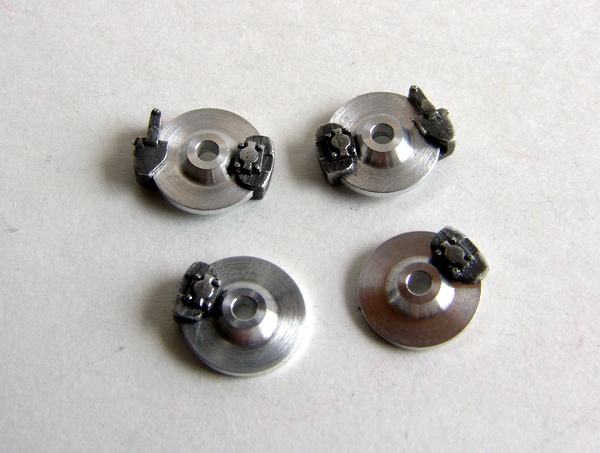 |
White metal calipers were carefully cleaned, and polished with wire brush. Then I painted them with Gun Metal metalizer, and lightly buffed them with t-shirt to remove some of the paint. Turned steel rotors were lightly scratched with sanding stick, and everything was assembled together. |
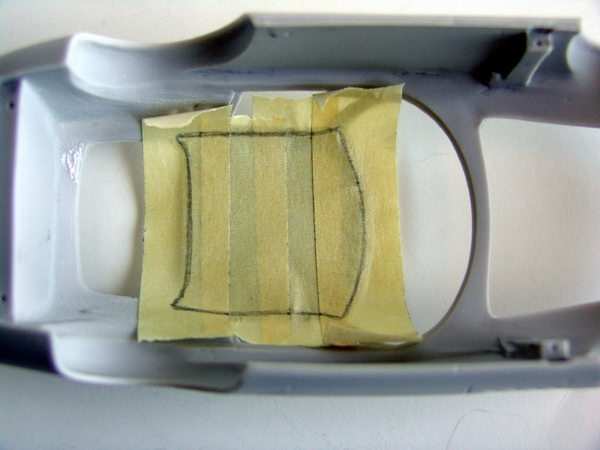 |
Before I painted the body shell, I traced a simple template for the headliner to several joined strips of masking tape. |
 |
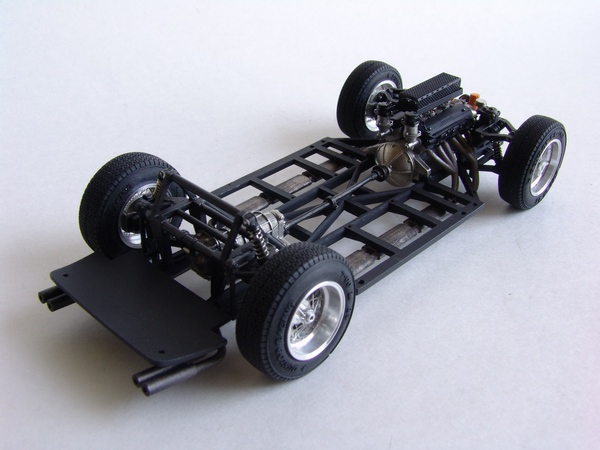
Completed engine was glued to the chassis (not a perfect fit) and front disk brakes installed. |
 |
Template was cut off, then stuck and traced to a piece of cloth tape, that was previously placed on a piece of glass (to allow it to be peeled back without sacrificing its adhesive strength). |
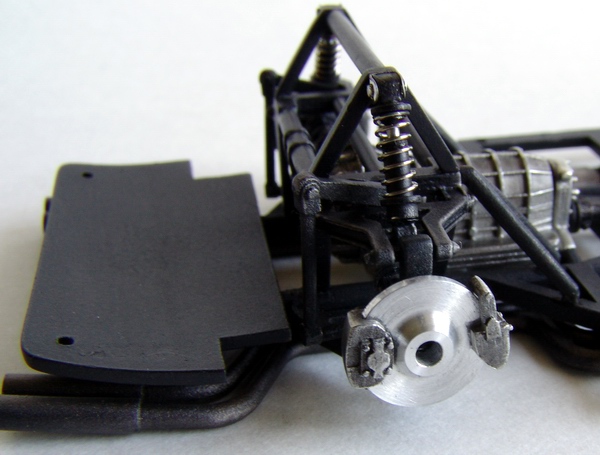 |
Then I installed rear brakes. You can also see on this picture that I had shortened rear shocks considerably to fit properly. |
 |
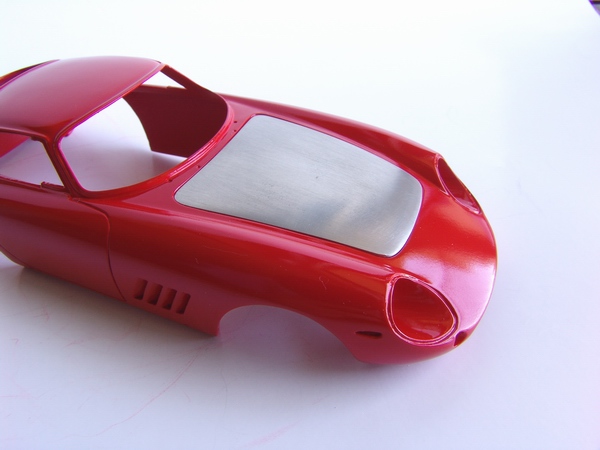
Using a sharp hobby knife, I cut the headliner from the tape using the template. It was carefully lifted off the glass and transferred to the painted body shell. |
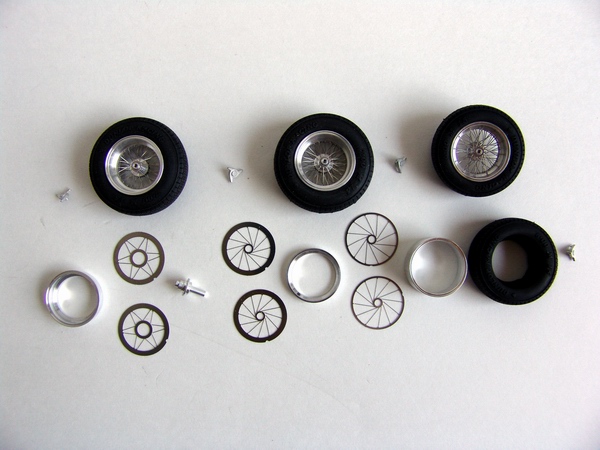 |
Wonderful multi-piece (11 parts each) wire wheels were put together. Hiro's version of Borannis is really the best wheel set you can get for classis Ferraris on the market right now. Their tires are simply spectacular, with complete sidewall detail, and very nice thread. |
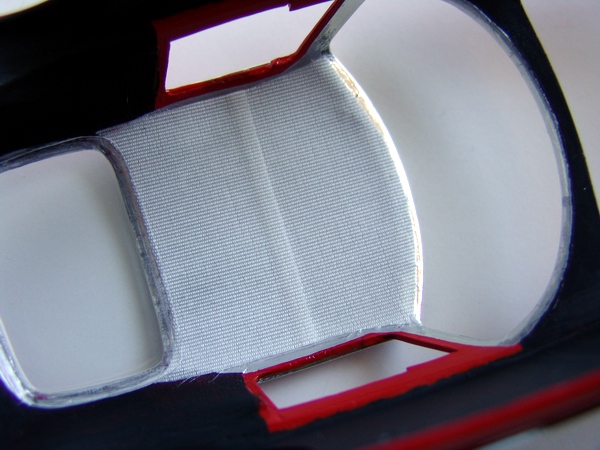 |
The adhesive on the cloth tape securely attached the headliner to the body. Body shell was painted flat black from the inside, and I proceeded to detail the outside of the model. |
 |
Wheels were attached to the chassis and engine connected to the transaxle with the driveshaft. Exhaust manifolds were also glued to the engine at this point (they didn't fit at all! I had to cut one of the sides almost 3 mm.) |
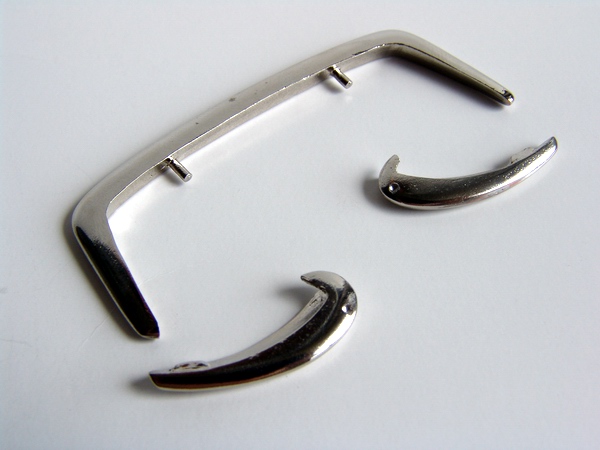 |
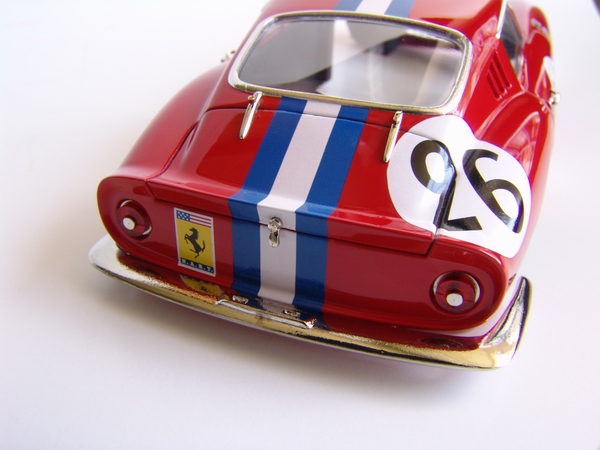
Chrome plating on bumpers was not the highest quality (some minor imperfections in the metal casting, especially front left bumperette), but I decided to leave it as is, since it was not very noticeable. |
 |
I also cleaned mufflers and exhaust pipes, and painted them with Model Master Burnt Metal. Then they were weathered with flat black wash and attached to the chassis. |
 |
Headlights were fitted with light bulbs (clear pieces of resin) and fitted with lenses. Then I glued lenses to the fog lights, and assembled and painted tail lights. |
 |
Ends of the exhaust pipes had to be bent upwards to conform to the rear end of the body (pipes will be fitted with chrome exhaust tips later). |
 |
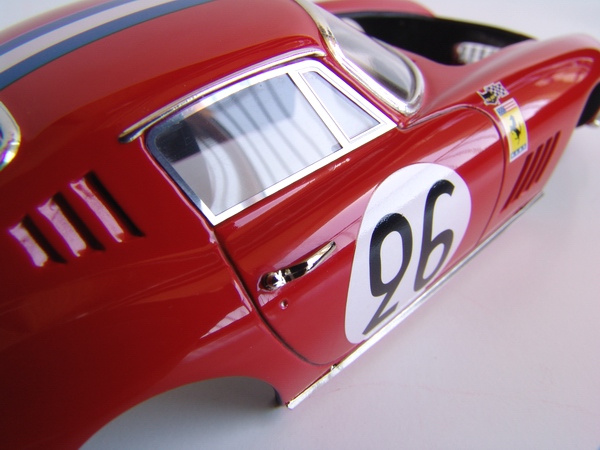
All bumpers, chrome trim, small fixtures (handles and external hinges) were fitted to the body, together with headlights and tail lights. I also glued in windshield and rear window, and added trim around them inside. |
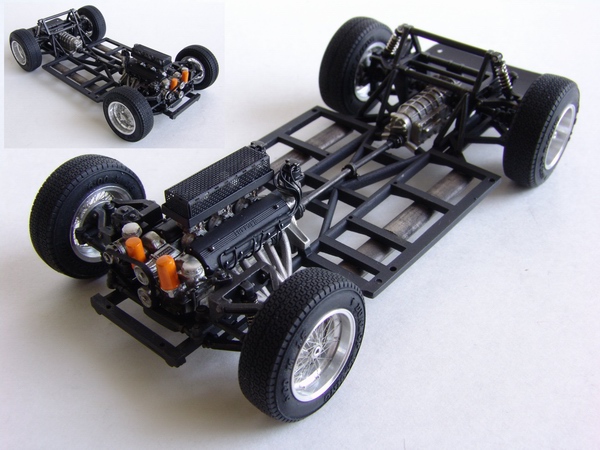 |
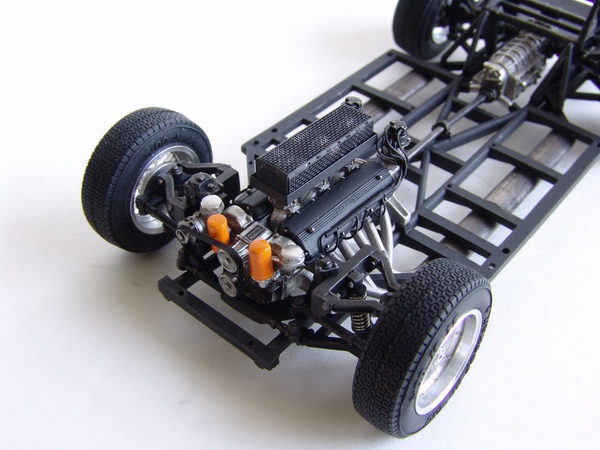
Completed "rolling" chassis looked absolutely wonderful, so I proceeded with assembly. |
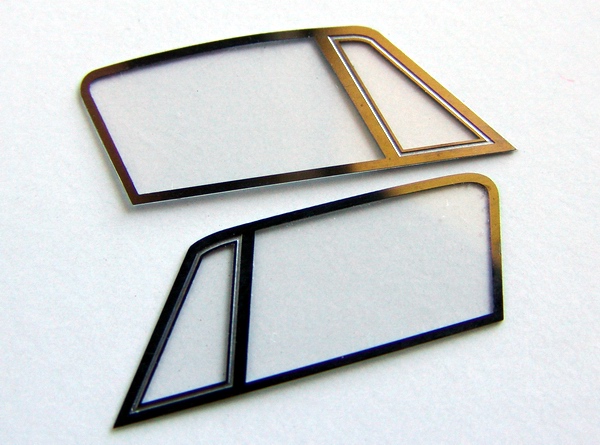 |
Side window trim was provided as P/E parts, which were fitted with pieces of clear acetate glued to the frames with fast-drying superglue. |
 |
Front of the chassis was not engineered to be attached to the body, and only had a place for the radiator. Attachment points were in the middle of the body, so I had to check the stance and fit before moving to interior assembly. |
 |
Then both side windows were carefully glued to the body shell using the same fast-drying superglue. Glass was waxed with Treatment wax before gluing to prevent superglue hazing. |
 |
Test-fitting showed that the stance was right, but both front and rear wheels were sticking out of the fenders - the tracks were too wide! I had to re-work brakes and wheel hubs to allow the wheels to sit deeper inside the chassis. Another example of poor kit design. |
 |
Fit of the windshield was really good (especially for the vacu-formed piece), it was sitting completely flush with the window frame. |
 |
Rear seat casting was really poor, and ribs on the seat were almost impossible to clean. So I decided to cover the seat with leather. Leather piece was thinned down as per my leather tutorial and cut to size. |
 |
Here is another picture of the insides with headliner, all glass, and trim in place. It s a shame it will be almost completely covered on a finished model! |
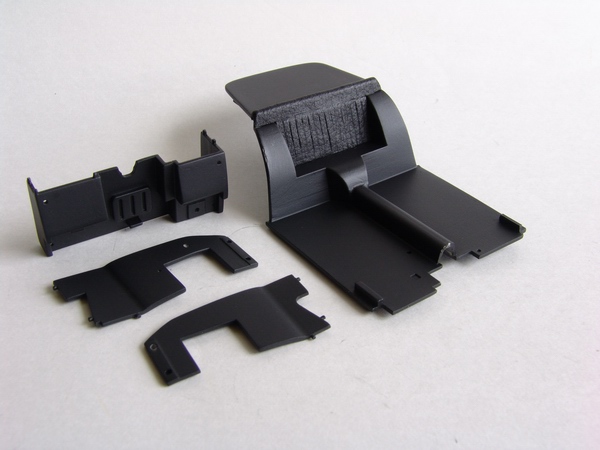 |
Inner fenders and interior parts were painted flat black, and leather piece was trimmed and glued to the rear seat. |
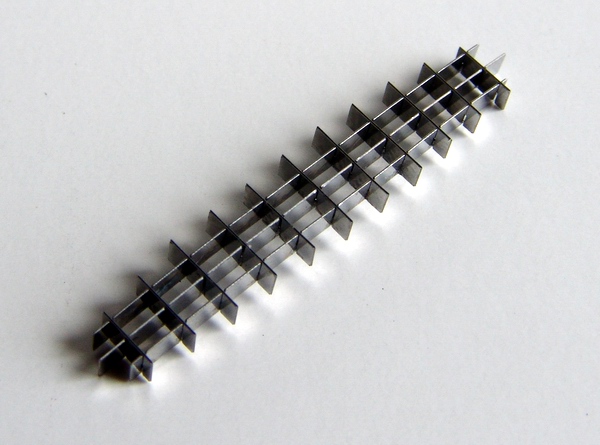 |
Famous Ferrari "egg crate" grille was put together from fourteen separate photo-etched pieces and secured with tiny drops of superglue on the inside. |
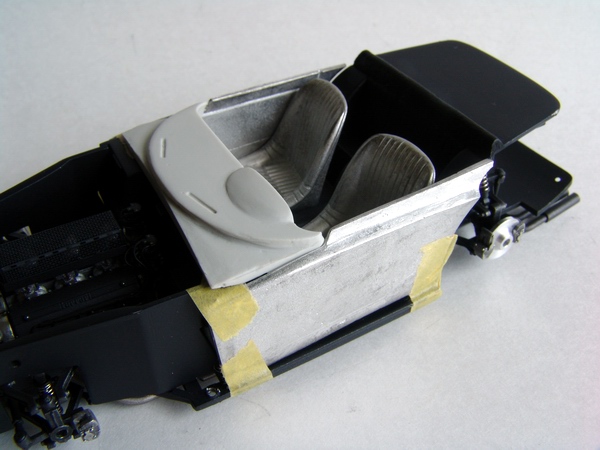 |
Interior was test-assembled together, and none! of the parts fit together! Door panels didn't fit, seats were too wide, dash was too short! I had to bend the door panels and file some material off the seats so they would fit. |
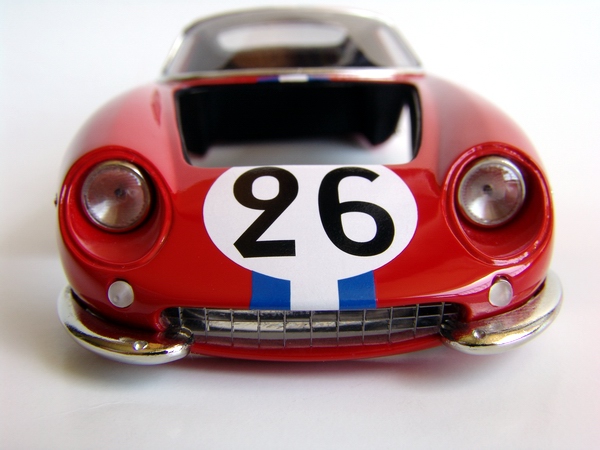 |
The grille was carefully mounted inside the body, and then I added front bumperettes, driving lights and front turn signals. Bumperettes had to be carefully trimmed from the outside to fit the body properly. |
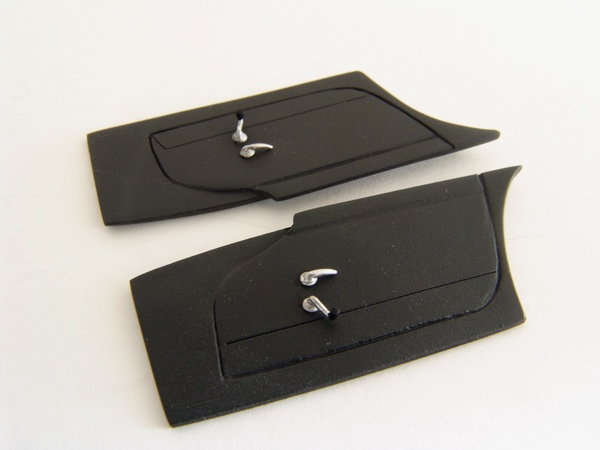 |
Panel lines on door panels were terrible, and even after deepening and re-scribing them, they looked only ok. I painted the panels flat black, and installed door handles and window cranks. |
 |
Now the body was almost finished, missing only few very small details. I lightly waxed entire body to remove all water spots, decal adhesive residue and fingerprints. |
 |
Seats were cleaned, modified to fit in the interior, primed with gray primer, and sprayed with semi-gloss black. I also made red (for contrast) lap belts with photo etched hardware from Acu-Stion Lamborghini Miura set. |
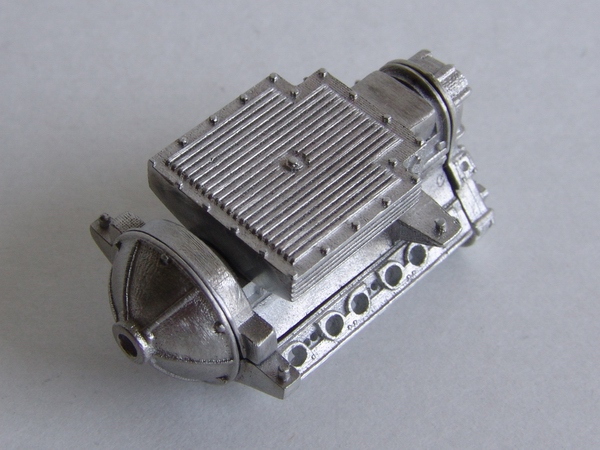 |
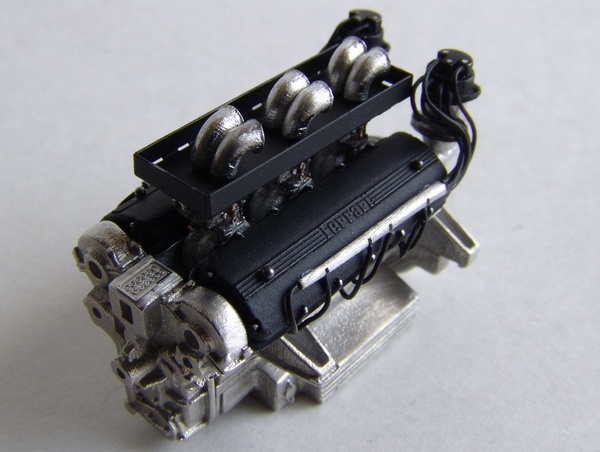
Engine block parts were carefully cleaned, polished with the wire brush, drilled, and assembled together. Almost all the parts required some sort of alteration before assembly. |
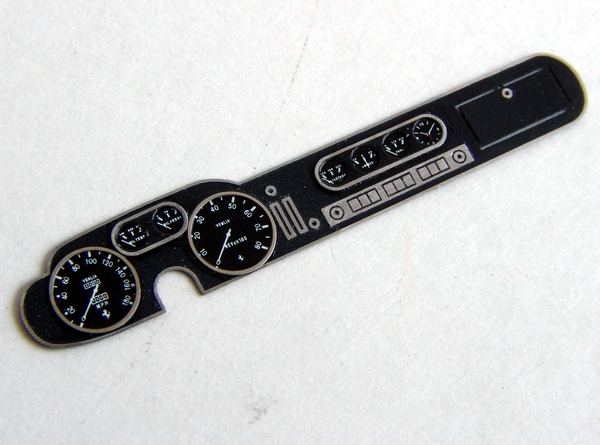 |
Photo-etched dashboard panel was painted flat black, and after the paint was completely dry, I carefully scribed it from all knobs and switches. Instrument decals were applied to the dash, and detailed with photo-etched trim rings. Dials were clear-coated to simulate glass. |
 |
Cams were drilled for the exhaust manifolds and glued to the block. Front cover was drilled to accept pulleys, generator and other equipment, and fitted to the engine block. |
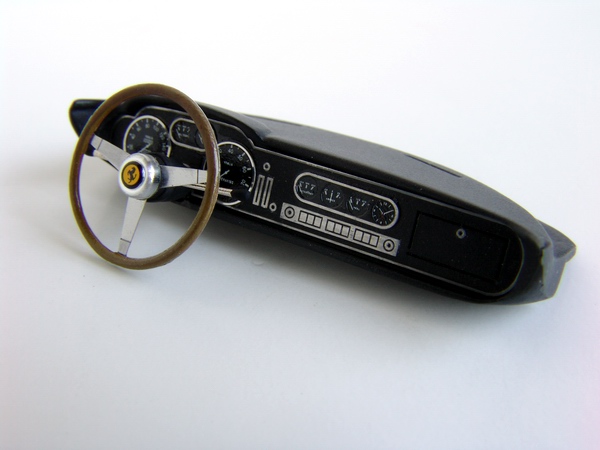 |
Dashboard was painted flat black, and fitted with P/E dash panel. Steering wheel rim was painted brown, detailed with BMF, and glued to the P/E spokes, and then to the steering column. Horn button was detailed with Cavallino decal. Steering column also received blinker and wiper stalks. |
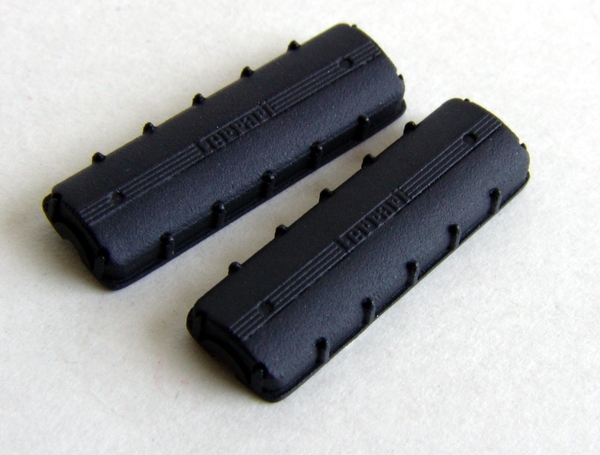 |
Cam covers were cleaned, fitted with photo etched Ferrari scripts, primed with metal primer, and painted with flat black from the distance to simulate "crackle black" finish of the real cam covers. |
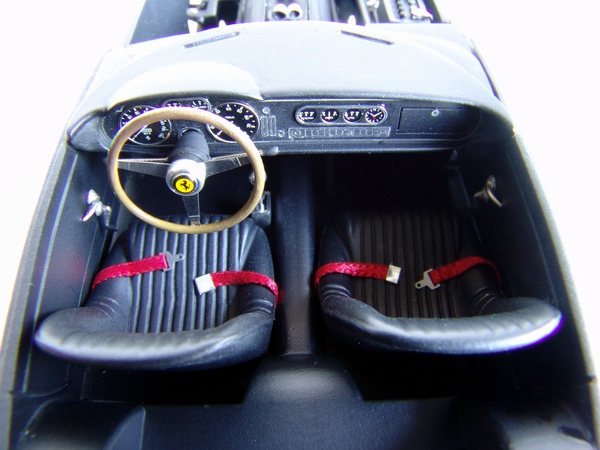 |
Everything was assembled together, and topped off with shifter with photo-etched gate, pedals, and a hand-brake handle. |
 |
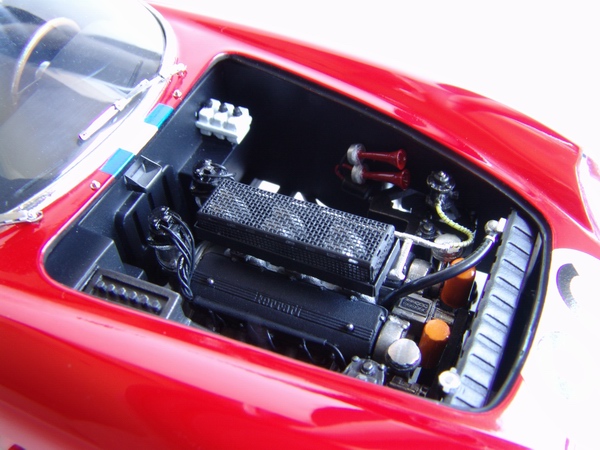
Distributors were cleaned, assembled, drilled for the plug wires and glued to the block. Then I attached plug wires, and assembled wire guides (tubes). Carburetors were installed and detailed with black wash at this time. I also attached fire order plate to the front cover. |
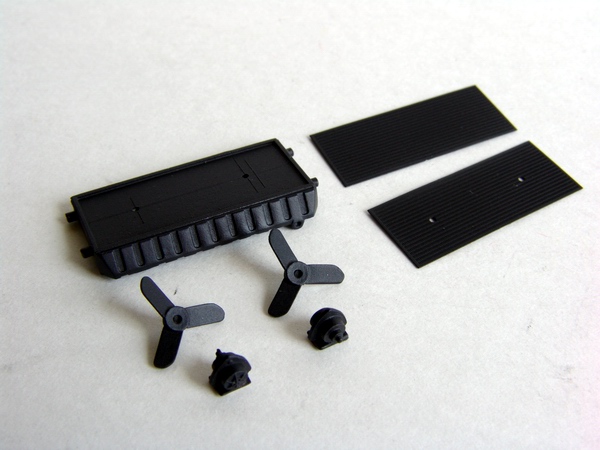 |
Radiator body, photo-etched mesh halves, and cooling fans and their motors were cleaned, and painted flat black. |
 |
Every plug wire was routed to its respective plug in the cams, and guide tubes were glued to the covers. I also cleaned and attached velocity stacks to the carburetors. |
 |
After the radiator was put together and glued to the chassis, I lightly dry-brushed it with MM Burnt Metal metalizer, and attached radiator cap. |
 |
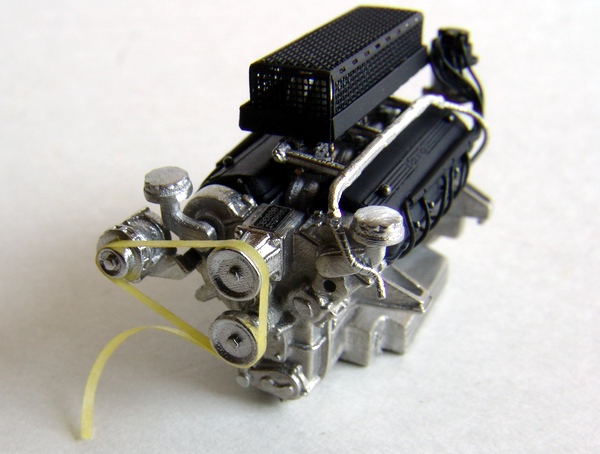
Drive belt assembly was made as one white metal parts, and looked very thick and crude. I decided to remedy this situation. |
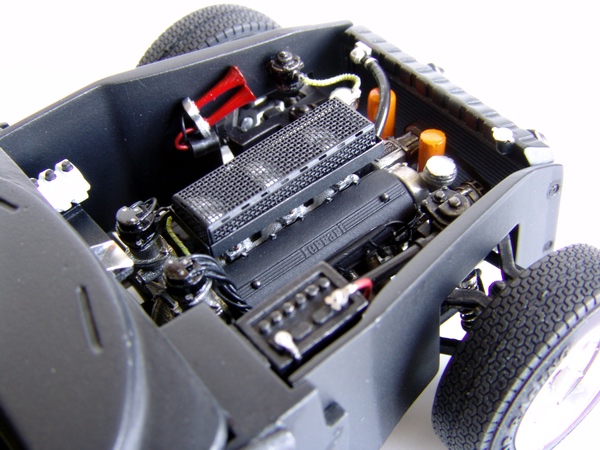 |
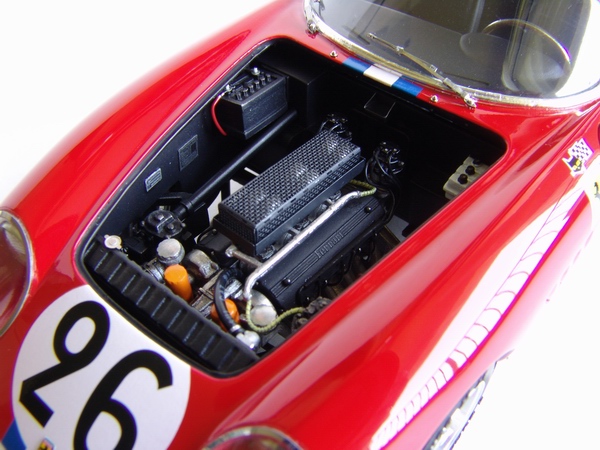
Then I installed inner fenders, and started to accessorize the engine bay - metal radiator hoses were replaced with vinyl piping with BMF clamps, fuel lines were replaced with yellow wire that had another fine wire wrapped around it. I also added fuel pump, wired air horns, and washer bottle. |
 |
I cut the belt off the pulleys and carefully cleaned and slightly re-shaped each pulley. |
 |
On the other fender I added a battery detailed with Detail Master battery kit (photo-etched clamps and wires), and tiny photo-etched data plates. Once interior and engine bay were completed, I permanently attached the body to the chassis, and continued with exterior detailing. |
 |
The pulleys then were glued to their respective places on the engine cover. I also attached oil tubes and generator assembly. Fuel lines were temporarily attached to the carburetors to figure out where (and how) they will be routed. Carbs were covered with protective mesh (P/E part). |
 |
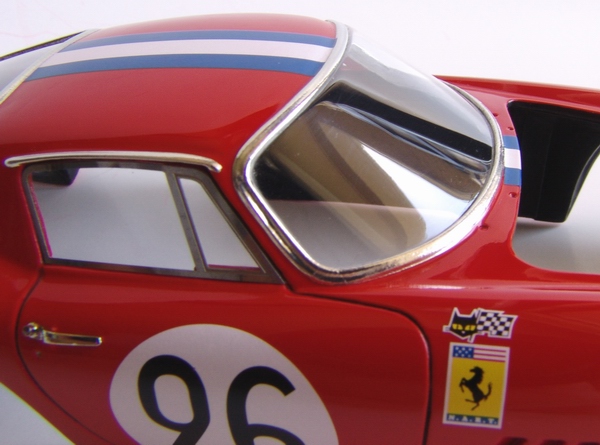
Headlight covers were cut and glued to the body with white glue. It took me a while to bend the covers' trim to fit correctly, but I managed to do it without scratching it. I also added driving lights and painted blinkers with Tamiya clear orange. |
 |
I made a belt from Tamiya masking tape folded in two layers (for proper thickness) and test fitted it on the pulley to determine the correct length. |
 |
Exhaust tips were glued to the pipes, and tail light centers were painted red. I also attached number lights to the roundels on the trunk lid and doors. |
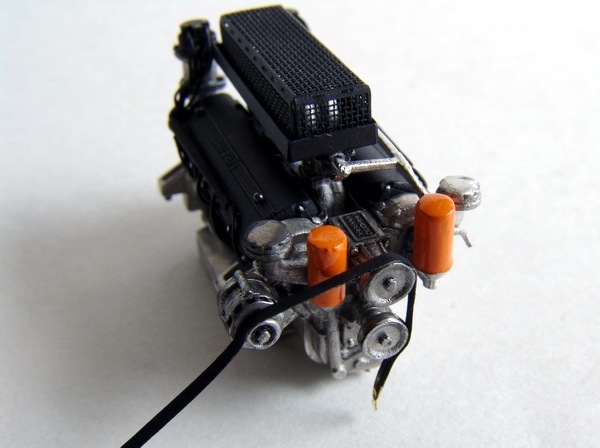 |
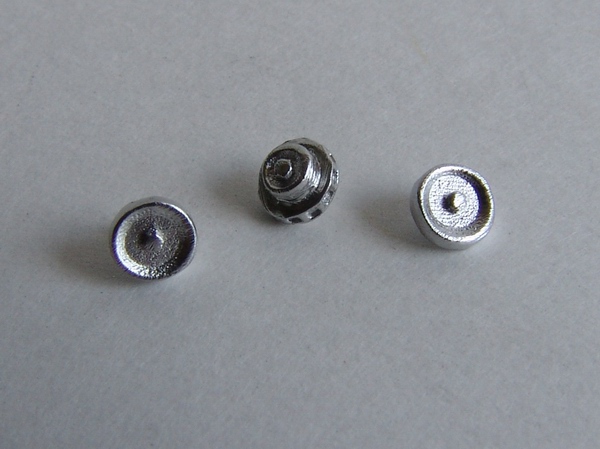
The tape was painted flat black, and once dry, glued to the pulleys and touched up with flat black. I also attached two oil filters painted with gloss orange Tamiya acrylic paint. |
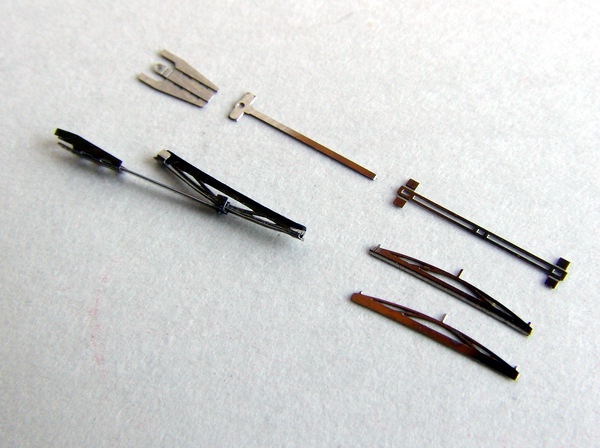 |
Delicate photo-etched windshield wipers were assembled from 5 parts each, and looked great. These are one of the best vintage wiper constructions I've seen. After assembly, I have painted the rubber blades flat black. |
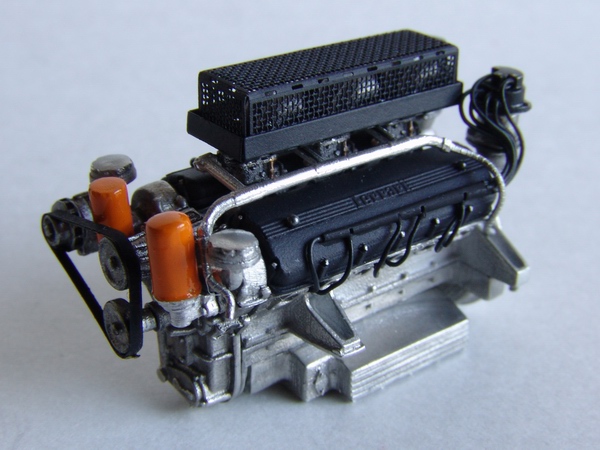 |
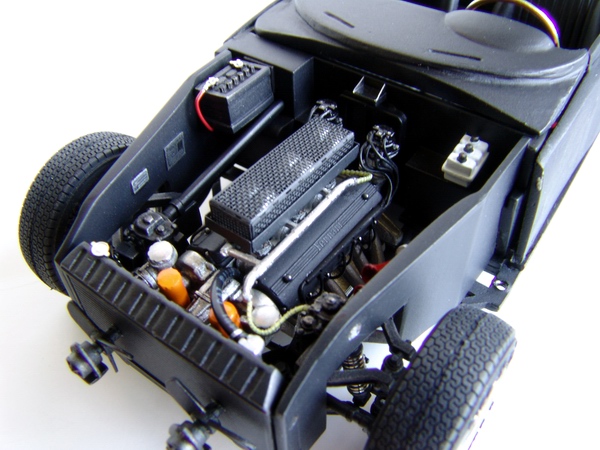
The engine was lightly weathered with black wash. It looked great, but I still wanted to change the fuel lines to a more realistic lines made from wire. The engine needed few small touch ups here and there, but I decided to do this after fitting it to the chassis. |
 |
Wipers were attached to the body and bent to conform to the windshield, and I also installed little washer nozzles made from tiny metal rivets (supplied in the kit). |
 |
Chassis frame was a nightmare to clean up! I used up two packs of flexi-files to clean it! It is really accurate and detailed, but the quality of the casting is just bad. After cleaning, it was primed and painted semi-gloss black. |
 |
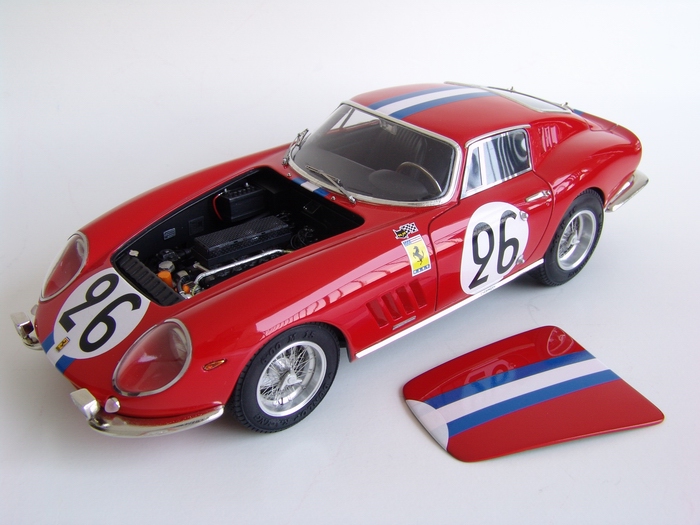
Now the model was almost completed, and needed only the hood to cover engine bay. |
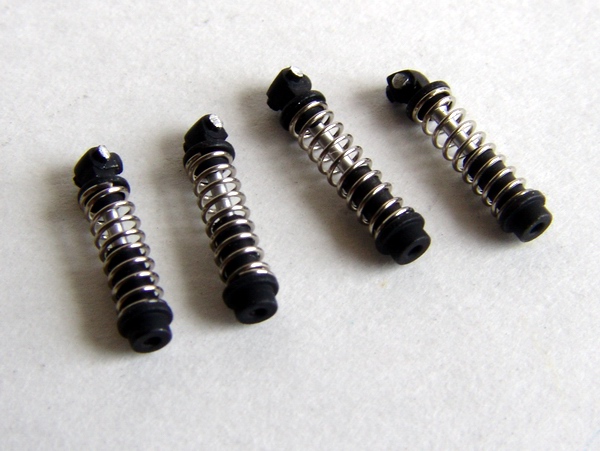 |
Shock absorbers were assembled from several white metal parts and a real metal spring, then carefully painted black, and detailed with metalizers. Unfortunately they were too long, and had to be disassembled twice during installation! |
 |
Another view from the front to show the complicated curve of the headlight covers' trim. The nose was fitted with small P/E rectangle with Ferrari badge decal. |
 |
Front suspension parts were also cleaned, and assembled together with A-arms, steering mechanism, rack, and tie-rods. |
 |
Another thing that I dislike about Hiro's kit design is that they use screws to attach chassis to the body. They can be painted, but they are still visible and detract from the model. Rear screws are somewhat covered by the exhaust pipes. |
Copyright 2005 Alex Kustov. No copying or reproduction in any shape or form without written permission of the author.