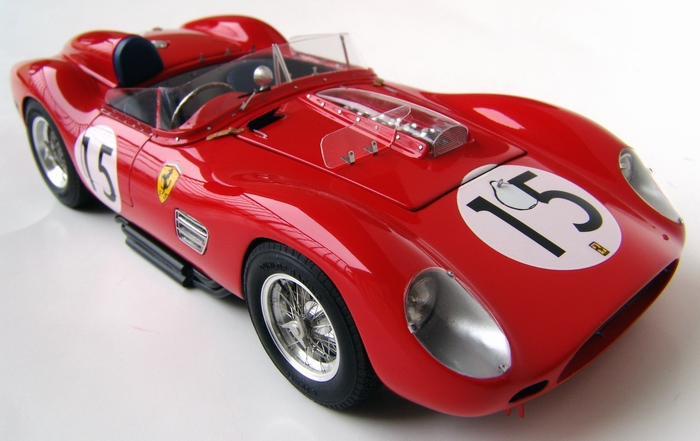
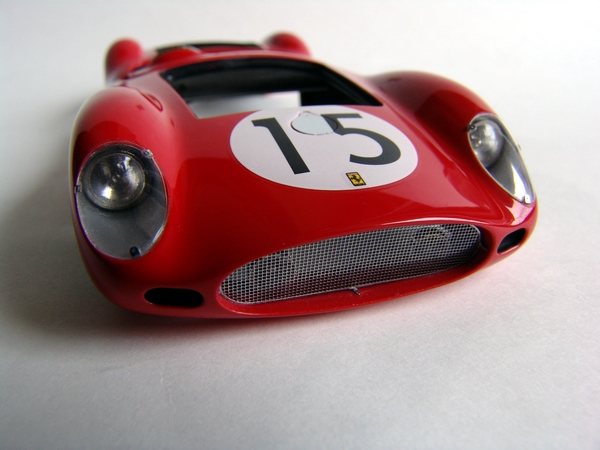
F e r r a r i 250 59/60TR LM
 |
 |
 |
Kit: 1/24 Model Factory Hiro Ferrari 250 59/60 TR LM Pros: Full-detail kit. Body and interior castings are very clean, delicate and smooth, on the inside too. Thin and perfectly registered decals that respond well to Microsol. Correct marking for four versions of the car included. Photoetched parts are crisp and nicely engraved. Although the metal is relatively thin, the depth of engraving is absolutely perfect. Attachment points are very thin, and soft metal sands very easily. Great turned metal parts. Superb wheels and very soft tires with great thread detail and correct sidewall markings. Great instructions and correct color guide. High parts count for ultimate replica! Cons: Extensive use of white metal (including delicate parts), excessive mold lines on metal parts (hard to clean), few very serious fit problems (requires extensive alteration of the kit). Way too thick hood and trunk (as well as separate parts for the trunk lid and headrest). No hinges. High price. Verdict: Once again, MFH folks have created most advanced kit of 59/60TR. I was really disappointed with this kit though. Engineering of the kit is much worse than Hiro's previous releases and takes a lot of work to correct. Make sure you plan ahead and test-fit everything in advance. It builds into breathtaking model, but recommended only for experienced builders. |
 |
 |
 |
|
 |
 |
 |
Buildup
This buildup was also published in Model Cars July 2006, #115, Building a Le Mans Winner
This buildup was also published in Model Cars August/September 2006, #116, Building a Le Mans Winner, Part II
This buildup was also published in Tamiya Model Magazine International February 2007, Issue 136, Gentlemen Prefer Redheads...
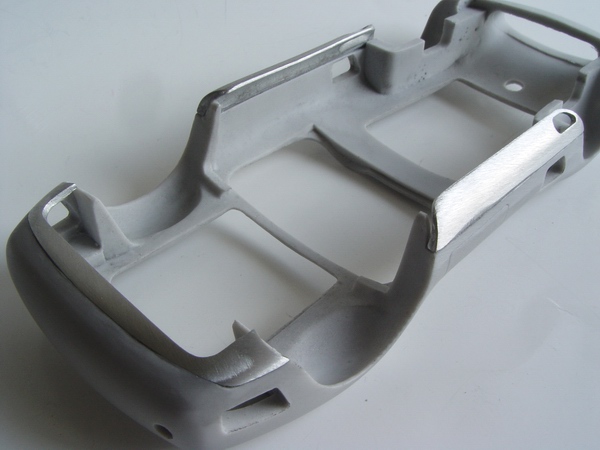 |
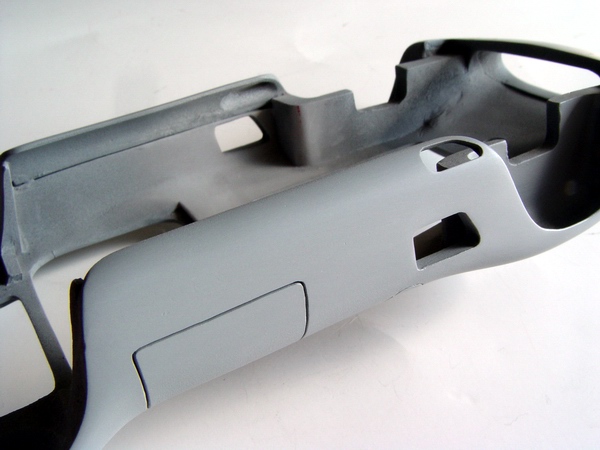
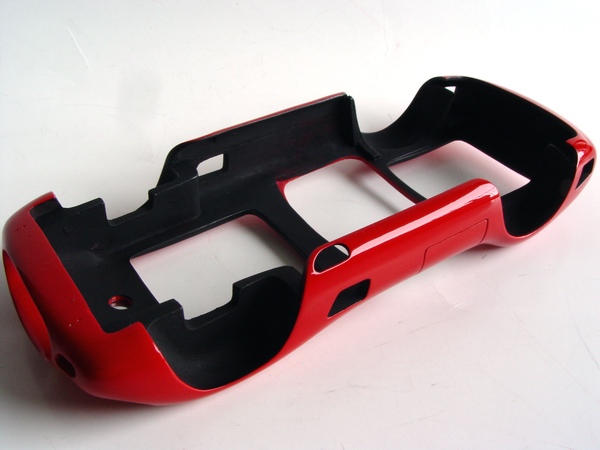
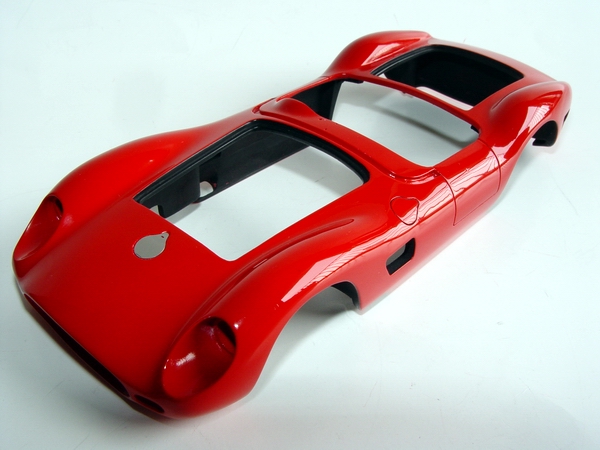
Every time I build a kit, I start with the body. Body in this kit was made from nice and smooth gray resin. Due to complex shape of the body, lower panels were made from white metal. I glued them to the resin with 5-minute epoxy. |

|
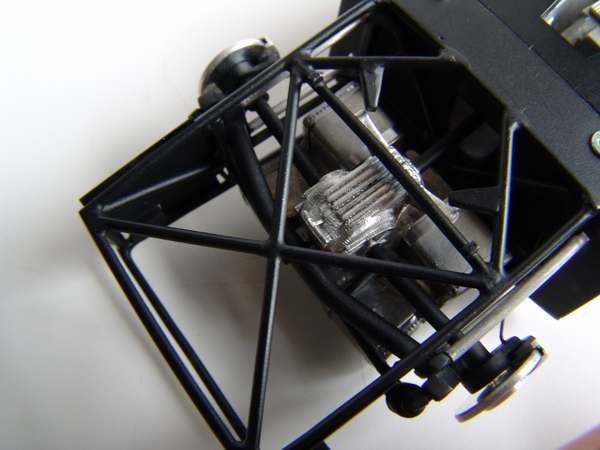
Rear tubular frame was assembled from 5 white metal parts carefully cleaned with flexi-files. The frame was glued together with 5-minute epoxy for additional strength. |
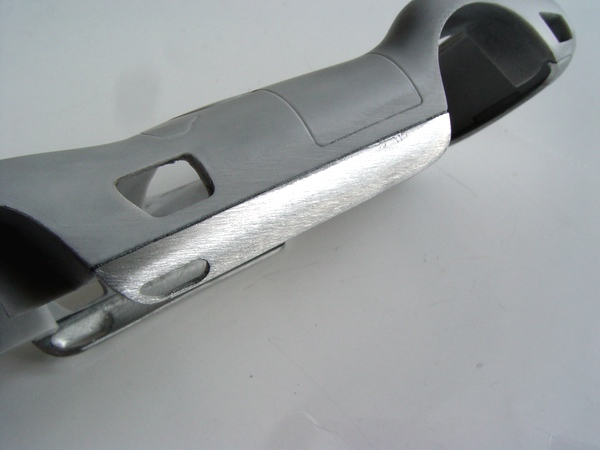 |
After rough sanding with coarse sanding block the gaps between the panels were still huge. I smoothed the surface with finer sanding stick and prepared it for putty. |

|
It was primed and painted flat clack, then fitted with rear axle, swing arms, wheel hubs and differential with half shafts. |
 |
Gaps were filled with Bondo glazing putty and left to dry for a while. When the filler was dry, I sanded the excess with fine sanding stick. |

|
Finally, rear suspension was fitted with shock absorbers. The whole assembly was screwed to the resin chassis with two metal screws. |
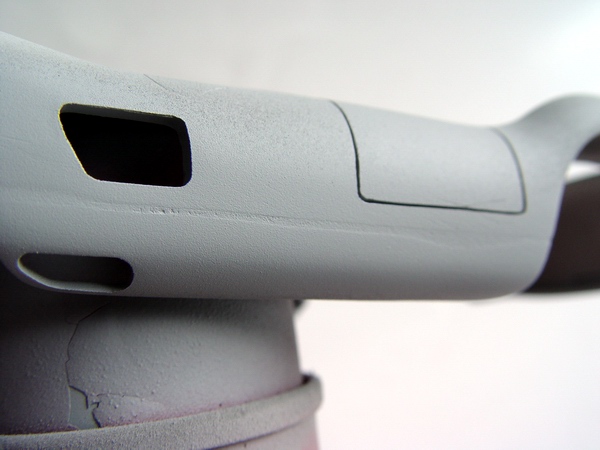 |
To check my work I sprayed a coat of Tamiya gray primer. The gap was still very noticeable and I proceeded to further refine it with putty. |
|
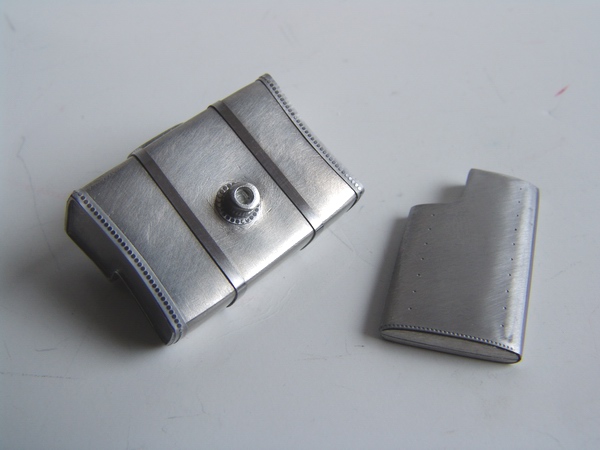
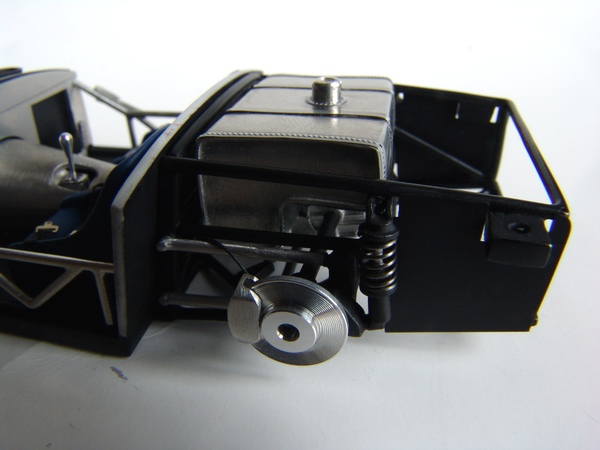
Gas tank was glued together from 4 separate white metal parts (it took forever to clean and polish them!) and detailed with p/e rivets and stripes. Oil tank was glued together and wrapped in two "riveted" p/e plates. |
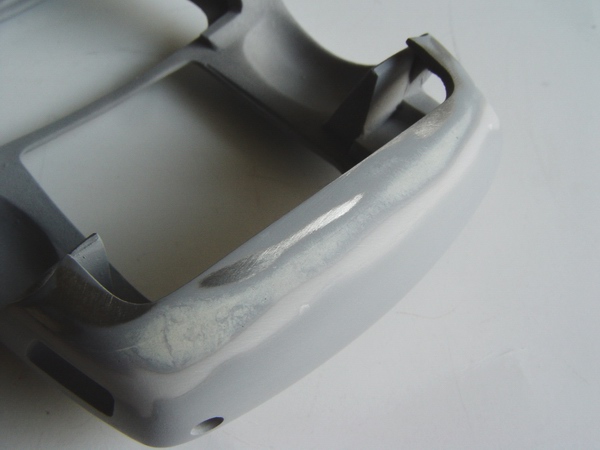 |
This time I used Squadron white putty (I think it shrinks less than Bondo filler, but its more fragile when dry) on the rear panel of the body.... |

|
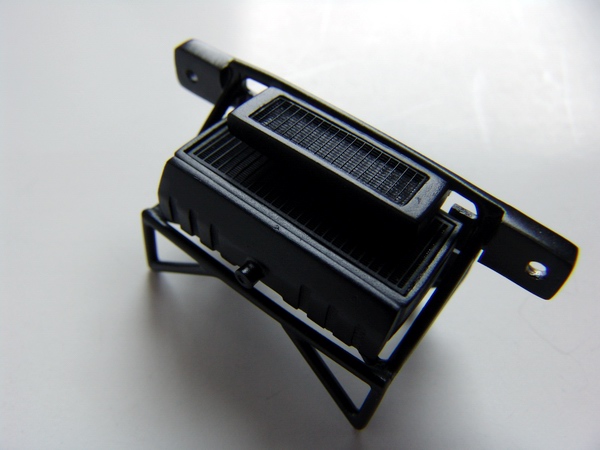
Water and oil radiators were cleaned, primed and painted satin black, and then fitted with fine photoetched mesh (from both sides) that was painted gun metal. |
 |
... and both sides to smooth the surface for another coat of primer. |
|
Front tubular frame was assembled from 3 separate parts, primed, painted satin black and fitted with radiators. |
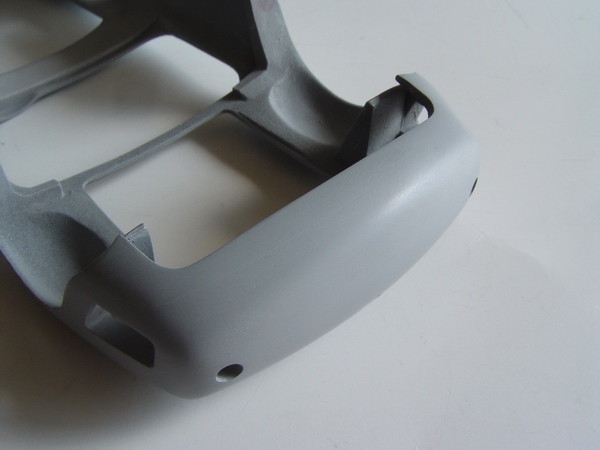 |
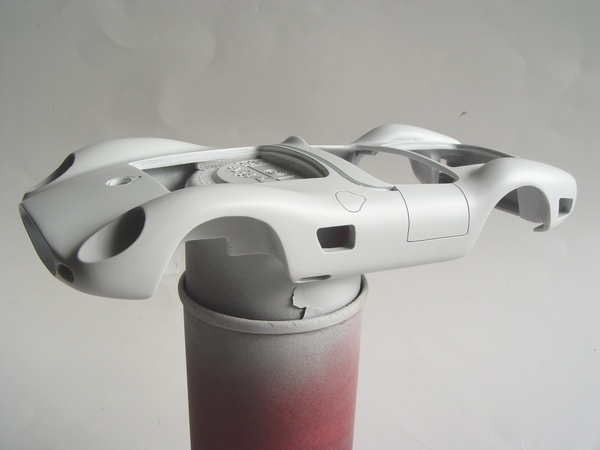
This time the surface looked much better, so I cleaned the rest of the body and sprayed the last coat of gray primer on entire body. |
|
The whole thing was glued to the chassis, together with engine bay frames, inner fenders, steering rack, shock absorbers, and ventilation system intake. Water radiator received its cap. |
 |
When primer was completely dry, I sanded it with 1500 paper under running water. Sides and rear were perfect! |
|
Rear received its disk brakes with brake hoses, inner fenders and drive shaft. |
 |
I left the body to dry overnight, and sprayed a coat of Tamiya white primer next day. When dry, white primer was "sanded" with toothpaste. The body shell was ready for the paint. |
|
Tank fit was terrible. I had to cut a groove in it and shave some parts of the differential so the tank would clear the trunk, and be in the center so the gas cap would be visible through the opening in the trunk lid. Quite a task at this stage! |
 |
I sprayed 3 mist coats of Tamiya TS8 Italian Red 20 minutes apart, followed by 2 wet-coats with 2-hour break to allow paint to gas out. In 5 days the paint has completely cured, and I painted insides with flat black with wide brush. |
|
Finally I attached anti-roll bar, and few other small suspension details - and the chassis was completed. |
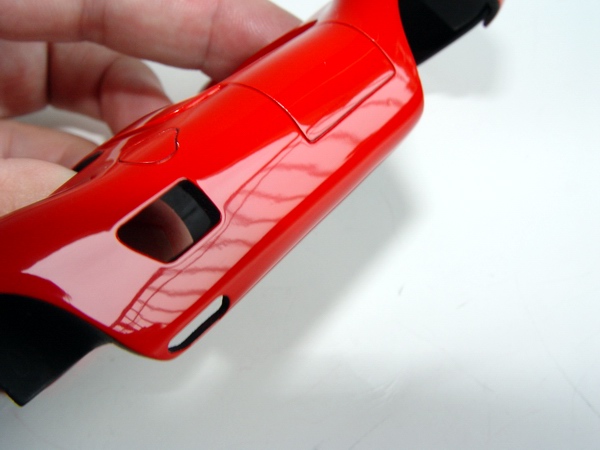 |
After initial polishing no trace of the gap was to be found on the sides or rear panel of the body. Future polishing will smooth the surface even further. |
|
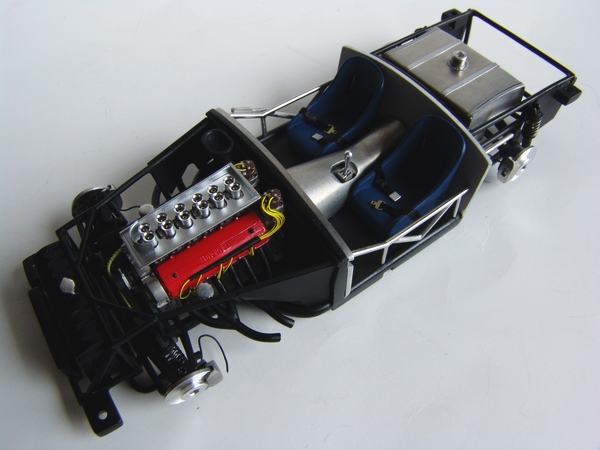
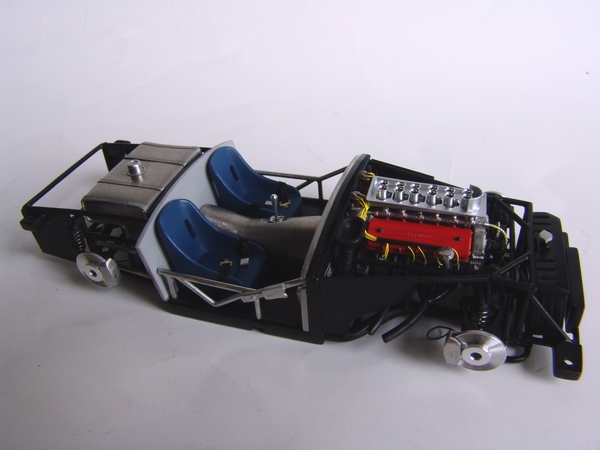
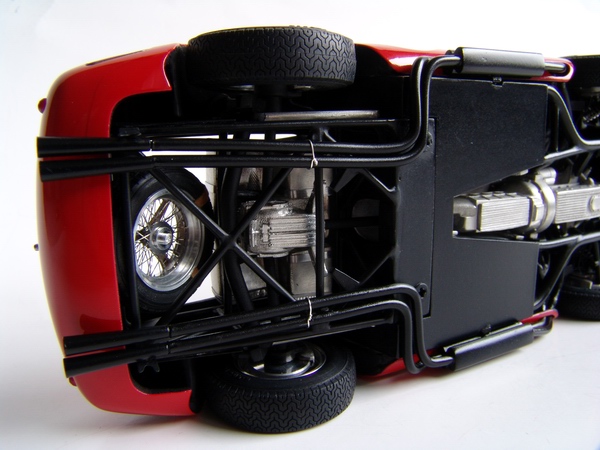
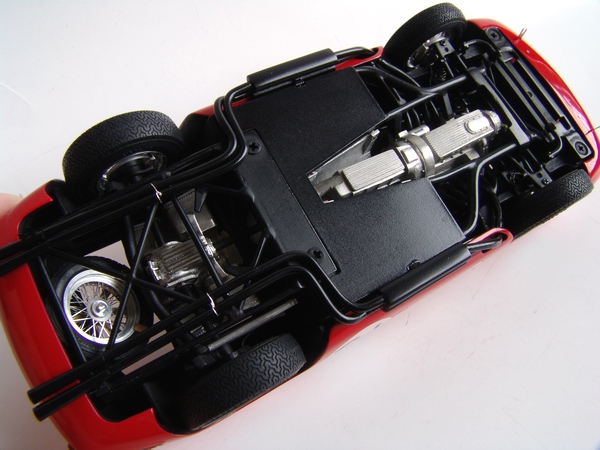
Completed chassis looks very realistic, with its complicated tubular frame, detailed engine bay, and accurate suspension. |
 |
Entire body was rubbed with 3M polishing compound, followed by Tamiya Fine compound to remove some fine scratches. |
|
Natural metal finish of unpainted parts adds tremendously to the realism of the model. Plus use of white metal parts gives it very solid feel (I think the chassis alone weights a pound). But these are about the only two advantages of white metal! |
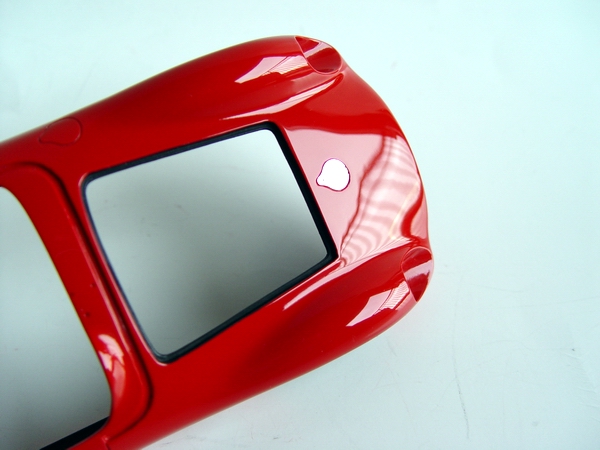 |
Finally the body was waxed with "The Treatment" model wax to restore the shine and luster of the paint. I also covered radiator access door with tiny p/e flap. |
|
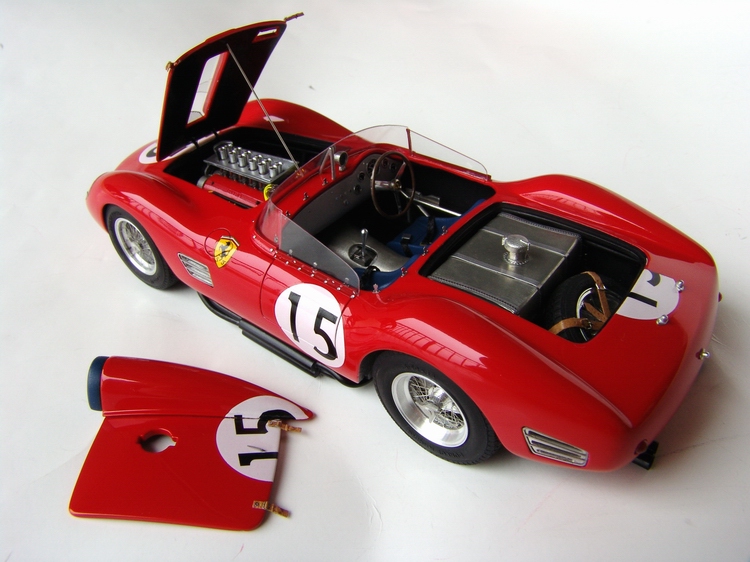
Both hood and trunk lid were way too thick. I spend some time with the motor tool and thinned the hood from the inside, then made a hinge from brass wire and soldered it to the hood. Joints were cleaned with needle files and a wire brush. |
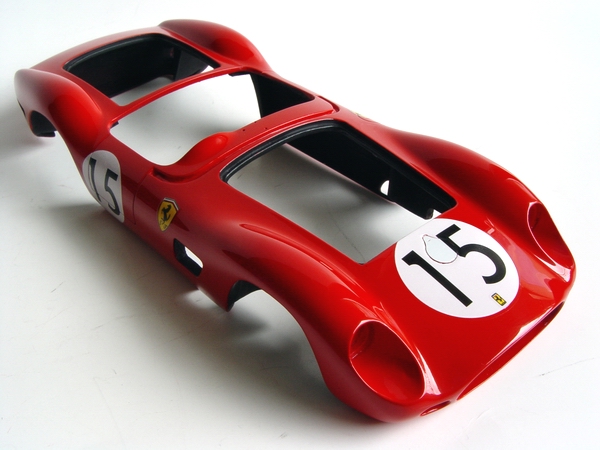 |
Then I decaled the body. Decals that were applied over panel lines were slit with the knife and softened with Microsol to conform to the panels. Panel lines were washed with Tamiya red/black acrylic mix. |
|
Hood and trunk lid had very rough top surfaces and had to be block sanded to remove all the small holes and pin marks (some are still visible around the scoop). Then I further smoothed them with fine sanding stick. |
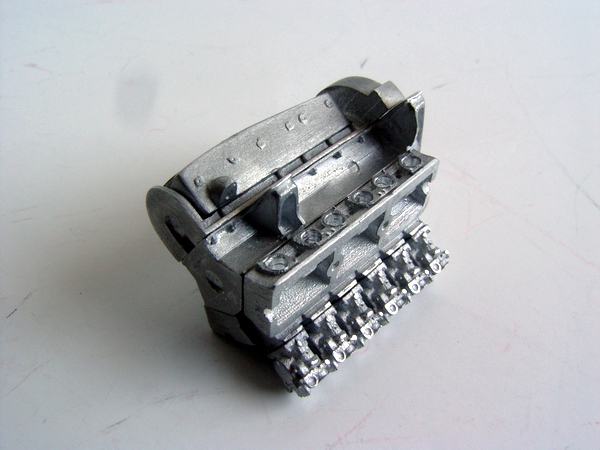 |
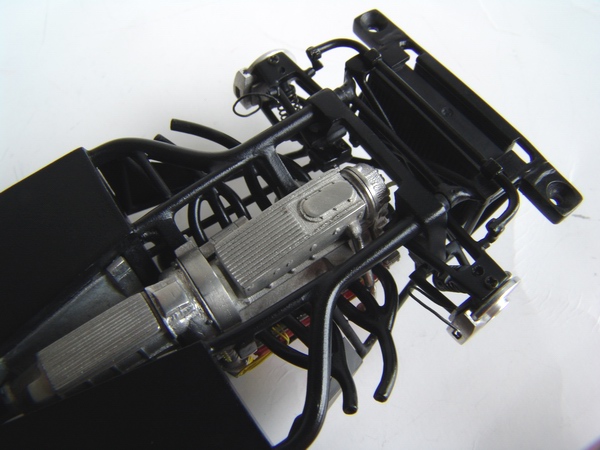
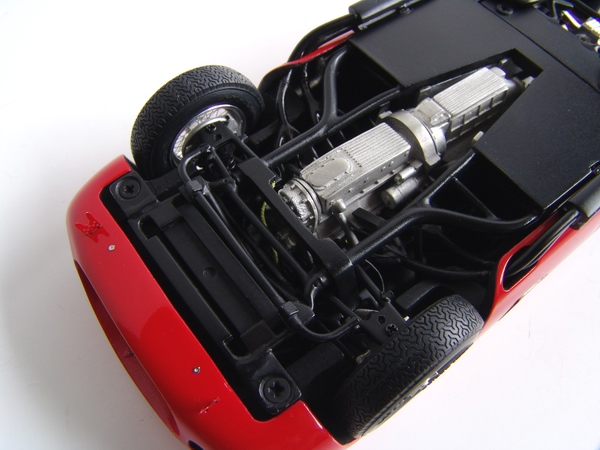
With the body almost complete, I moved to the engine. This is where nightmare started. White metal is very hard to work with, and Hiro's parts are not the cleanest! Engine block, heads, and carburetors were cleaned and put together. |

|
Both trunk and hood were primed with metal primer, then with two coats of Tamiya white primer (last coat was wet-sanded with 3000 grit) and then painted with 3 mist and 2 wet coats of Tamiya Italian Red. |
 |
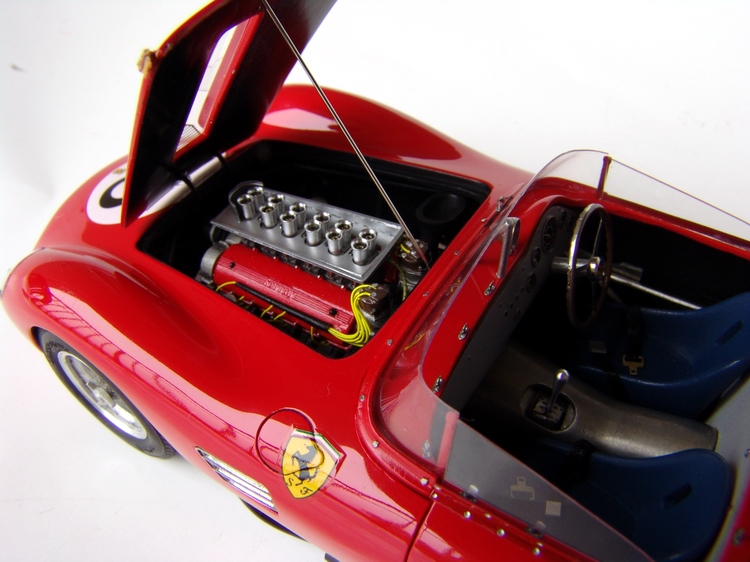
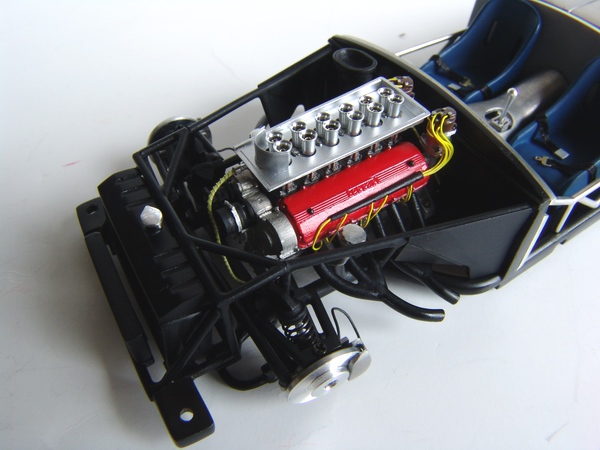
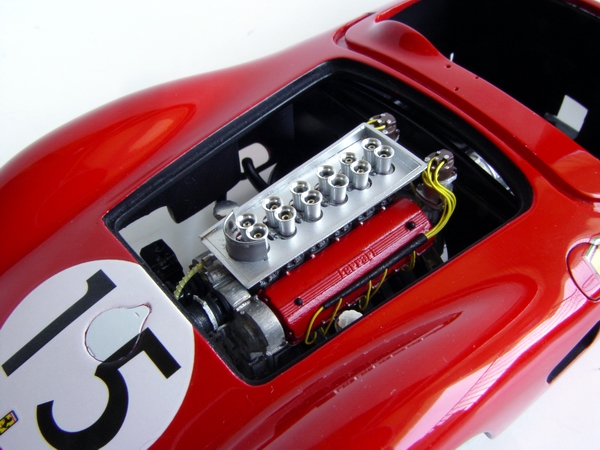
Then I added the gearbox, red cam covers with p/e scripts, and velocity stacks. Carburetor bodies were black-washed and detailed with some silver and bronze paints. Finally, I glued tiny bronze tubes inside each velocity stack. |
|
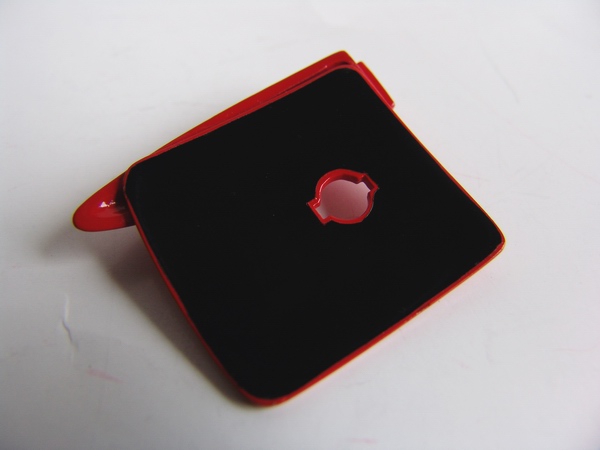
After polishing and waxing I masked both trunk lid and hood and painted the undersides with Tamiya flat black. |
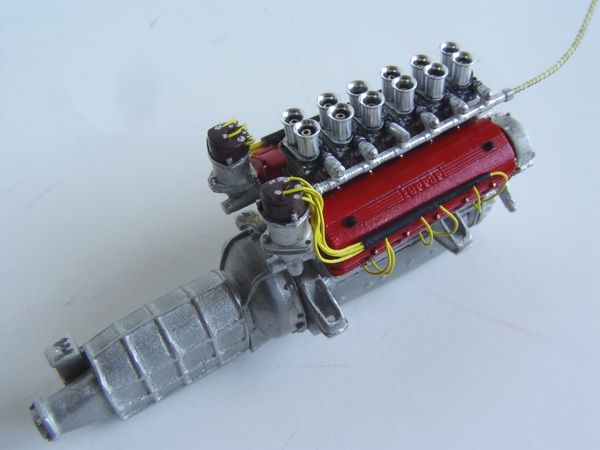 |
Distributors were drilled out, fitted with ignition wires and glued to the block. I also attached fuel fittings to the carburetors and self-made fuel lines (yellow wire wrapped in tiny steel wire) to the fittings. |

|
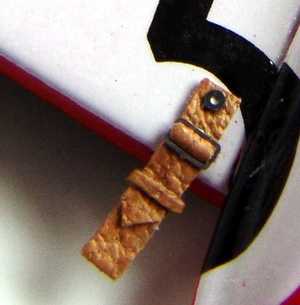
Trunk lid was decaled and fitted with headrest and two straps made from real leather and some photoetched rivets. |
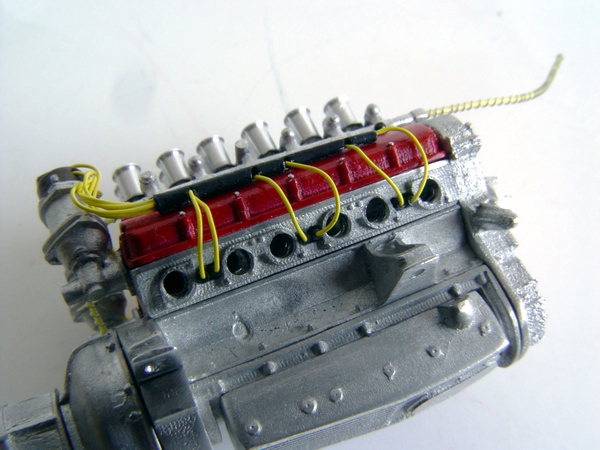 |
Plug wires were glued to the wire holders, then cams were drilled for spark plugs and exhaust headers. Finally, I glued the wires inside the plug boots (I made the boots from small black wire insulation). |
|
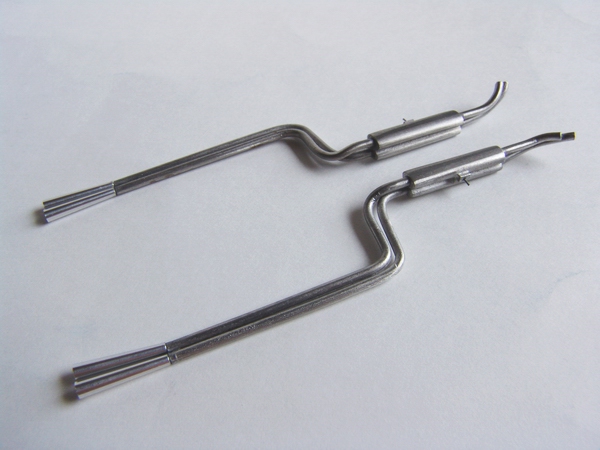
Exhausts were cleaned, and put together from 7 pieces each. I also drilled a small hole in the muffler and inserted a pin there - it will help to attach the exhausts securely to the chassis. |
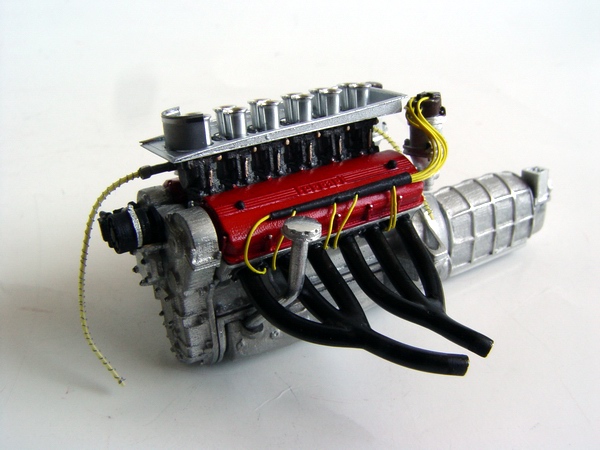 |
Then I started to detail the engine. I added p/e air scoop to the carburetors, then generator, water and fuel pumps, starter, oil tubes, and exhaust headers, previously painted in satin black. |
|
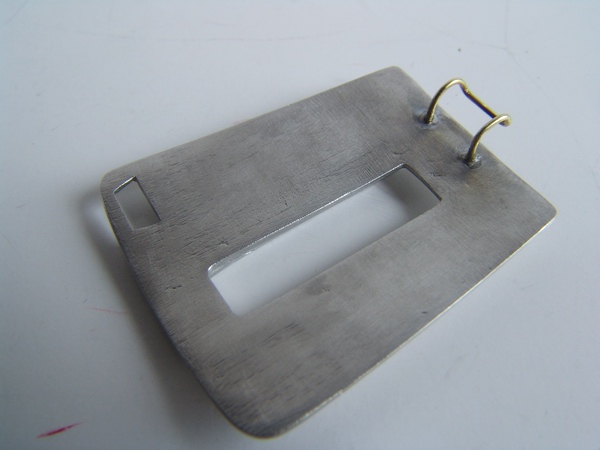
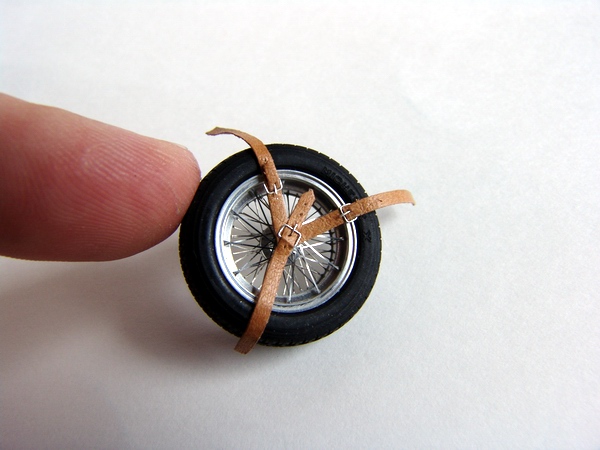
Spare wheel was fitted with three straps made from real leather and detailed with buckles made from thin steel wire. |
 |
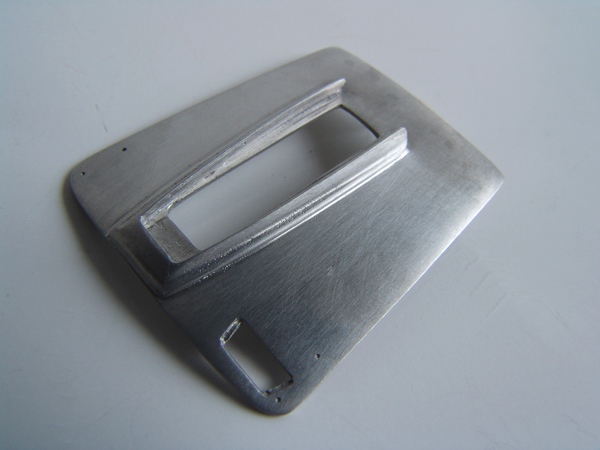
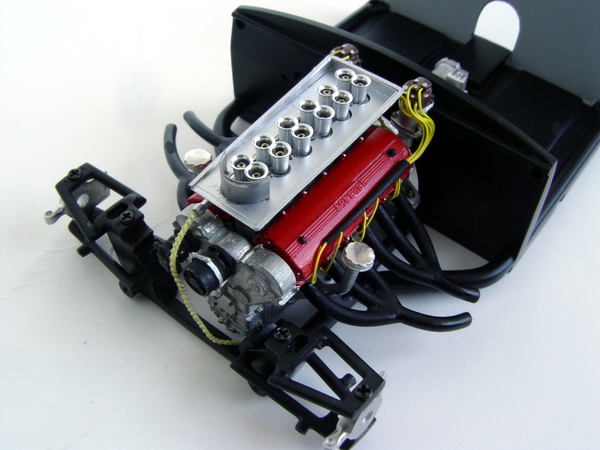
Chassis plate was cleaned and thoroughly sanded. I primed it with gray primer, and painted Tamiya semi-gloss black from the can. Engine was installed into the chassis frame, and I started working on front suspension. |

|
Turned steel headlight's and fog light's bezels were fitted with nicely molded and engraved lenses. Headlight covers were cut from vacuuformed clear sheet. P/e grille was slightly darkened with diluted black paint. |
 |
White metal parts of the front suspension were cleaned and sanded with flexi-files, then primed with metal primer and painted flat black. Entire front suspension attaches to the chassis via tiny screws, but I added some CA glue for strength. |
|
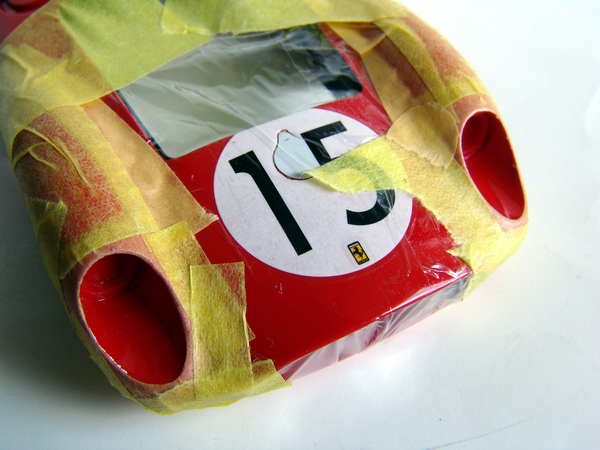
Headlights were painted silver on a real car, so I masked the front end and cut out the openings. Note that I didn't tape over the decal in the front, but used cling wrap instead. |
 |
After engine was fitted to the chassis and front suspension complete, I test fitted the body to the chassis. Fit was far from perfect, so I made few modifications to the rear bulkhead and front inner fenders and wheel wells. |
|
I airbrushed the headlight openings, installed the headlights and covers with tiny p/e tabs. Then I installed fog lights and a grille. |
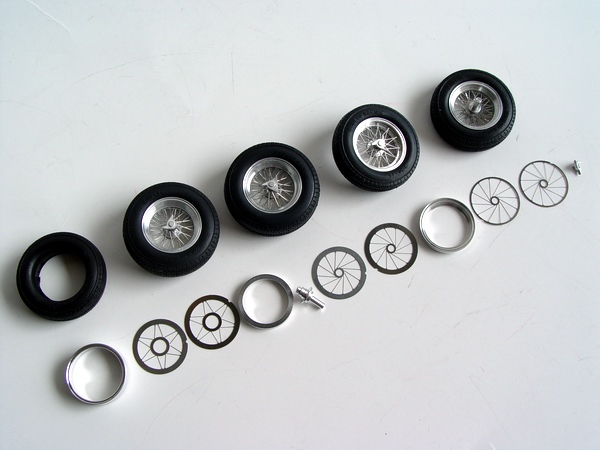 |
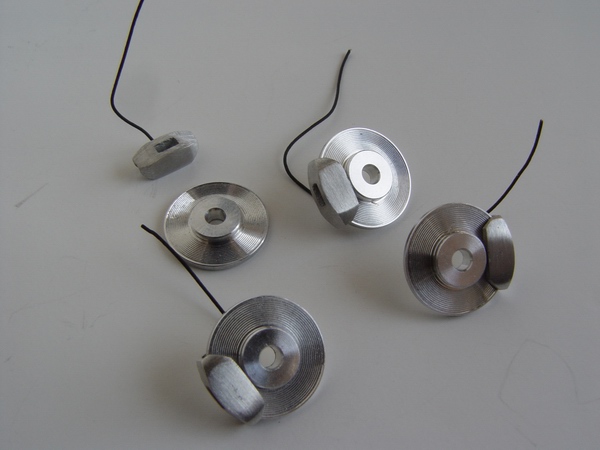
Beautiful photoetched and turned parts (12 total for each wheel) were used to make 5 very realistic Boranni wheels. Two slightly larger rears, two smaller fronts, and one spare. |
|
Wheels were glued to the chassis and entire assembly was finally screwed to the body with two metal screws in the back and two in the front. Exhausts were glued to the chassis, and I also put the spare in the trunk. |
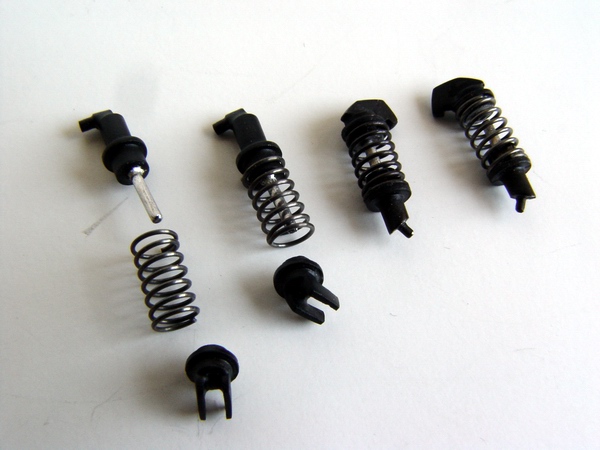 |
White metal parts for the shock absorbers were cleaned, primed and sprayed with satin black. Then I scraped the paint from the working parts and put shocks together using supplied springs. I had to cut both socks and springs to fit though. |
|
For some reason, exhausts were a little too short to reach the headers, so I had to fabricate small spacers. Finally I installed front and rear jack stands and painted the screw heads flat black. |
 |
Nicely turned aluminum brake rotors (note brake pad's grooves!) were fitted with white metal calipers and brake hoses. |
|
Chassis was touched up, and slightly weathered here and there with flat black wash, and dry-brushed over some suspension components to simulate slight wear. |
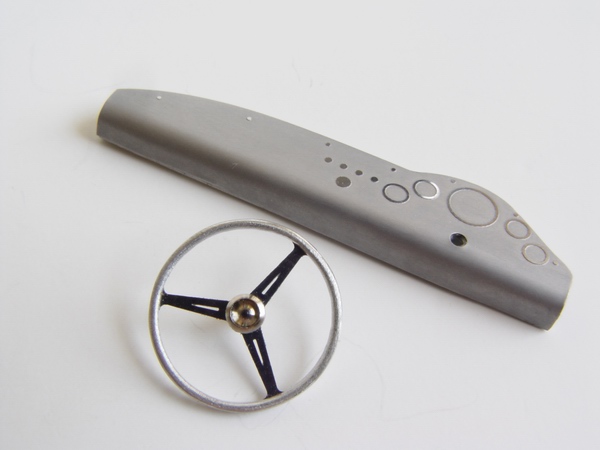 |
Then I assembled steering wheel (p/e spokes, white metal rim, and turned steel center) and dashboard (white metal piece covered with p/e part bent to shape). |
|
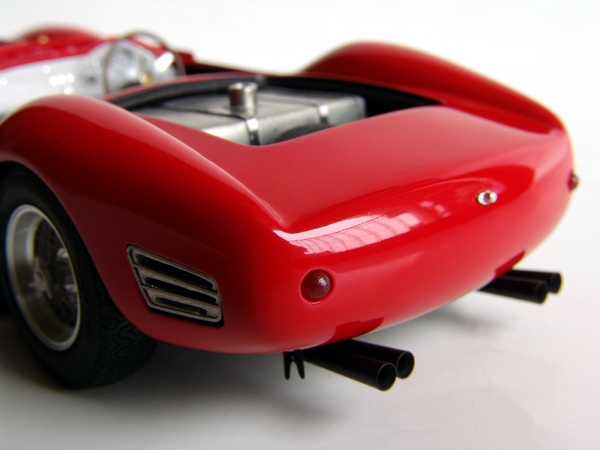
Body was fitted with font and rear side extractor slots, taillights and small license plate light. Exhaust tips were painted flat black inside and tied to the frame with thin wire. |
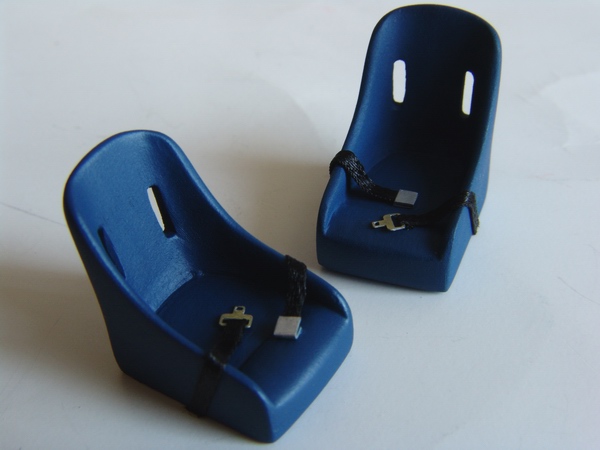 |
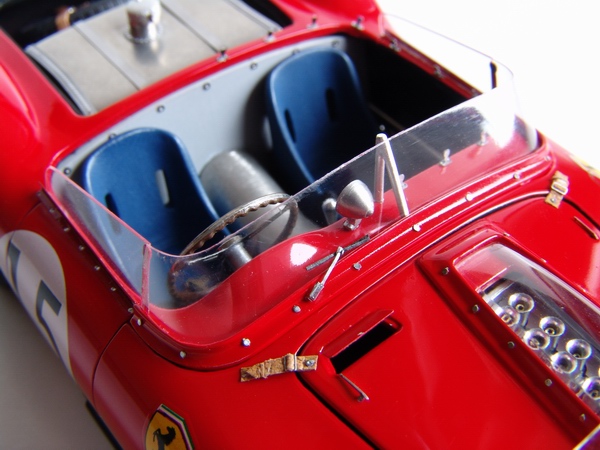
Seats were cleaned (what a headache!) primed, and sprayed with custom mix of few shades of blue acrylic paints. Lap belts were made from craft-store ribbon and Scale Kraft photoetched hardware. |

|
Windshield frame was cleaned, primed, painted and glued to the body. I also installed central post and rearview mirror with p/e face. |
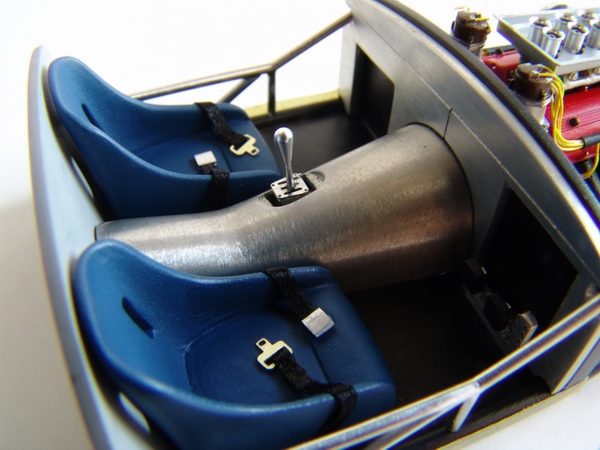 |
Interior was fitted with white metal firewall, central tunnel, and tube frames. Then I added the seats, pedal assembly with nice p/e faces, and turned steel shifter with photoetched gate and reverse speed blocker. |
|
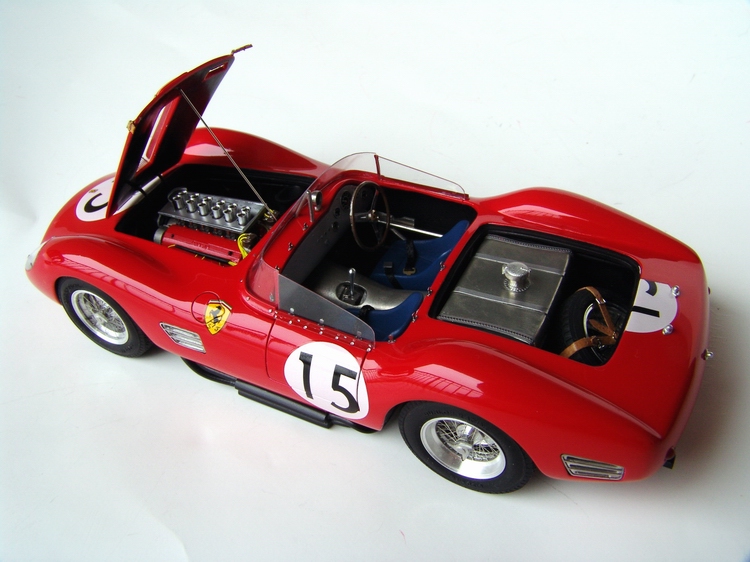
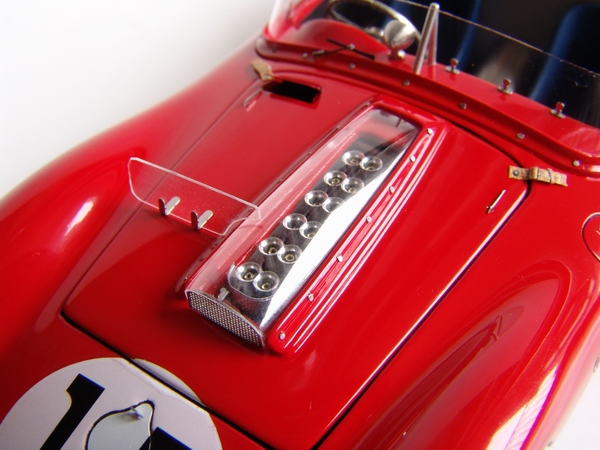
Hood was detailed with clear scoop with p/e mesh, bug deflector, flag catches, and real leather straps. |
 |
Front suspension received its brakes, fuel lines were connected to the pump and routed to the gas tank. Front part of the chassis was ready. |

|
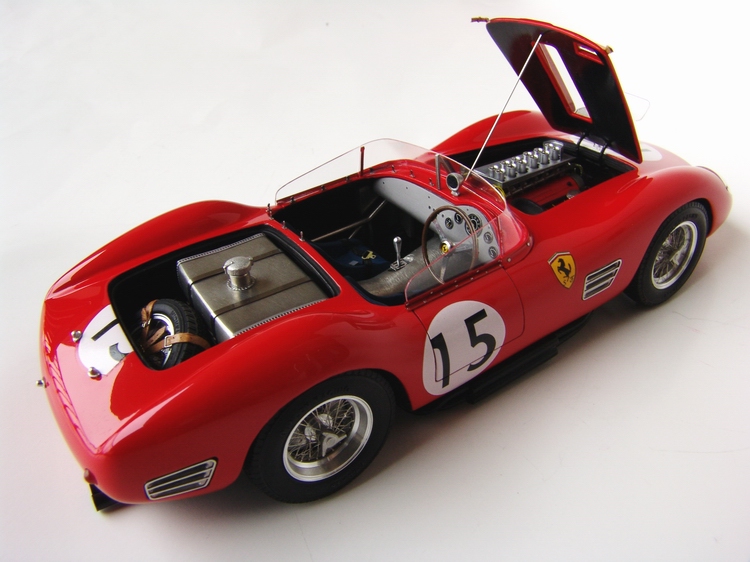
Finally I installed the windshield, and side windows with its frames. Eleven tiny photoetched rivets were glued to the body, and fitted with even smaller fasteners. These were used to hold a tonneau cover on real car. |
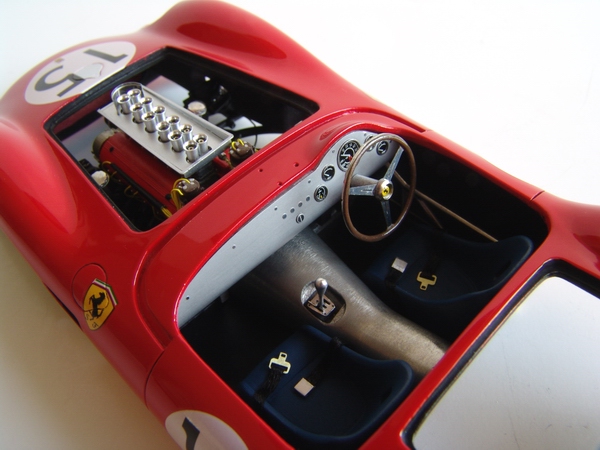 |
Dashboard was detailed with instrument decals, p/e rings (around the clocks), and other small p/e details. Steering wheel was painted brown, detailed with BMF (aluminum rim) and topped off with Cavallino on the horn button. |
|
Windshield frame and hood scoop were detailed with some p/e rivets, and I also installed the wiper with tiny rubber strip, and a polished gas cap. The model was cleaned, waxed, and sealed in a display case. |
Copyright 2004 Alex Kustov. No copying or reproduction in any shape or form without written permission of the author.