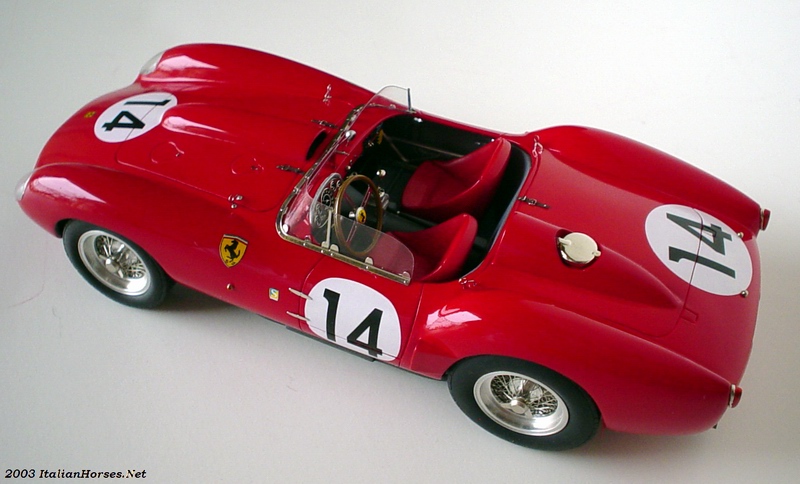
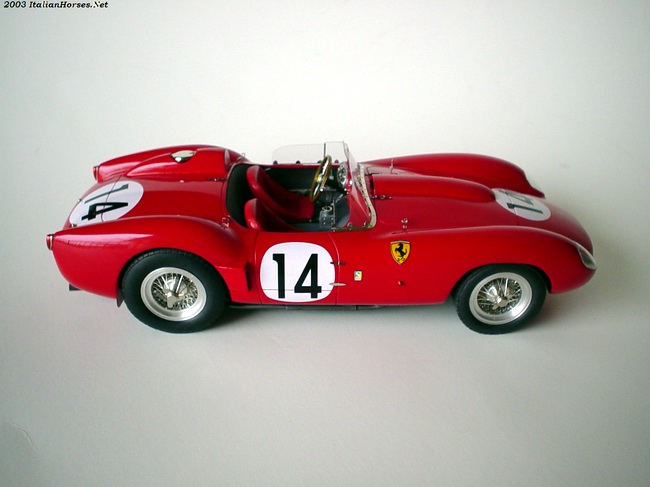
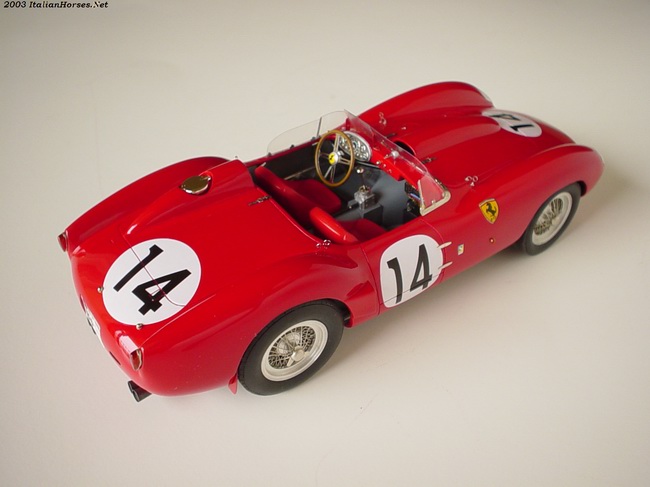
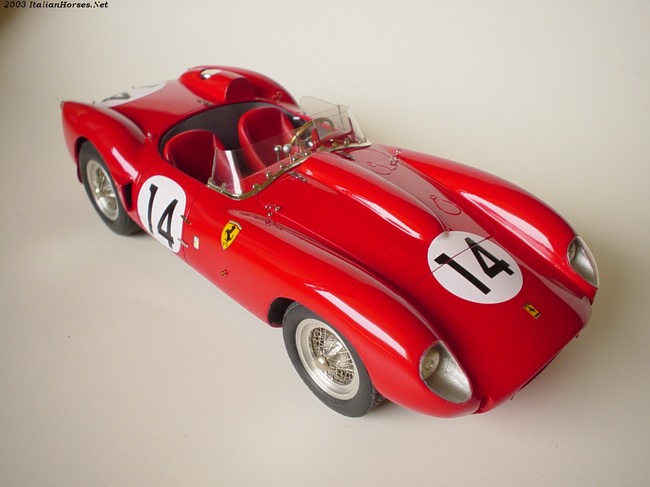
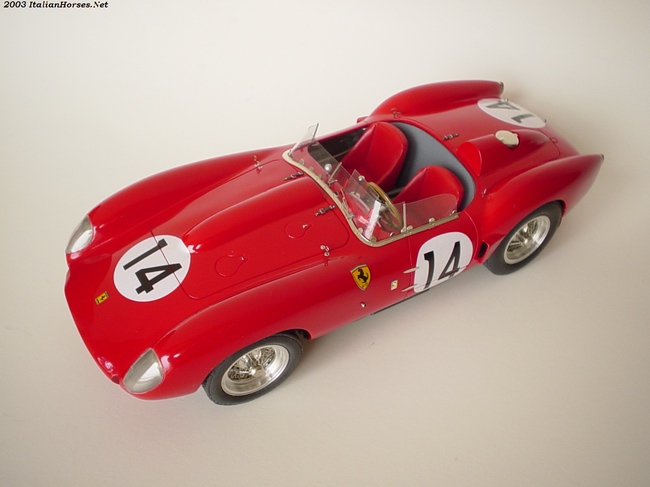
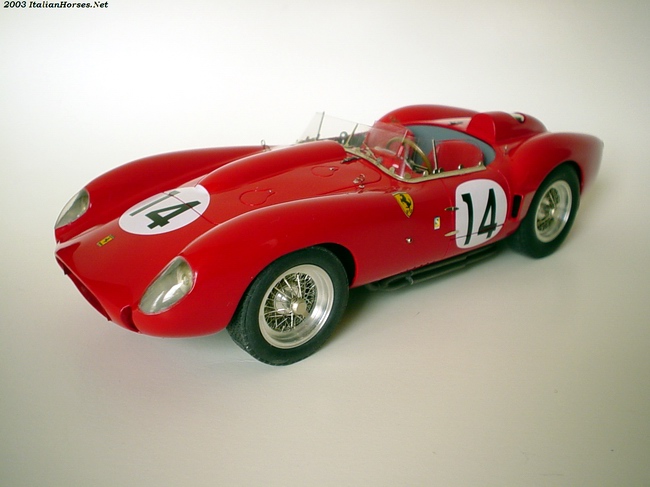
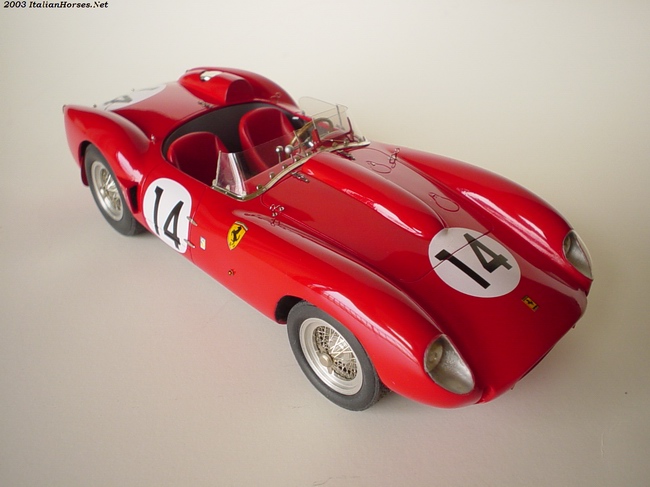
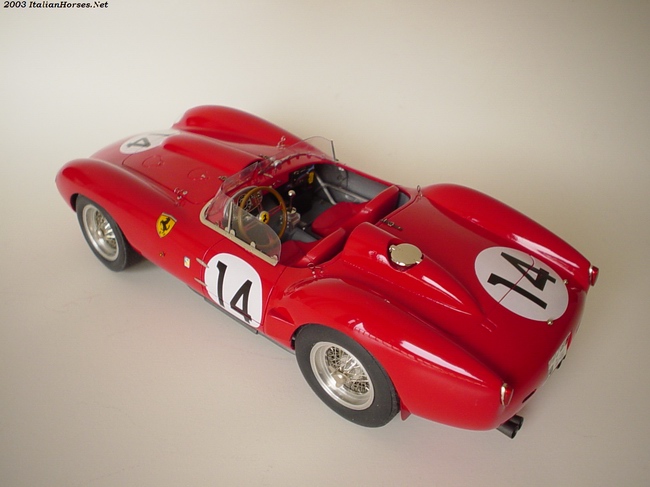
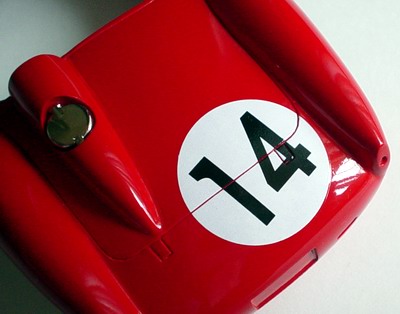
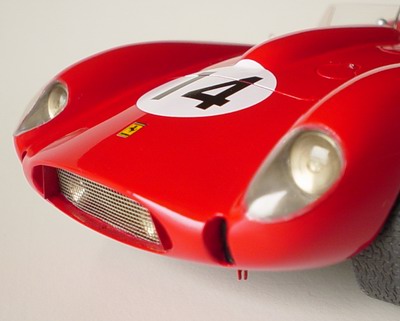
F e r r a r i 250 TR58. Le Mans 24h 1958: Hill/Gendebien, Finished 1st.
 |
 |
 |
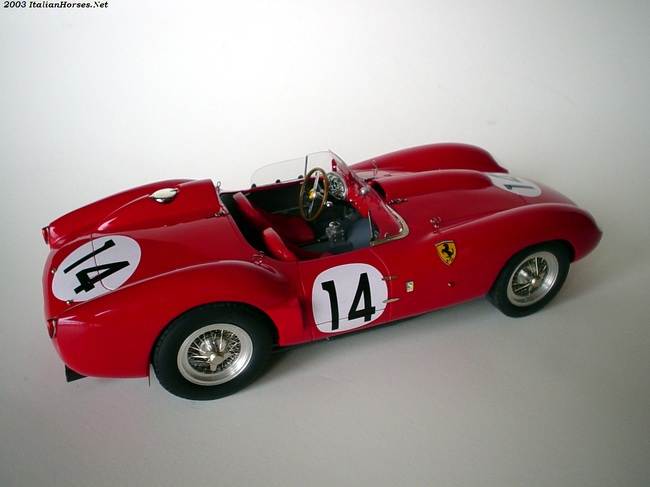 |
Kit: Renaissance 1/24 Ferrari 250 TR58 LeMans Winner #14 Kit #24-3
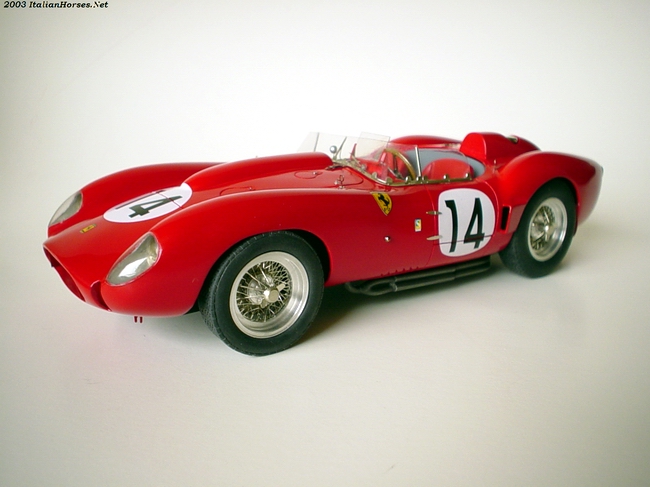
Pros: Very accurate body shape and crisp moldings, which is very important for
a resin kit. Excellent photoetched parts, many white metal and turned metal
parts. Very thin and accurate vacuum formed glass and headlight covers.
Beautiful PE wire wheels with real rubber tires. Real leather for tonneau
cover. Very accurate and thin decals. Good overall parts fit. Curbside, but that is expected from a resin kit. Instructions are somewhat vague, written in French version of English, but understandable. Incorrect color guide. Body panels are irregular, and require quite a bit of block sanding prior to priming and painting to look good. Parts fit is not bad, but requires some tweaking, but this is also expected.
Overall, this is a wonderful kit! The model look very true to the original, and the level of detail is amazing! It is not a kit for beginner, but experienced modeler will find it relatively easy to work with and results could be spectacular. One of the better curbside kits in 1/24 scale of this car. Highly recommended for seasoned modelers interested in Ferraris and LeMans history. |
 |
 |
 |
 |
|
 |
 |
 |
 |
|
 |
 |
 |
 |
Buildup
This buildup was also published in Scale Auto, February 2006 Volume 27, Number 5, 1958 Ferrari 250 Testa Rossa
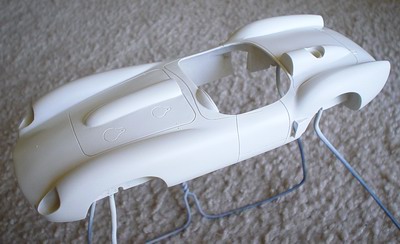 |
This is the body after all the preparation work and several coats of primer, ready for paint. It took me quite some time to sand it smooth and drill and fill all the bubbles. The quality of resin casting is pretty good, but still required some work. Many areas must be block-sanded to make them really flat. |
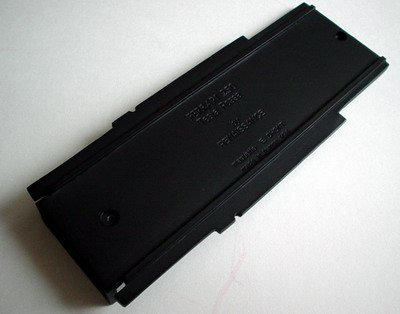 |
This is the chassis plate after second coat of flat black. This time it looked perfect. Now it was the time to assemble the exhausts. |
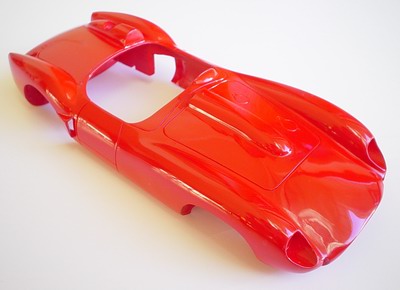 |
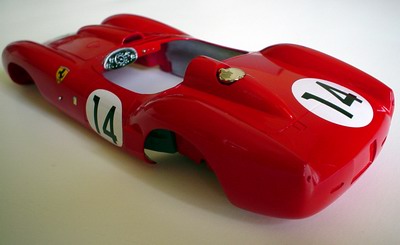
After three mist coats and 2 wet coats of Tamiya TS-8 Italian Red, I waited 5 days and polished the body with 3M Fine Polishing Compound and waxed it with The Treatment's Last Detail model wax. The polishing smoothed out some irregularities in the paint and it became like glass! |
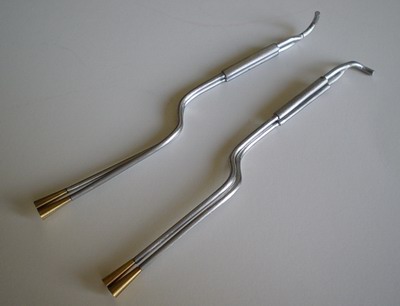 |
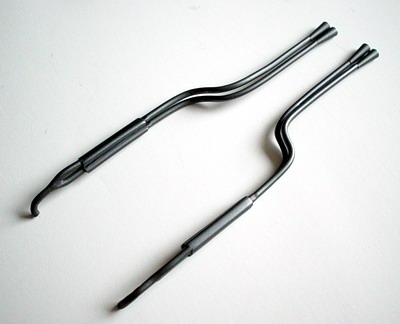
Exhaust were assembled from three white metal parts (one dual pipe and two mufflers) and two turned brass tips. I slightly drilled out the tips. The assemblies were lightly sanded and then cleaned with toothpaste. Toothpaste does not react with white metal and cleans it very well. |
 |
Finally, body was rubbed with some Tamiya Modeling wax to give it that amazing shine! |
 |
Then complete exhausts were airbrushed with Testors Titanium metalizer, buffed, sealed, and cleared with flat clear coat. Then I applied some Detailer black wash over them. |
 |
Then I installed the dashboard instruments (its a photo etched part with the decal underneath), plated white metal gas cap, turned metal blinkers, and decals. Decals were applied with MicroSol, and responded to it very well. Decals are very thin and opaque. |
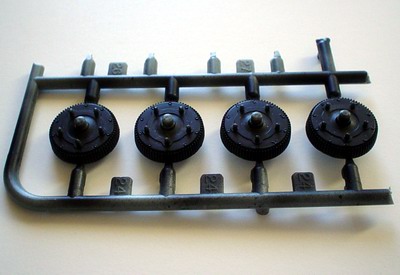 |
1958 Testarossa had drum brakes all around, but Renaissance kit has no brake detail. To correct this, I used drums from Fujimi Enthusiast series Porsche kit. I got these from someone and they were already painted black. |
 |
Headlight fairings were painted silver, and headlights installed. The headlights are made from combination of turned metal bezel and clear glue, and look very realistic. |
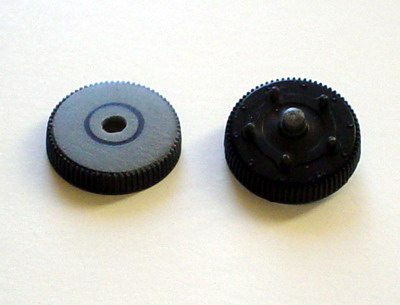 |
I inspected several pictures of Ferrari drums of that period, and made some corrections. I sanded the brakes smooth and drilled the hole for the axle. |
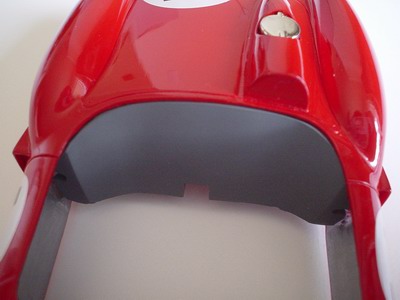 |
Rear bulkhead was cleaned, sanded smooth and painted Tamiya German Gray and installed into the body. Some of the references call for the aluminum color for the bulkhead, and it is right for some TR's, but # 14 was painted gray to minimize sun reflections during the race. |
 |
After all four drums were ready, I sprayed them with Testors burnt metal metalizer, sealed them and applied a black-aluminum wash to the sides. They are almost exact copies of the TR's drums. |
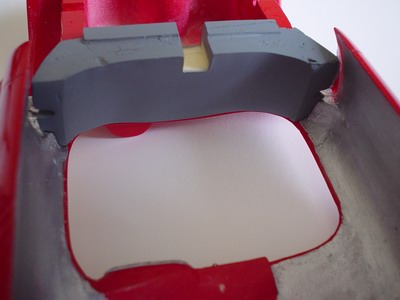 |
The inner body was painted silver to simulate the aluminum bodywork. I just brush painted it with some Testors aluminum metalizer using wide brush. Also on this picture you can clearly see how bulkhead attached to the body. |
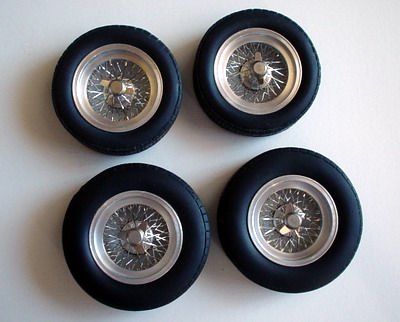 |
The beautiful wire wheels were inserted into very rubber-like, no-name tires. The tires had some flash on them, but it was easily cleaned with fine sandpaper. The threads were sanded with more coarse paper for used appearance. The walls were wiped with the cotton cloth moistened with rubbing alcohol to remove the shine. |
 |
After decals dried completely, I slit them along the panel lines with new #11 hobby knife blade, and applied some setting solution to the edges. |
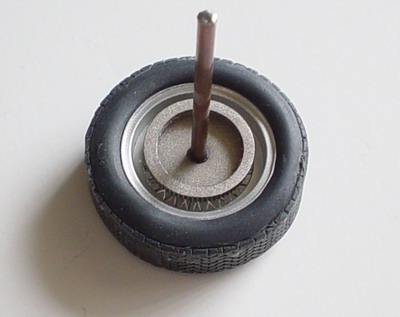 |
Then I attached the axles and glued the drum brakes to the wheel centers. Before gluing drums to the wheels. make sure they are not touching the chassis plate when wheel assemblies are installed. |
 |
While decals were drying, I used hairdryer to help them conform to the panel lines. The result is very realistically split decals! |
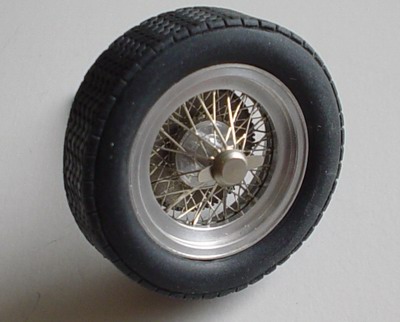 |
This is how the drums look from the outside. This small addition enhances the appearance of the entire model tremendously! The wheels looks so much better! |
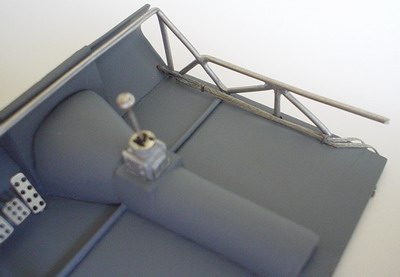 |
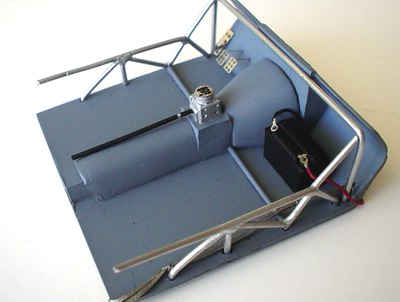
Now lets move to the interior. It was cleaned and painted gray like the rear bulkhead. Then I installed tree white metal parts that simulate the tube interior frame. I also added some Detail Master braided lines to imitate oil lines, and tied them together with some fine wire. |
 |
After finishing with the chassis, I returned to the body. I installed tiny number lights and taillights. Locating pins for the taillights were not correct, so make sure you test-fit them before drilling the holes and gluing the lights |
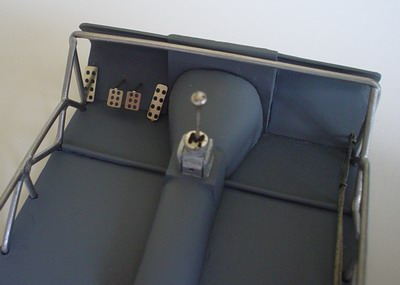 |
Photo etched pedals and foot rest were installed and shifter gate was painted aluminum. Shifter was glued to the gate and the gate was topped off with nice PE part. |
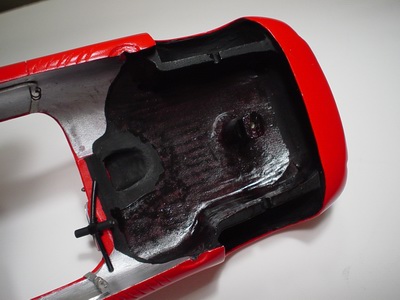 |
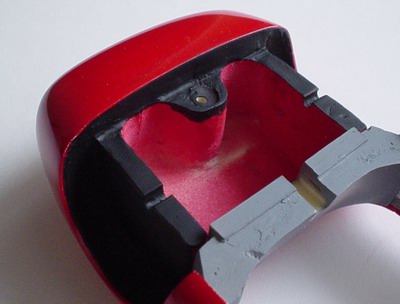
I used satin black marker to paint the inside of the body black (I would suggest using flat black, but I was out of paint!) before inserting the interior and attaching the chassis. |
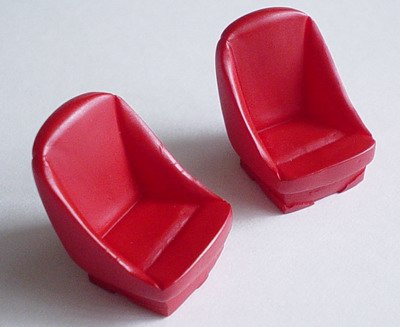 |
Both seats were cleaned, but I tried to preserve the wavy surface to simulate the leather pattern. Then I painted seats with custom mixture of gloss and flat Tamiya acrylics and weathered them with dark cherry wash. The result was a pair of very leather-looking seats! |
 |
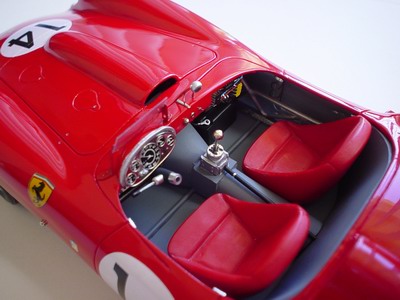
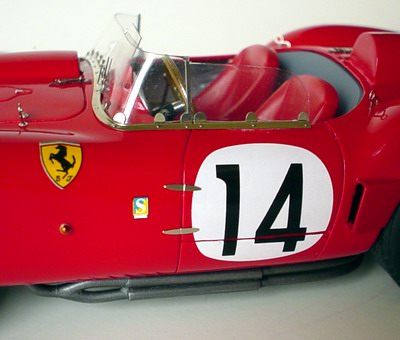
When the interior was securely attached to the chassis plate, I glued in the seats. I also drilled all the required holes in the body and installed the glass support, rearview mirror, ignition lock and several indicators on the dashboard. Then I attached a bug/wind deflector above the instrument cluster. |
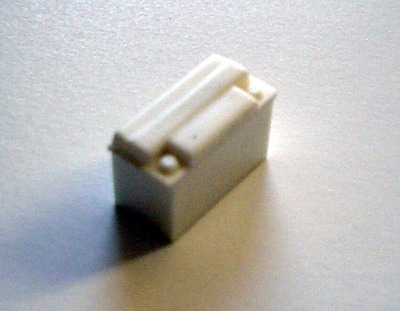 |
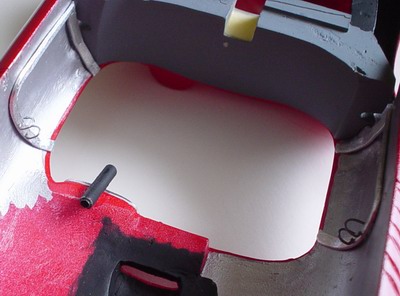
The real car had a battery installed in the passenger foot well. Renaissance kit is missing this part completely, so I used a battery from my spares box (I believe its a battery from Fujimi Enthusiast series BMW 635 CSi kit). |
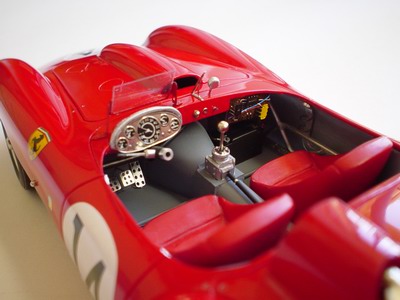 |
This is the view of the interior from the other side. You can see the ignition lock and indicators on the dash, and also a scratchbuilt blinker arm. |
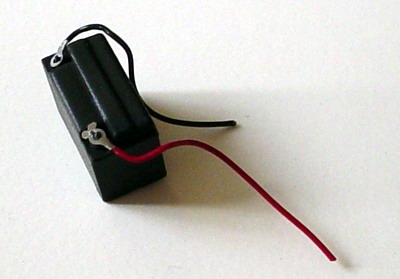 |
The battery was slightly re-shaped and painted black, then wired with Detail master photo etched clamps and battery cables. I didn't use any decal for the battery since real battery probably was just black. |
 |
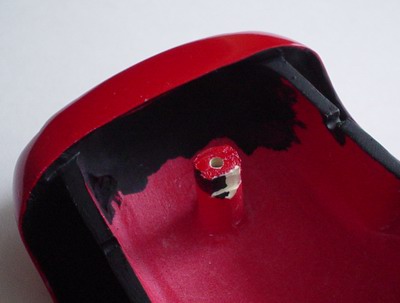
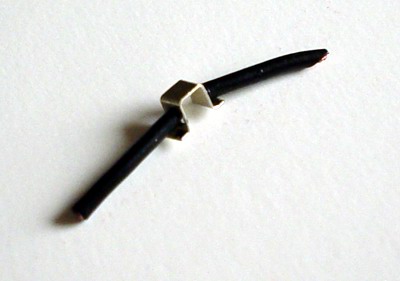
Here is the better view of that blinker arm. I used small diameter tubing, and made a round indent on one side with a round file. The other side was sanded smooth. I glued in a piece of wire, partly stripped of its insulation to represent the arm. The rest of the sheath was used to simulate the handle! Completed blinker arm was glued to the steering column. |
 |
The battery was glued to the interior and the positive cable was routed to the engine bay though the hole drilled in the firewall. The negative was just glued to the other side of the interior. Shifter link was also installed at this time. |
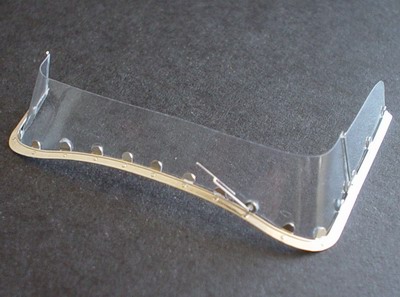 |
I cut out the vacuum formed windshield using the template, and glued it to the photo etched frame. In my opinion, this was the hardest part of the whole building process. The only glue you can use to glue a metal frame to the clear plastic is CA, and minor mistake could lead to messing up entire window. Wiper was also attached to the frame. |
 |
Rear wheel wells were painted flat black. I didn't paint the entire body shell black inside, since the only visible area will be the wheel wells. |
 |
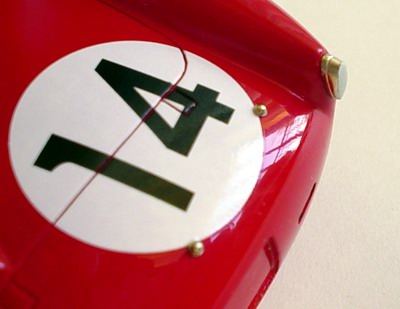
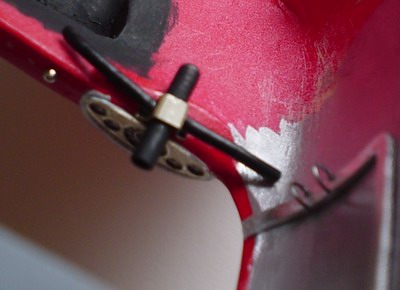
The windshield was shaped to conform to the body and glued to its place. Two tiny photo etched washers (each side) were glued to the place where hood fastener would go. I also drilled small holes for the fasteners. |
 |
The same was done to the front wheel wells. The chassis plate attaches to the body by screws, but one of the stands was too thick and I had to carve a groove to allow front axle to go though it. Kit supplied axles are too thin and must be changed to thicker rods. |
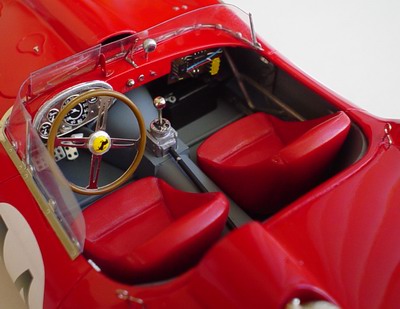 |
This is the view of the completed interior, with everything installed. I did not glue the steering wheel, so it freely spins in the tube. Everything looks amazingly life-like. With some minor additions, Renaissance kit interior could be built into a very realistic representation of the real thing. |
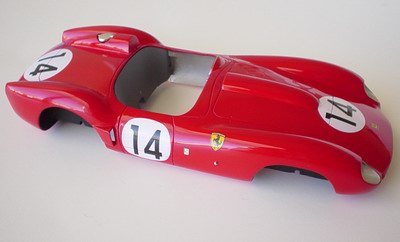 |
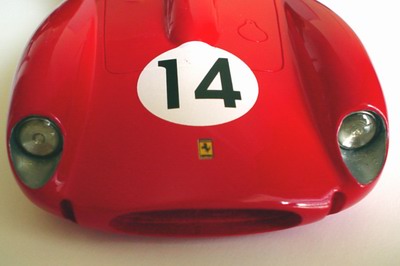
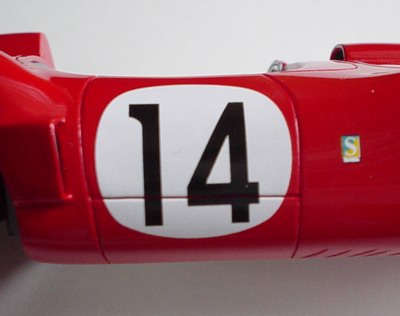
This is how the body looks with all the wheel wells painted flat black, and all the decals applied. Now, let's do some detailing! Renaissance made an amazing kit, but it still is missing some details I wish they included. |
 |
After installation of the windscreen, I assembled and glued hood belts, hood catches, and some other minor details. Belts and catches were also added to the trunk. |
 |
I had no choice but to scratchbuild them! I used small diameter aluminum tube to make inner door frames. I bent the tube then flattened it. The internal hinges were made from thin wire and superglued to the frames. The frames then were bent to conform to the body from inside |
 |
Side turn signals were painted Tamiya clear orange. I also attached door hinges at this time. I used CA glue to attach hinges, and one of them is not perfectly straight, but there is no way to fix it. |
 |
I polished the frames with fine grit polishing wheel clamped to my Dremel, and superglued them inside the body. Then I moved to the steering column. I cut a short piece of small diameter aluminum tubing, painted it flat black, and glued it to the dashboard. |
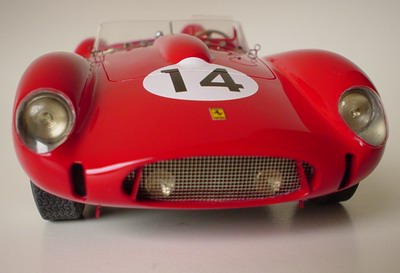 |
At this stage I installed running lights, and radiator grille. This part is very tricky, cause grille seems slightly larger than the opening, but when you twist is slightly - it snaps in place. After the grille was installed, I added brake cooling ducts to the radiator opening. |
 |
Then I made a clip from the PE frame similar to the one on the reference pictures, and glued two pieces of the frame tubing (that hold the steering column attached to the dash) to that clip. |
 |
Clear headlight covers were cut out of vacuum formed plastic, and glued with Elmer's white glue. When the glue dried, I wiped the excess with a q-tip moistened in rubbing alcohol. Make sure to test-fit the cover before gluing them in place. |
 |
Then I glued the clip to the tubing underneath the dashboard. The black frame tubing is actually a thick wire, so it was bent to the correct shape after the clip was glued in place. The clip was later painted flat black. |
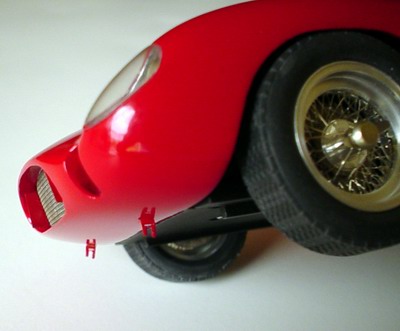 |
The final touch in the front is two housings for the jack, They are painted photo etched parts, and attach directly to the body. Also on this pictures you can see how brake drums sit inside the wheels. |
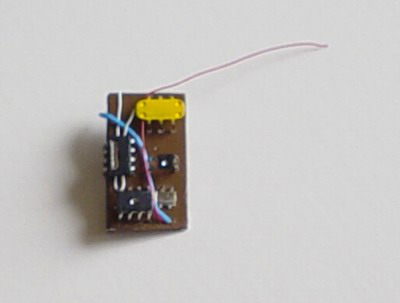 |
This is the completed circuit board. It was built from six photo etched parts and several wires. The hardest part was to bend all the small resistors and relays and glue them to the main board. |
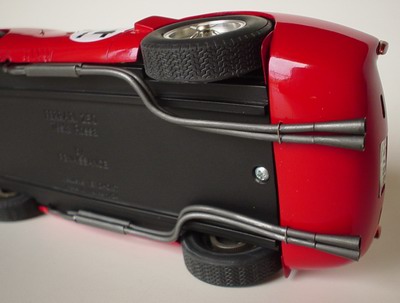 |
Exhaust pipes were attached to the body with a piece of thin wire wrapped around them. Then pipes were shaped to conform to the chassis. |
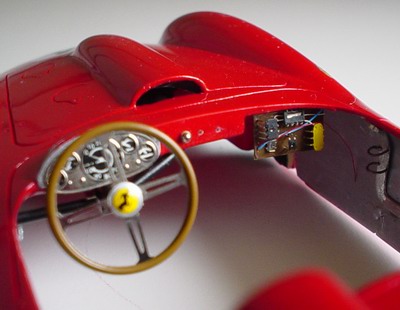 |
I glued the circuit board to the body and added a four-piece steering wheel. The rim halves were painted with the mixture of Tamiya acrylic paints and topped off with Cavallino Rampante decal. The only thing that was missing from the steering column now is the blinker arm. |
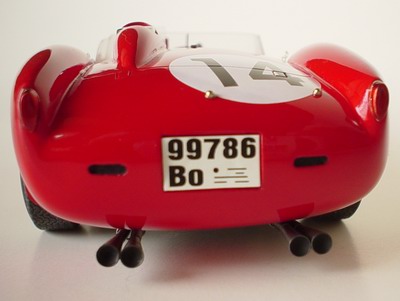 |
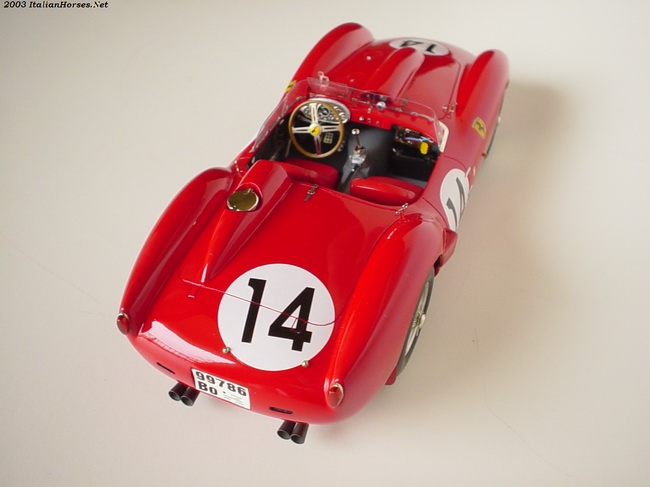
Then I painted the taillights with Tamiya Clear Red, cooling vents with black, and exhaust tips flat black inside. License plate was cut out of the decal sheet and glued using Elmer's white glue. It looks more realistic on the paper backing than applied like a usual decal. |
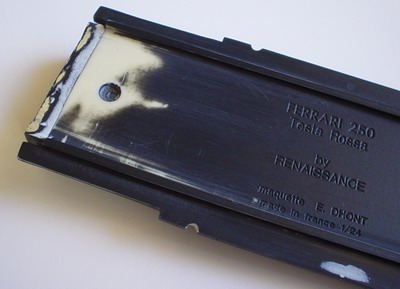 |
The chassis plate was painted flat black, but when I glued the radiator, it was not sitting flush with the chassis. Black also revealed some imperfections in the chassis plate surface, so it was filled and sanded again. |
 |
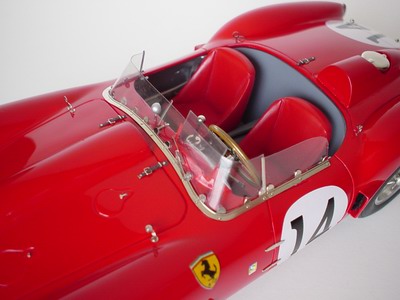
Finally, rear mudguards were painted red and glued to the rear wheel arches. The model was cleaned and lightly waxed. Then I thoroughly dusted it, took some pictures, and sealed it in display case. Done. |
Copyright 2002 Alex Kustov. No copying or reproduction in any shape or form without written permission of the author.