F e r r a r i Enzo
 |
 |
 |
|
Kit: Tamiya 1/24 Ferrari Enzo, kit #24260 Pros: Incredible number of detail that allow to create an ultimate replica of the Ferrari's newest supercar - Enzo. Highly detailed body, with opening doors and engine lid allows to view engine and interior after assembly. Excellent parts fit (almost perfect), good chrome plating, very nice tires, great looking metal transfers, traditional window masks, mesh, great and thin decals (compatible with Microsol), easy to follow instruction sheet. Cons: Incomplete painting instructions, full painting guide given only for the red color. No word about what parts are made from carbon fiber, so you need a lot of reference pictures to figure out where to apply C/F decals. Most parts are molded in color, which is good for beginners, but creates unnecessary priming work for people who want more professional results. Verdict: This is one amazing kit. Tamiya blows the doors with this one! Its quite complicated, and I would not recommend it for beginners, but experienced modelers will enjoy it immensely. Quality of Tamiya moldings and engineering is outstanding, and in my opinion, this is one of the best plastic kits issued over the last 10 years, beating even Tamiya's excellent F360 Modena kit. If you looking to buy this one - it will not disappoint. It also should be mentioned that the following model is built from the above kit with addition of Acu-STion Ferrari Enzo Full transkit and some scratchbuilt details. |
 |
 |
 |
|
|
 |
 |
 |
|
Buildup
This buildup was also published in Model Cars May-June 2004, #95, Building the Supercar
This buildup was also published in Model Cars June-July 2004, #96, Finishing the Enzo
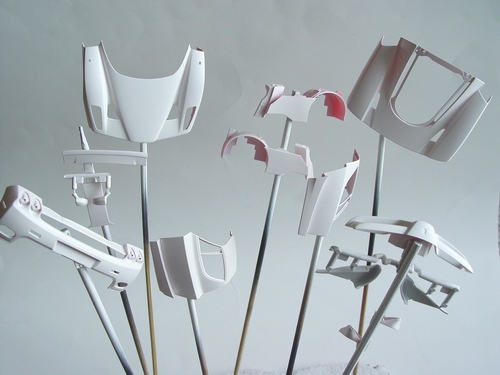 |
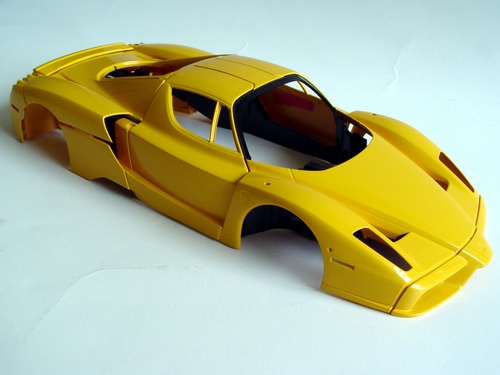
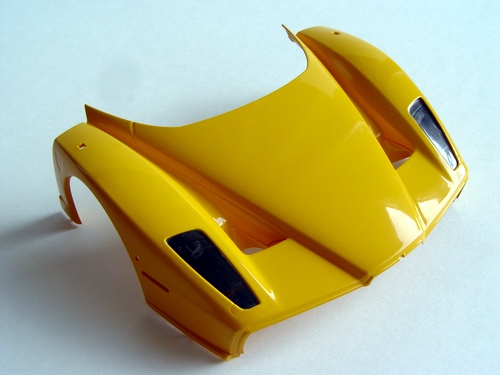
As usual, I started with the body panels. Tamiya divided car's body into several separate panels, and in my opinion, it is much easier to paint smaller parts than entire body. The problem is that its much harder to align the panels right during assembly! I cleaned the parts, and sprayed two thin coats of grey, and then white Tamiya primers. |
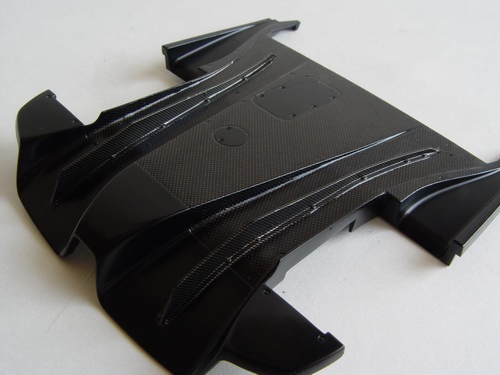 |
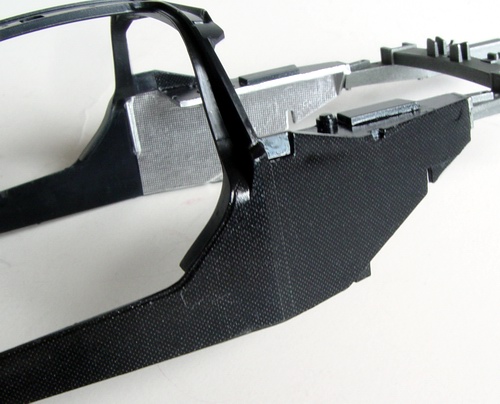
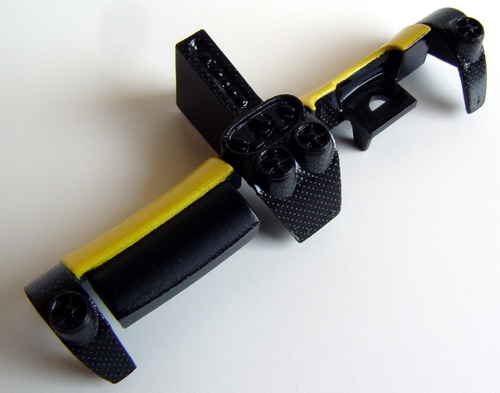
This chassis part took me about a day to decal. The reason is its complicated shape, and two different types of the C/F decals used. I used plain-weave 1/24 SMS C/F decals for the majority of the work, and Renaissance 1/24 twill-weave decals for the fins. That is the way it is done on the real car according to the reference photos I have. |
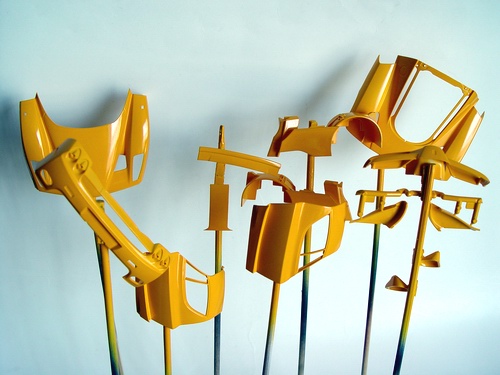 |
Then all the parts were sprayed with Tamiya Camel Yellow as an undercoat, and then 2 mist and 2 wet coats of Tamiya Chrome Yellow. I allowed paint to dry thoroughly between layers, and after about a week, it was ready for polishing and waxing. |
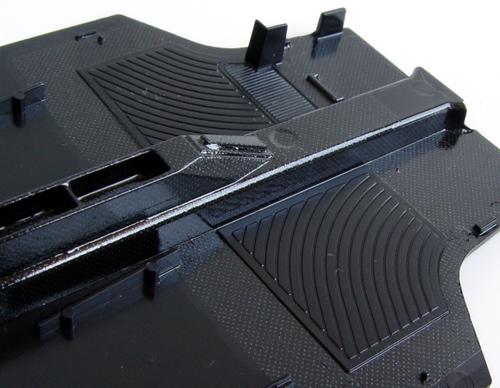 |
Chassis plate was also decaled with C/F on the interior side, but I didn't decal the whole thing - only the areas that will be visible after assembly (the rest will be covered by seats, foot wells, etc.) The most complicated part was decaling the central tunnel. |
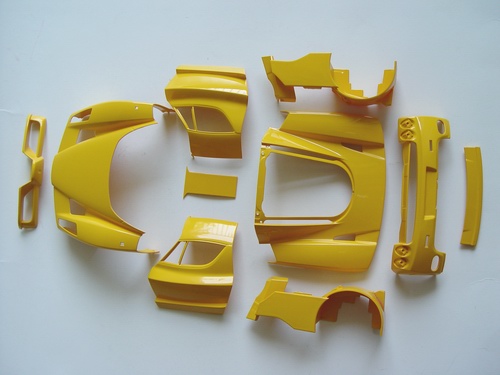 |
On this picture you can see all the panels polished with Tamiya polishing compound and then waxed with Last Detail "The Treatment" model wax. Polishing was pretty much straightforward, although I used up two dozen q-tips to polish all the curves! |
 |
Seats were primed with gray primer, and then sprayed Tamiya German Grey. Then I made templates using 40mm Tamiya masking tape, and covered seat back with C/F decals. |
 |
After polishing, I test fitted all the panels to the monocoque. Preliminary fit was pretty good, and I continued with the assembly. |
 |
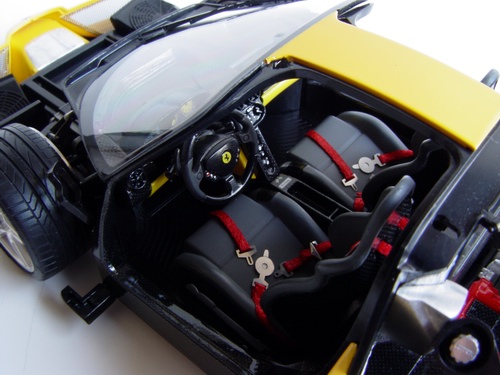
5-point racing seat harnesses were made using photoetched hardware from Acu-STion set and red 1/16 inch ribbon from craft store (I bought mine in Hobby Lobby). |
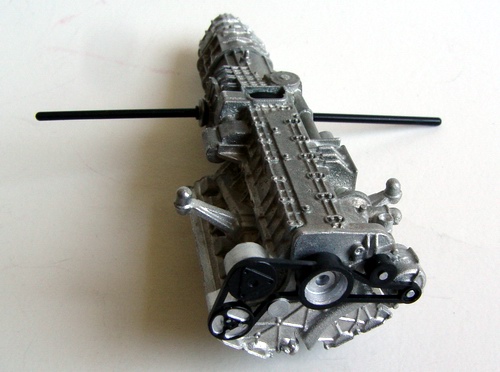 |
I decide to use white metal cast block from the Acu-STion detail set. It is a little bit cruder than Tamiya plastic parts, but has a wonderful metal sheen when polished, its much heavier than plastic, and gives the model a solid feel. The rest of the parts are from the kit. |
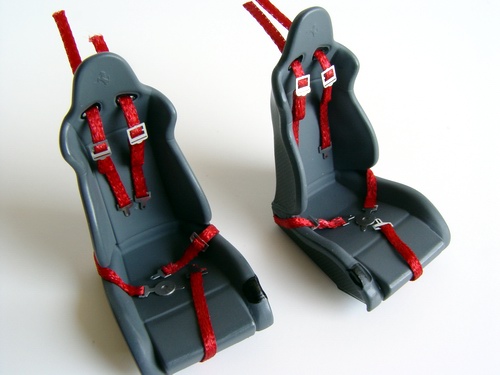 |
Harnesses were fitted to the seats. Red belts look great against grey, and instantly turn Enzo into a racer! |
 |
I decided to use manifolds supplied in the Tamiya kit, since they look much more accurate. Acu-STion parts look bad, I still don't know why they decided to cast them and the muffler in white metal. Complete waste. Manifolds were painted with Alclad II Chrome, and then wrapped in foil and detailed with different washes and heat-stained with transparent Tamiya acrylics. |
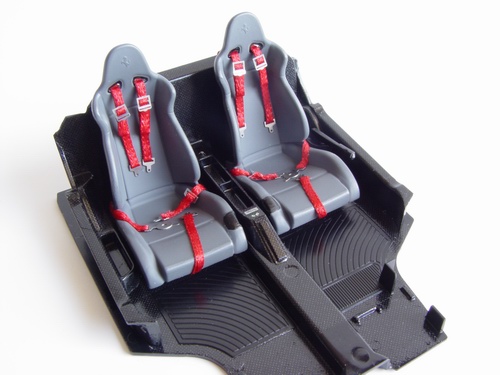 |
Rear bulkhead was attached to the chassis plate, and seats glued to it as well as hand brake lever. Notice that seat and the bulkhead covers all the areas not decaled with C/F. |
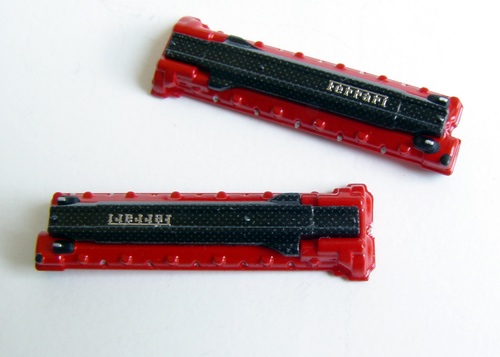 |
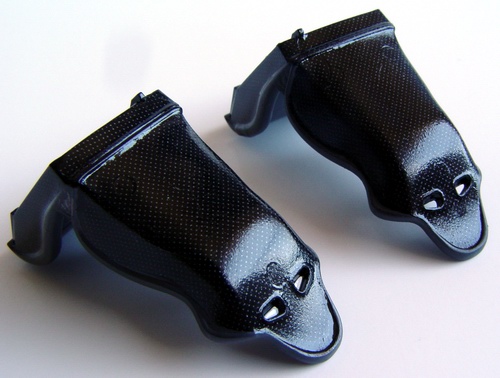
Cam covers were painted Italian Red, fitted with covers detailed with ScaleMotorSport 1/24 plain-weave C/F decals and topped off with Acu-STion PE scripts. I also picked out small details and nut heads with silver paint. |
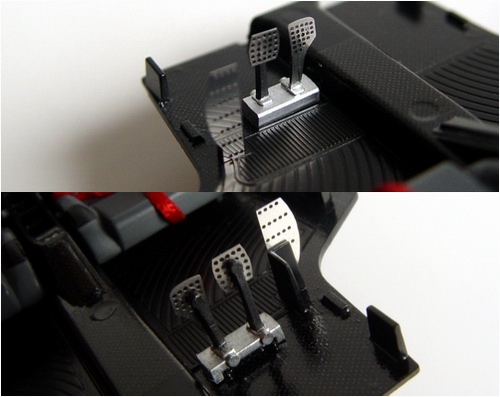 |
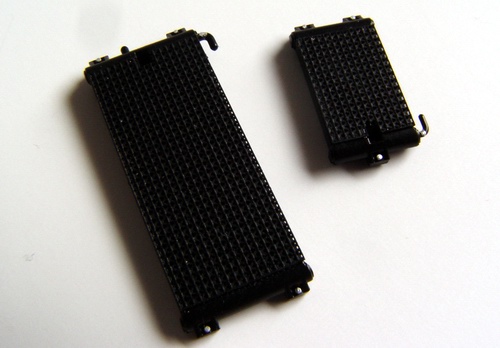
Kit pedals were cut off from the base, and pedal pads separated from their arms. I used photoetched pedals from the A-S set and glued them to the leftover arms (see lower part of the picture) and then glued the arms back to the base. |
 |
Brake rotors were assembled from extremely nice Acu-STion brake set. The etching is made from relatively thick metal for the rotor sides and the middle part, and when assembled, gives you a very realistic vented rotor. The hard part was to align the sides so the rotor looks "drilled". |
 |
Front part of the chassis was C/F decaled and glued to the monocoque. Then I installed the interior and water lines. Brackets holding doors were also attached at this time. |
 |
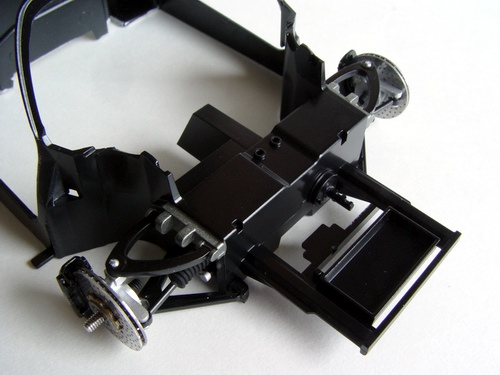
The engine block was glued to the frame and fitted with cam covers, velocity stacks (also A-S white metal part), manifolds, and rear suspension arms with brakes. On this picture you can clearly see how nice the rotors really are. |
 |
Next, I installed the dashboard. When I test fitted it, I realized that I did some unnecessary decal work - dashboard hides a lot of the floor in the front and big part of the central tunnel. Oh well... |
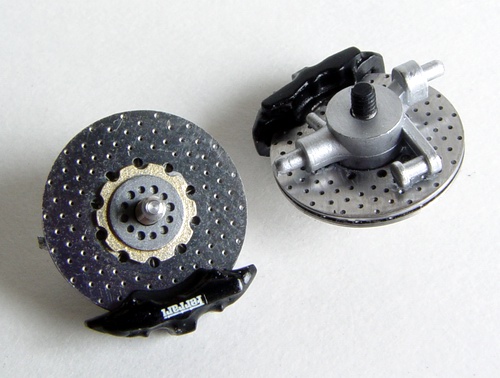 |
Finally, when all the rotors were assembled (this picture shows front brakes), I painted white metal calipers with Tamiya semi-gloss black and applied kit-supplied decals. Rotors were glued to the hubs and fitted with the calipers. Completed brakes looks extremely realistic. |
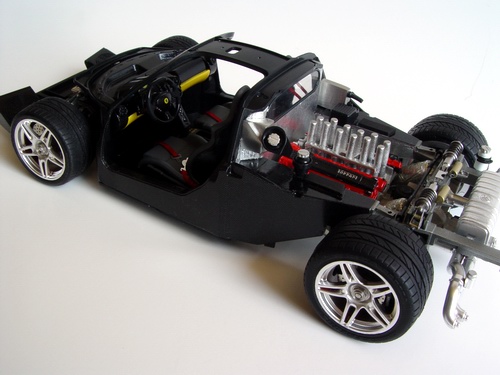 |
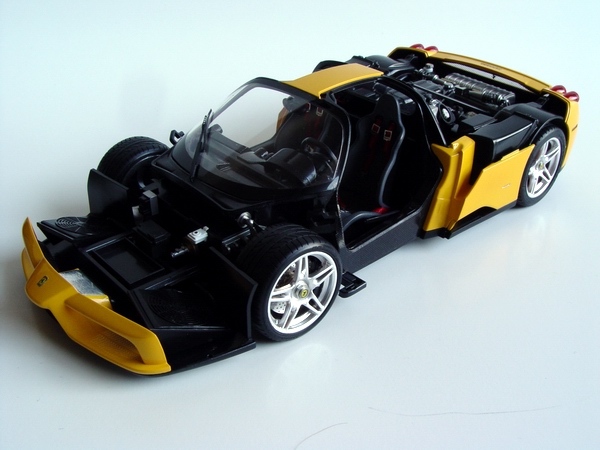
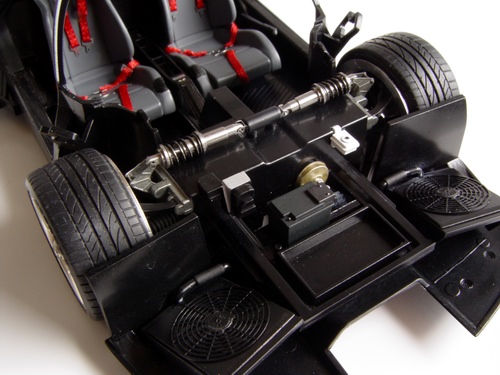
The "rolling chassis" again, this time with front sections of the chassis floor and the interior installed. All that's left are body panels and minor engine bay details! |
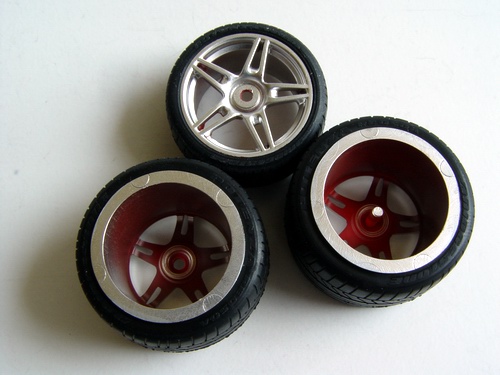 |
Since Acu-STion set has completely different brakes and wheels could be removed after the model is completed to show off all the brake details, wheels must be modified to fit the new hubs. I removed the pins sticking out from the center of the wheel, and drilled a hole of the same diameter instead. |
 |
Tamiya suggest using mesh included in the kit for all the opening, but A-S set provides PE mesh pieces for all the openings, radiators, grilles, etc. I mounted all the pieces on the bamboo skewer with double sided tape and sprayed everything flat black. |
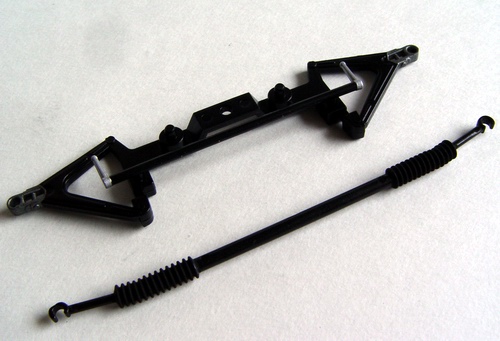 |
Front A-arms were fitted with stabilizer bar, and detail-painted. Steering rack was also cleaned and painted at this time. I always paint all the rubbers flat black, and then rub the paint with my fingers to make it look like a real rubber. |
 |
Radiators were painted with semi-gloss black, detailed with Testors silver metalizer and fitted with PE mesh pieces. |
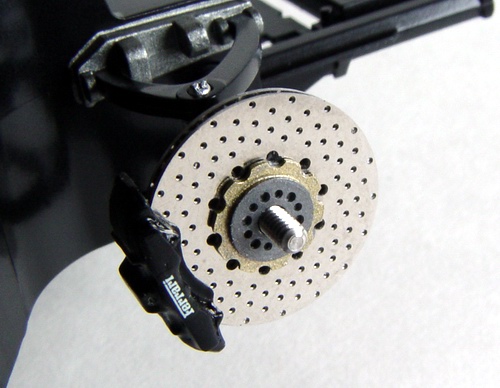 |
Front suspension was assembled, and brakes installed. This picture one more time shows how great brake detail level is. Its also important to align the pins straight so all the wheels touch the ground. |
 |
Engine intake was decaled with C/F decals from SMS, detail painted with Testors Aluminum metalizer, and topped off with PE emblems from A-S transkit. |
 |
Finally I installed a steering rack. I had to enlarge the ears that grab the hubs on this part a little bit in order to make them turn freely. Even after that wheels seemed to turn more easily to the left than to the right. |
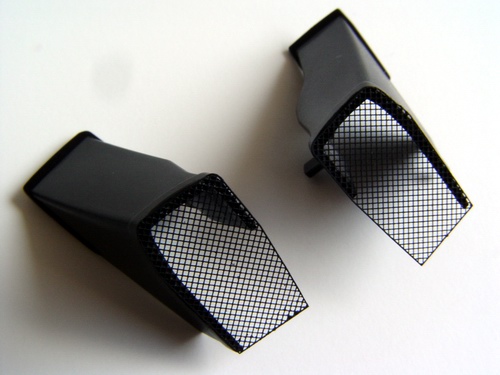 |
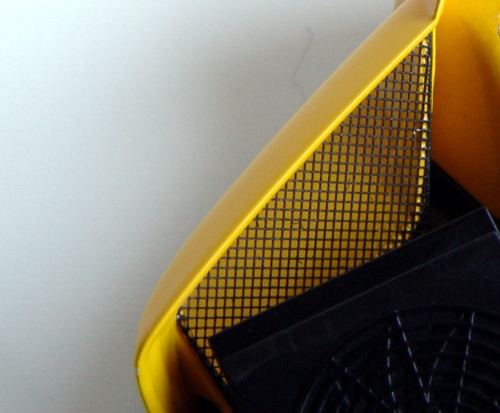
Side air ducts were also fitted with photoetched mesh. They look much better with these metal parts instead of nylon mesh. |
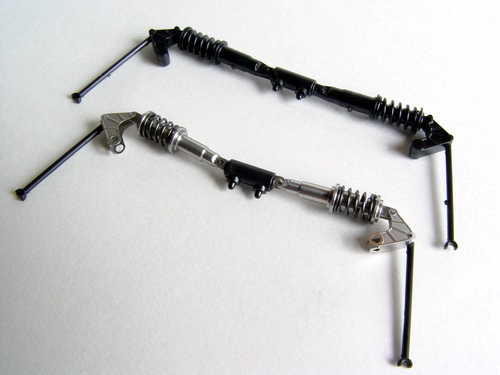 |
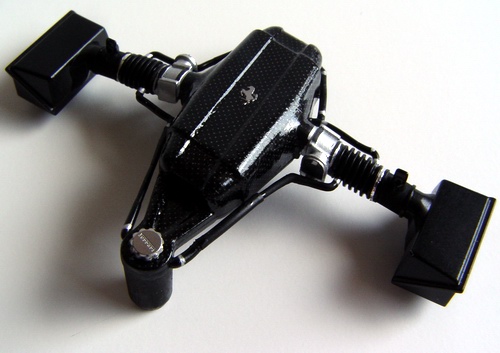
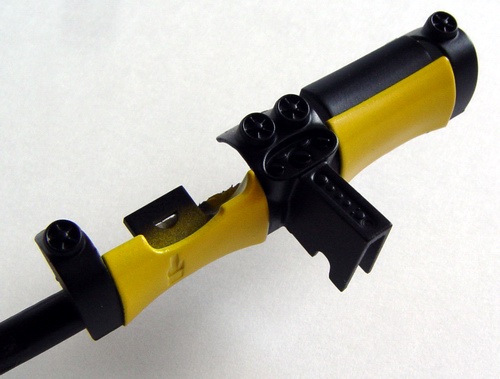
All the shock absorbers in the kit were substituted with A-S suspension set. The parts in the transkit are incredibly well done! Each shock was assembled, and fitted with PE brackets (this process was accompanied by a lot of cursing!) Middle part and connecting rods were cut from the Tamiya part and glued to the shocks. This is the front suspension. |
 |
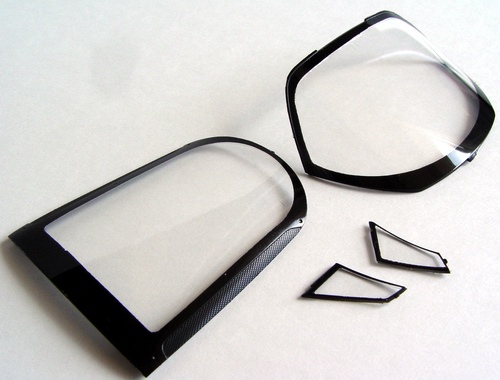
Rear panel was painted flat black from the inside after I installed the turn signals (backed with some BMF). This is where I was not very happy with the fit - Tamiya parts are so precise, that they forgot to leave some room for paint - I had to scribe the paint from the openings to fit the lenses. |
 |
This picture shows rear suspension, with connecting rods also taken from the Tamiya part. Although the assembly of each pair took about 2 hours, its well worth it, because the difference is really dramatic. |
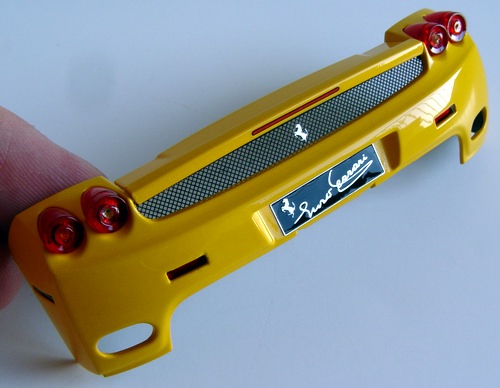 |
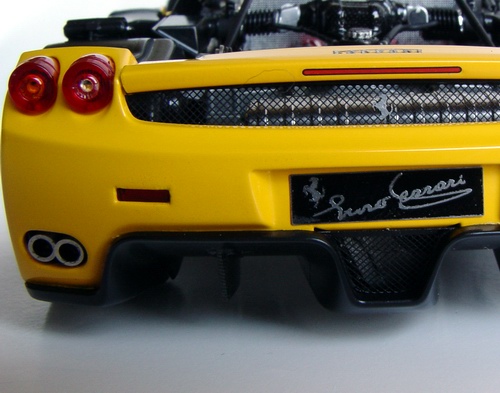
On the outside, I assembled taillights, applied third taillight decal, photoetched mesh with tiny Cavallino, and finally "Enzo Ferrari" license plate from A-S detail set. |
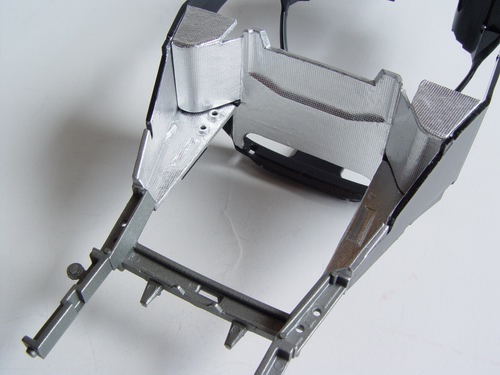 |
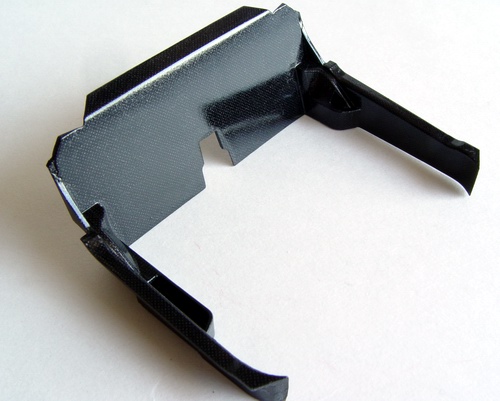
Now let's move to the monocoque. In order to simulate aluminum heat shields in the engine bay, I used foil from the cigarette packs, it has the same scale texture as perforated aluminum shielding on Enzo. I made several templates with masking tape, then transferred it to the foil. Foil was glued to the monocoque with Elmer's white glue. |
 |
Front cowl was fitted with the headlights. I decided skip the C/F decals on the headlights, since they are barely visible, and very complicated to decal right. |
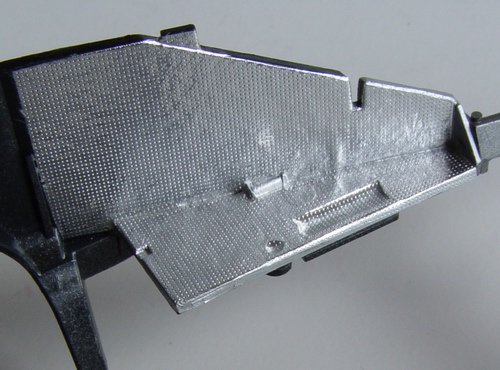 |
The hardest part of this process was to make foil to conform to all the curves of the engine bay. Working little by little with the help of toothpicks and q-tips, I was able to conform the foil to all the curves without ruining the texture. Again, complicated process, but worth every minute - the engine bay looks so much more real! |
 |
Lenses on the headlights were backed with some BMF to make them reflective even after they are painted. |
 |
Almost entire monocoque was covered with 1/24 plain-weave C/F decals from SMS. It took me about 3 days, 2 sheets of decals, and a lot of patience! I decided not to decal the roof (it will be covered by roof panel), parts of the interior (that will be covered by a dashboard), and parts of the front end, since it will be covered by the front cowl. |
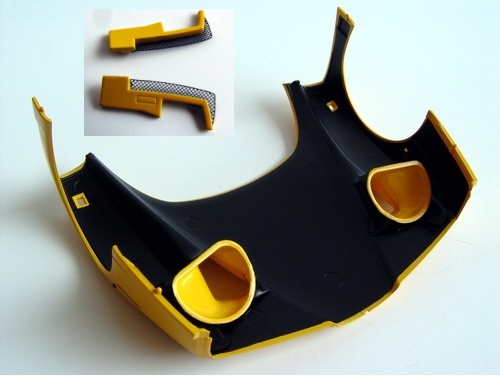 |
Finally, the cowl was carefully masked (including air ducts) and airbrushed with several coats of semi-gloss black. This step would be not necessary if you will glue the cowl to the chassis and make it non-removable. I wanted to be able to remove it and show off detailed front suspension and other details. Vents were fitted with PE mesh (inset). |
 |
Bunch of small details (some from Acu-STion transkit, some from the kit) were assembled, painted, and detailed with PE bits from A-S set. |
 |
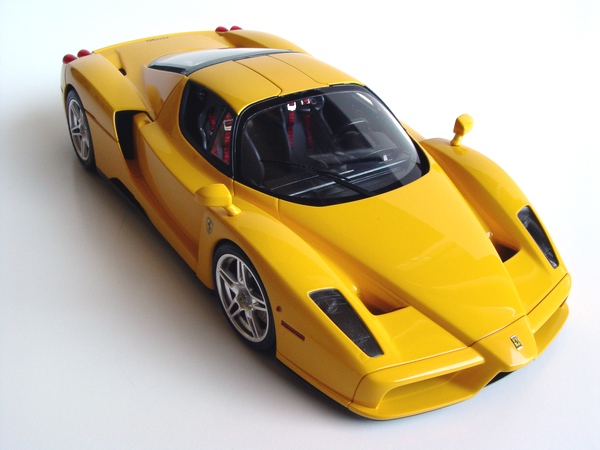
All the windows were masked using Tamiya pre-cut masks, and sprayed semi-gloss black. Those masks are usually great, but I was not very satisfied with the fit of the rear window mask this time - it was a little bit off. |
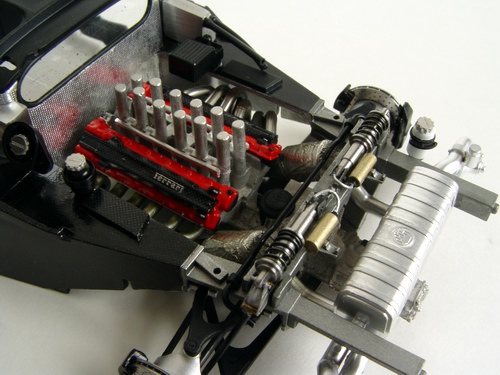 |
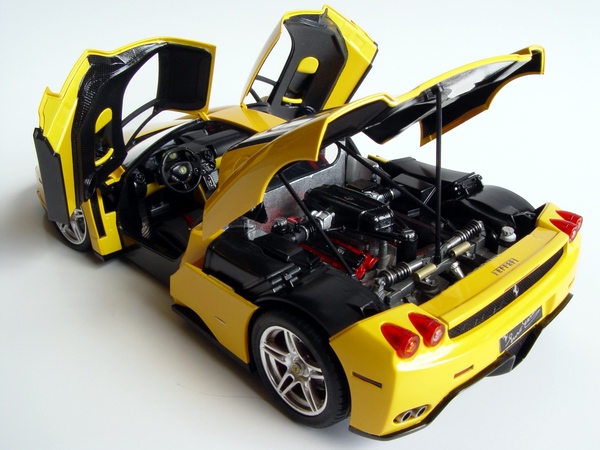
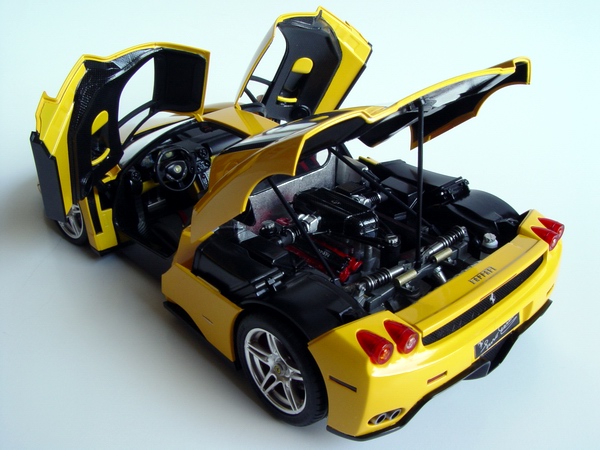
Finally, the engine was glued to the monocoque, together with small engine bay accessories, muffler and other exhaust pieces. Then I installed shock absorbers and connected them to the rear suspension. The engine bay started to take shape. |
 |
Engine lid was also carefully masked and painted semi-gloss black. I also used BMF to make a heat shield over the exhaust. |
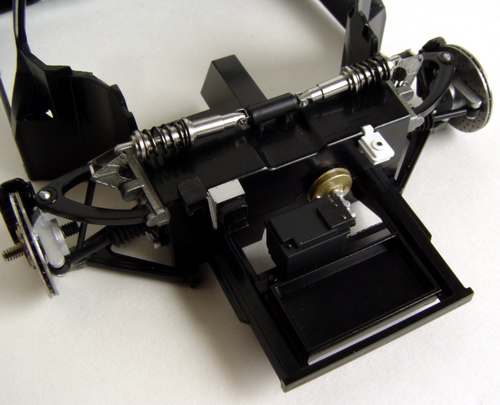 |
Front shock absorber assembly was also installed and connected to the suspension, along with all the small details on the front end - battery, coolant bottle, master cylinder, etc. |
 |
Window frame was also painted black, and eventually fitted with the rear window. I also applied PE mesh from the transkit to the vents on the rear window, and to the openings on the engine lid. |
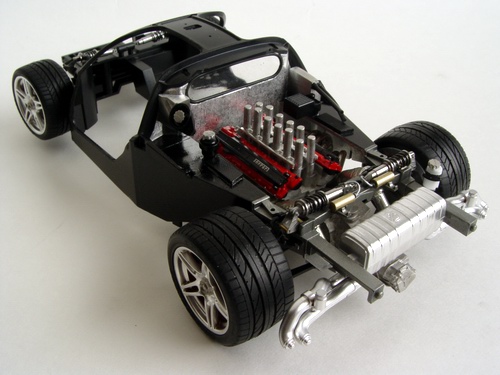 |
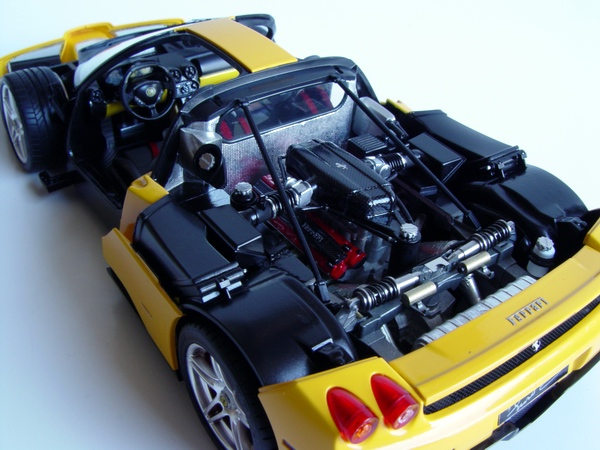
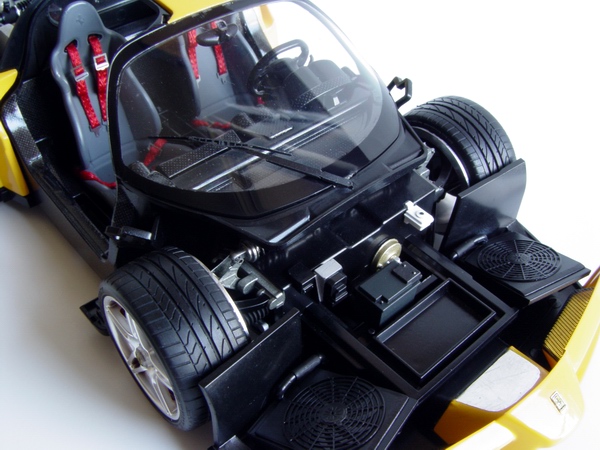
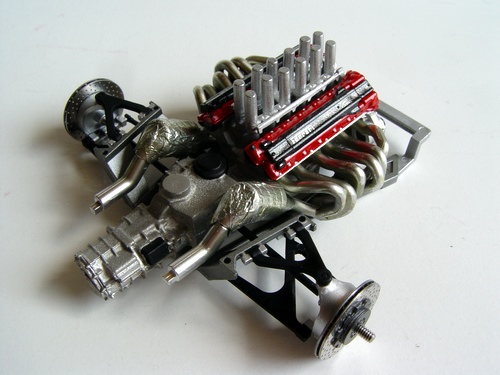
This is the picture of the "rolling chassis". Because of the white metal engine, it is quite heavy, and looks like a buggy in this picture! |
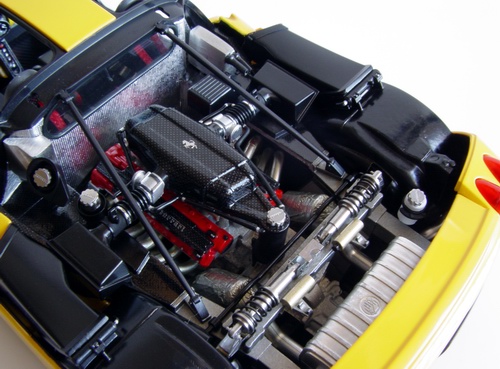 |
Radiators, air ducts, intake with air boxes, and all the little details were added to the engine bay. I lightly weathered some engine parts with black wash to make them look a little used. |
 |
Kit radiators (on the left) were substituted with scratchbuilt radiators with PE fans from A-S transkit (on the right). I made the boards from Evergreen sheet styrene and painted them and the fans semi-gloss black. |
 |
Lower parts on the inner door panels were masked off, primed with gray and white Tamiya primers, and painted Chrome yellow. |
 |
Completed radiator assembly looks only slightly better than Tamiya parts, and in my opinion was not necessary, especially if you will glue the front cowl to the chassis (this will hide the radiators). |
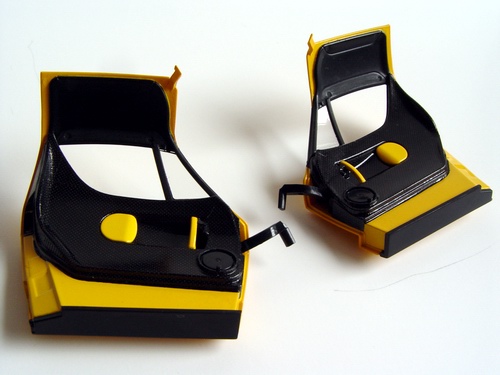 |
Then inner panels were decaled with 1/24 Scale Motor Sport plain-weave C/F decals, and fitted with the handles, etc. Roof panels were painted semi-gloss black. |
 |
After finishing the radiators, I moved to the interior. Lower dashboard piece was primed gray, white, then sprayed with several coats of Chrome Yellow. Part below the steering column and the glove box were masked off, and the dash sprayed semi-gloss black. |
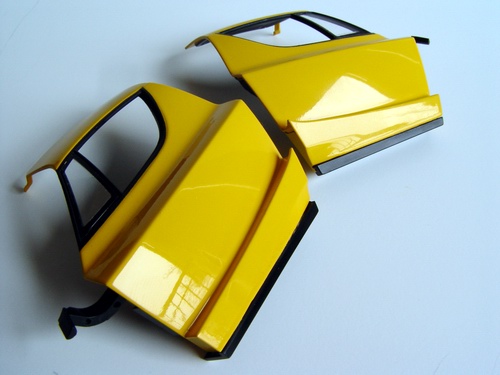 |
Window trim on the outside panels was masked off and painted flat black. After paint has dried, I removed the masks and rubbed the trim with my fingers to make it look like real rubber. It looks like its gloss in this picture, but its really not! Side windows were also installed at this time. |
 |
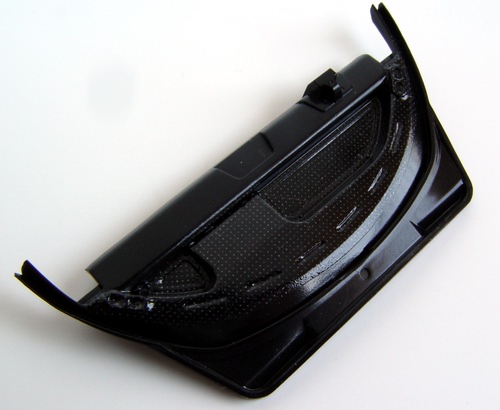
All black parts were covered with 1/24 plain-weave C/F decals from SMS. This was very tricky, and required a lot of patience. But when everything was completed, the part looked great. |
 |
Nose part was glued to the chassis (its very important to glue it to the chassis and not to the front cowl if you making the front cowl removable and want to eliminate the gap between the front cowl and the chassis), along with the roof panel and the windshield. |
 |
Upper portion of the dashboard was treated in a similar fashion. I used a lot of reference pictures of the real car to determine which areas on the dashboard are C/F and which are not. |
 |
Nose was also fitted with some photoetched mesh from the Acu-STion transkit. |
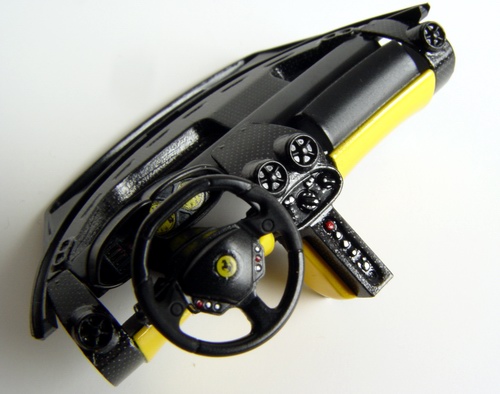 |
Then I glued two pieces together, assembled the steering column, attached steering wheel and the instrument binnacle and detailed everything with decals and paint. |
 |
Photoetched mesh was also added to the rear chassis plate, and rear body panel was glued to the monocoque. Then I glued metal tips from the A-S set, and "Ferrari" badge to the wing. |
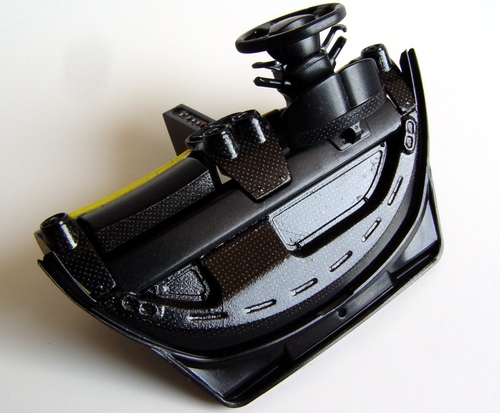 |
Completed dashboard is one of the most difficult I've ever made, but it looks great with all the little details and C/F decals in place. |
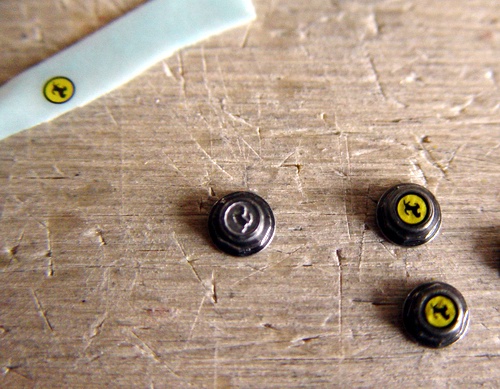 |
Nuts that hold wheels in place were fitted with photoetched centers, and then decorated with decals from Tamiya 360 Modena kit (Enzo decals were way big for these). Then I used a lot of Microsol so decals would conform to the photoetched pieces. |
 |
After hours of applying C/F decals, this interior part was also completed. I sealed all C/F decals with several coats of clear, so they look like real carbon fiber. |
 |
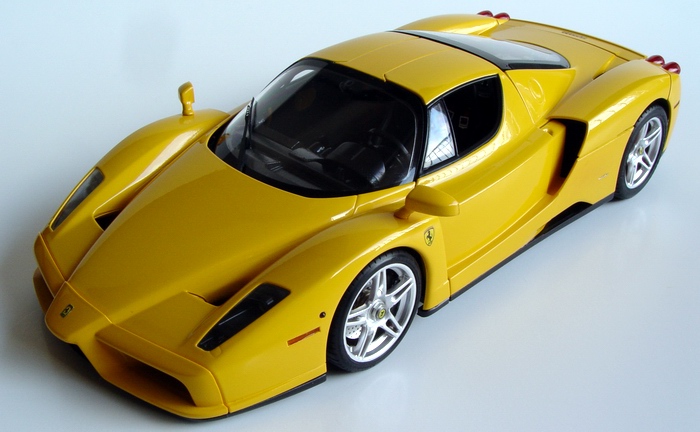
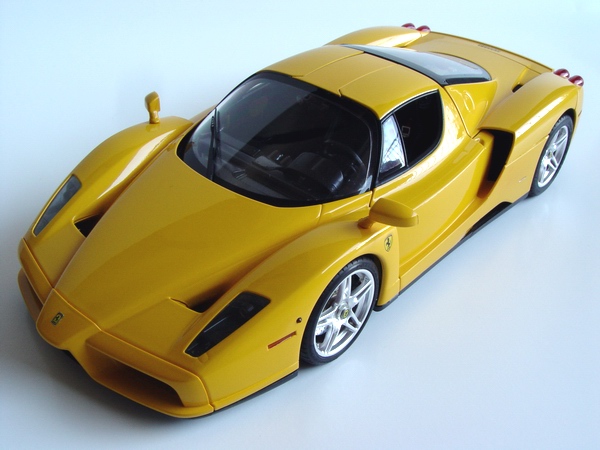
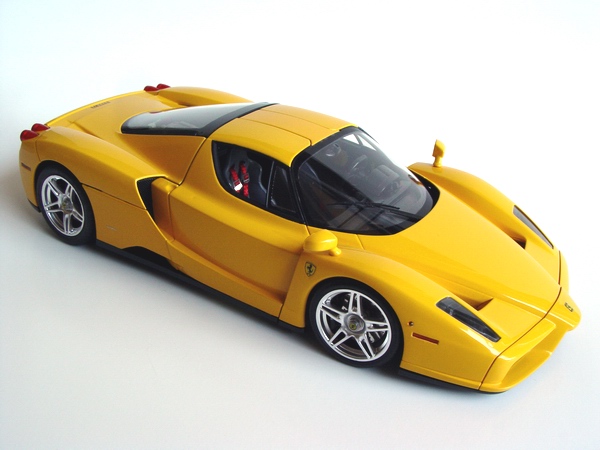
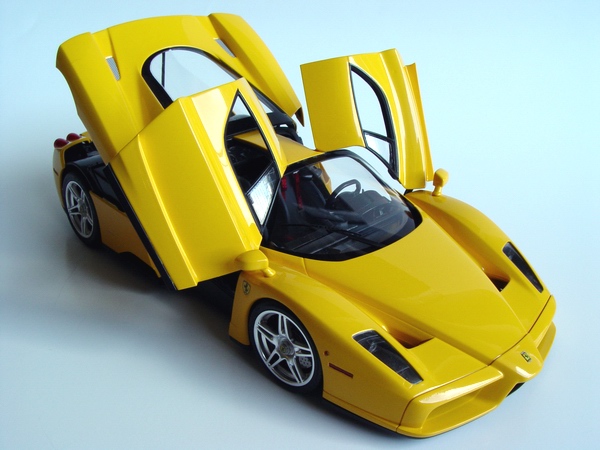
All the panels were assembled together, and all the rivets on the chassis were picked out with silver paint. Finally, model was waxed and fitted with photoetched scripts and Scuderia shield decals. Done! |
Copyright 2004 Alex Kustov. No copying or reproduction in any shape or form without written permission of the author.