Honda S2000
 |
 |
 |
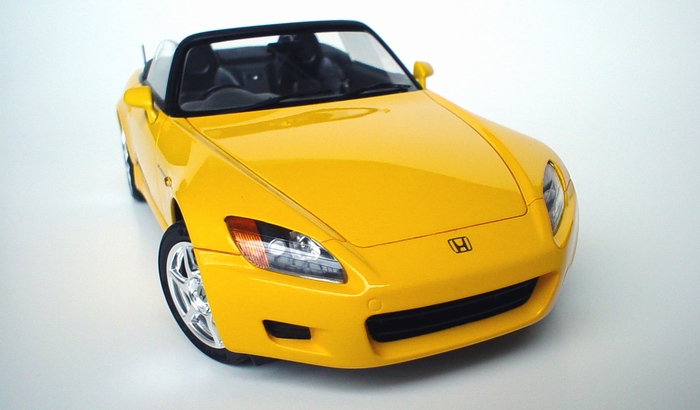
Kit: Tamiya Honda S2000 Kit # 24211 Pros: Traditional Tamiya quality. Very crisp details, excellent parts fit, perfect rims and rubber-like tires, great interior detail, very thin decals and great metal transfers, sophisticated headlights and taillights assemblies that yield amazingly realistic results. Great instruction sheet and correct color guide. Near perfect kit. Cons: Can't think of anything except it being curbside. Verdict: Kits like that is why Tamiya is number one in plastic models! True to original shapes, no flash, great detail - the kit that builds without a hint of a problem, and looks so realistic, you can almost hear the engine running.... Highly recommended to any builder. |
 |
 |
 |
Buildup
This buildup was also published in Model Cars July - August 2003 #88, Hot Honda: Building a Honda S2000
 |
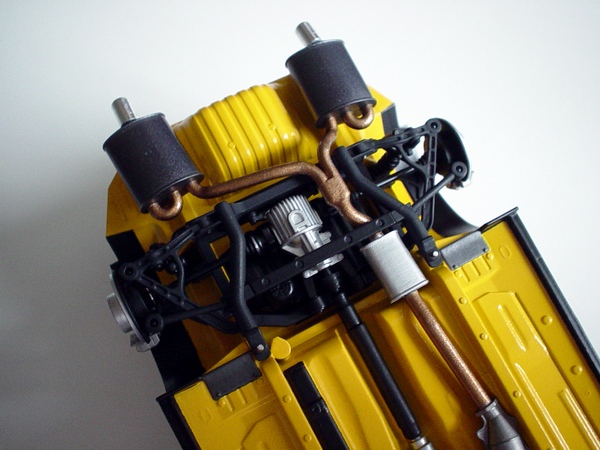
Front suspension. The chassis were sprayed Tamiya Lemon Yellow, then masked and sprayed Tamiya Semi-Gloss Black. Engine was painted with Testors aluminum metalizer. |
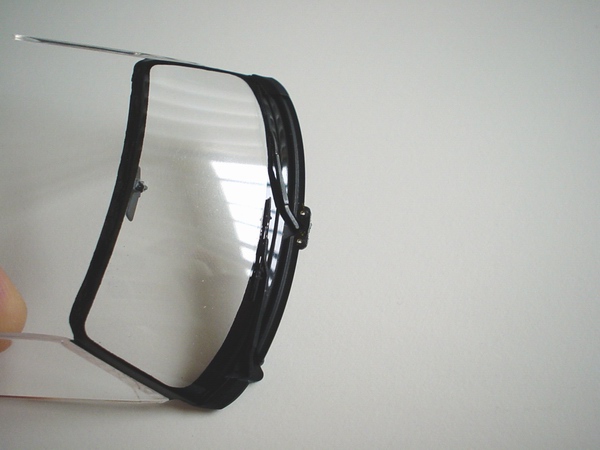 |
Glass is ready for installation. I threw away kit wipers and used some Detail Master wipers. These are 3-piece, very detailed P/E wipers. You can't really see the difference on this picture, but they look amazing! Glass was also polished with 3M Compound and waxed. |
 |
Another shot of front suspension. Later I picked out all the bolts and nuts with different metallic paints, and applied some black wash to the engine. |
 |
This is a better picture of (unassembled) wipers used for the model. These are a bit pricey, but the package contains enough to make 5 pairs of wipers, so its not really that expensive - just over a buck per model. |
 |
Chassis rear. I touched up rear shock saddles with yellow to cover them evenly before spraying. It was such a pain to mask that gas tank! But thanks to Tamiya masking tape it turned out quite good. |
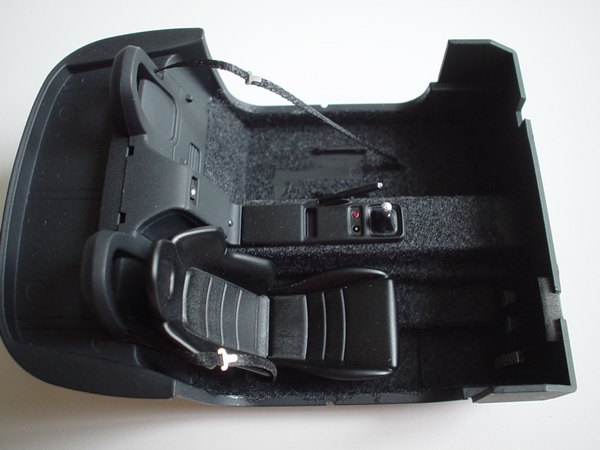 |
Picture of the interior before final seat installation. I used 1/32 inch Hobby Lobby ribbon and Detail master buckles to make seatbelts and super-glued them both to the retainers and the seats. Seats were painted semi-gloss black to look like they made from real leather. |
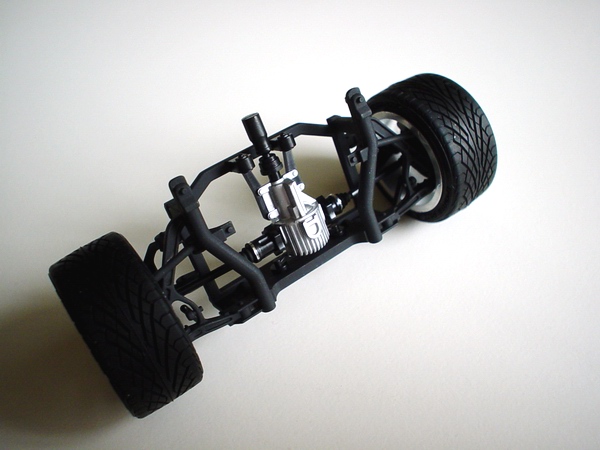 |
Rear suspension. Brilliant Tamiya engineering recreates the real thing perfectly! I wish the drive shaft was a single part though! Boot clamps were simulated with tiny BMF strips. |
 |
Pedals were painted silver, and if you are accurate they look very realistic. I also mixed black and gray Detail Master flocking to simulate Honda gray carpet and flocked the interior. |
 |
Exhaust was painted using 4 different colors: Tamiya Gun Metal, and Testors flat bronze, aluminum and burnt metal metalizers. Tips were drilled out. |
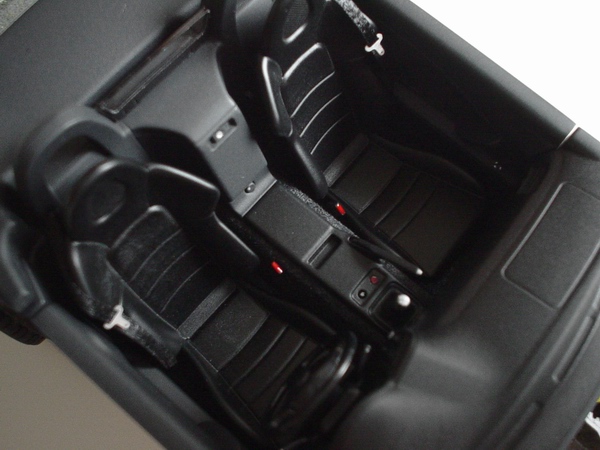 |
I've scratchbuilt seatbelt retainers from sheet styrene and flexible vinyl, painted them black and glued them to the seats. I also painted the release buttons red - they add to the realism of the interior, and this is very important for the model that's will be displayed with its top off! |
 |
This is how rear suspension looks when assembled. Interesting thing is that a bar secures the whole thing after the exhaust was installed. On this picture you can see that drive shaft is a 2-piece part. |
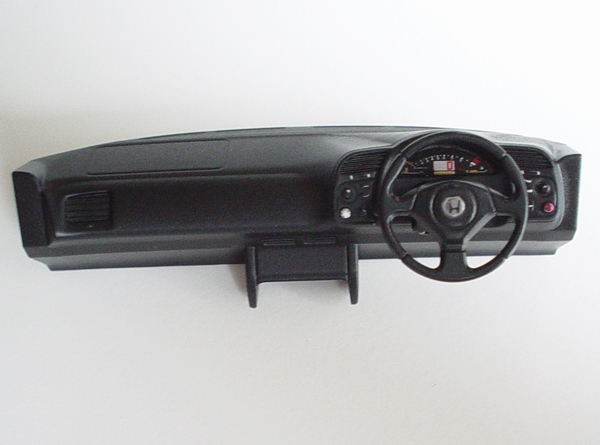 |
Dashboard was painted satin black and detailed with decals and careful detail painting. |
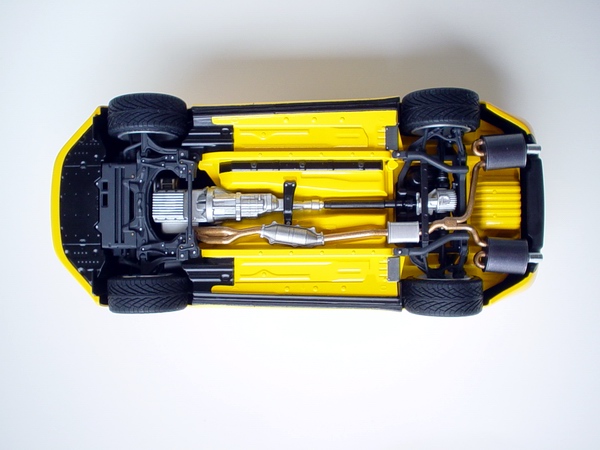 |
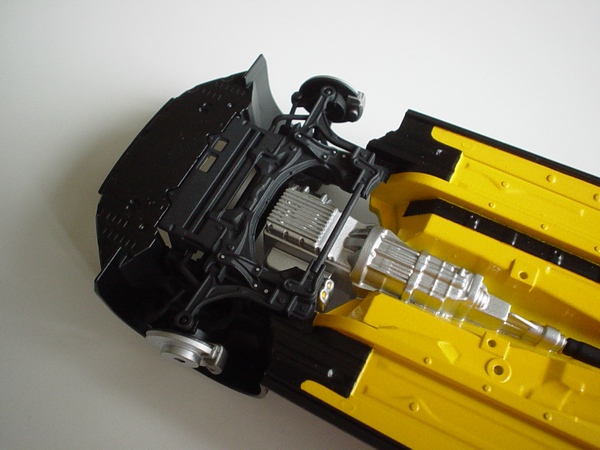
This is view of completed underside. Here you can see that all the nuts and bolts were picked out in metallic paints, and body shell painted flat black inside. |
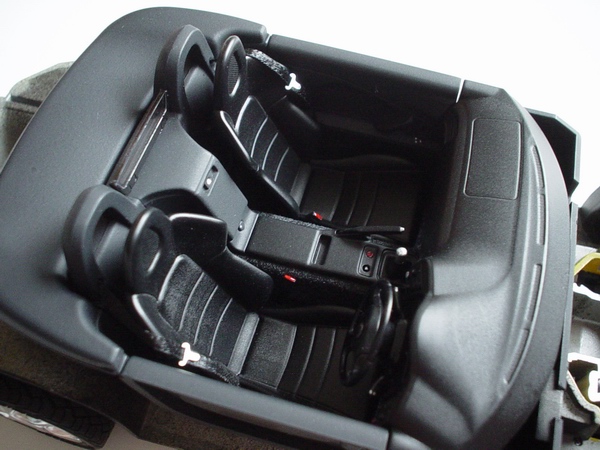 |
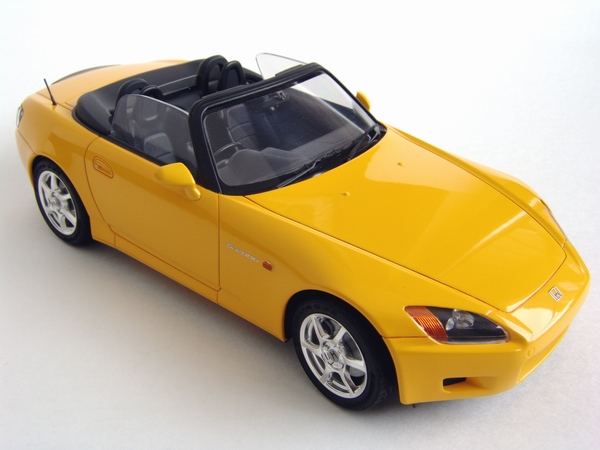
This is a picture of a completed interior tub with everything installed. You can also see the rear wind deflector installed. |
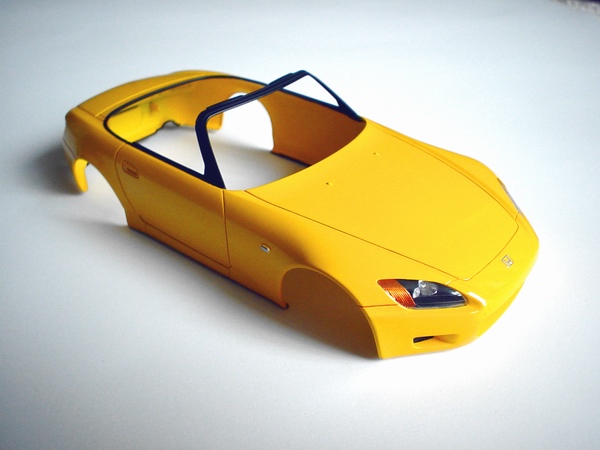 |
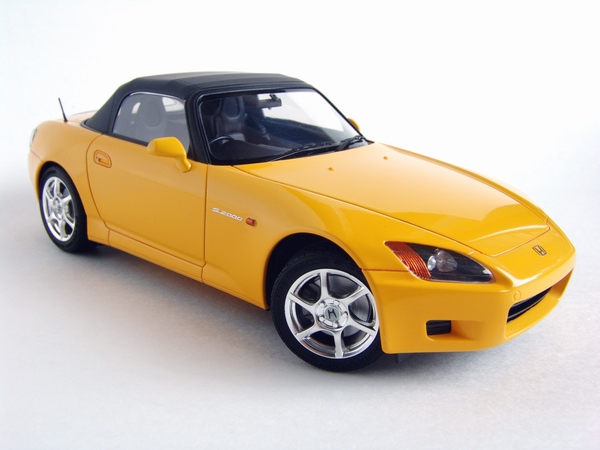
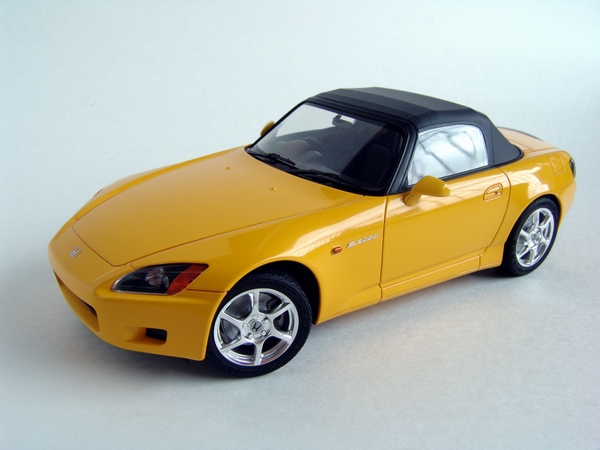
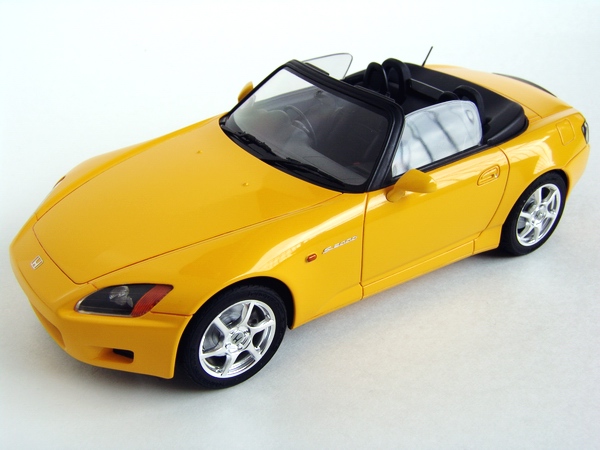
Painted, polished, and waxed body with installed headlights, painted window frames and applied front emblem. Couldn't wait to see how it looks with this emblem on! |
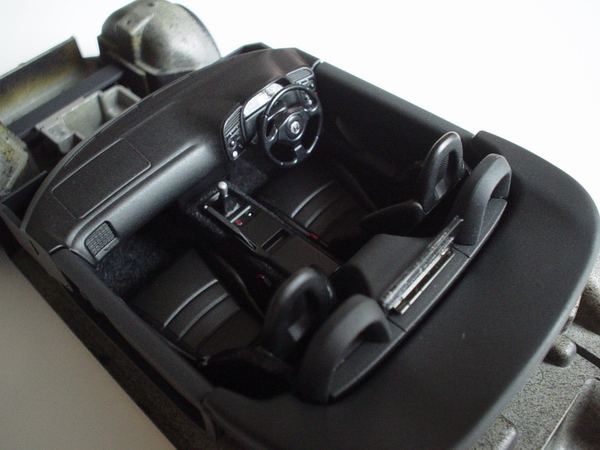 |
Another picture of completed interior. This is the way it will be seen when displayed. I didn't glue the dashboard in case I want to switch it for the left hand drive one day. |
 |
Rear end with everything ready for taillights installation. The third stop light was painted red over silver before installing the cover. I painted the lens Tamiya smoke on the outside and clear red from the inside. |
 |
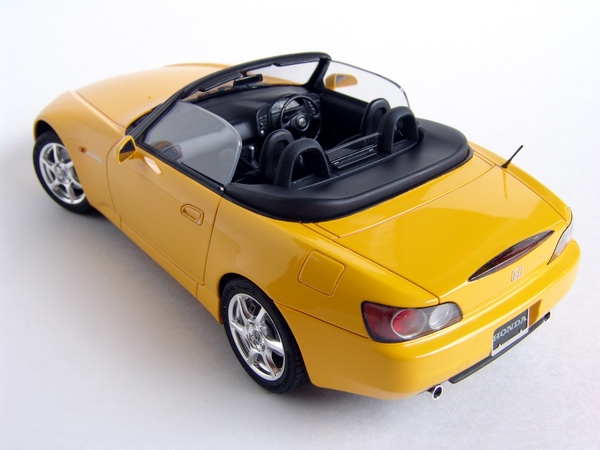
Final assembly. Soft top, antenna, mirrors, metal transfers, rim decals, turn signals - presto! Assembled model looks amazingly accurate and true to the original. |
Copyright 2002 Alex Kustov. Updated in 2005. No copying or reproduction in any shape or form without written permission of the author.