
Preparing Plastic Kit for Paint - Primer Stage
I have received a lot of messages via email recently asking about my preparation techniques. I’m not doing anything special really, but I decided to put together this little tutorial to show all the stages of preparing the body for the paint up to primer stage, to answer all these questions.
First thing you do when you take the body out of the box, is you look at all the flaws the part has – mold lines, pin holes, sink and swirl marks, warpage, flash, bubbles, etc. Before continuing, you need to take care of all these imperfections. Some of these are specific to plastic kits, some, like bubbles, are more common on resin castings.
Mold lines are very small raised lines that usually run along the side of the roofline, down the pillars, along the edge of the hood and trunk, over the lights and bumpers. This is where different parts of the mold meet. These are inevitable on most plastic kits, its just some are more pronounced than others. Recent plastic kits are so well engineered, you will have hard time finding mold lines!
|
|
|
| Mold line on the front fender | Mold line and a bit of flash on rear fender |
Most mold lines are easily removed with fine sandpaper or sanding sticks. I actually prefer fine sanding sticks because they are flat, and can be used for block sanding. If you need to remove mold lines in a tight stop, you can use rolled sandpaper, or a needle files to get there.
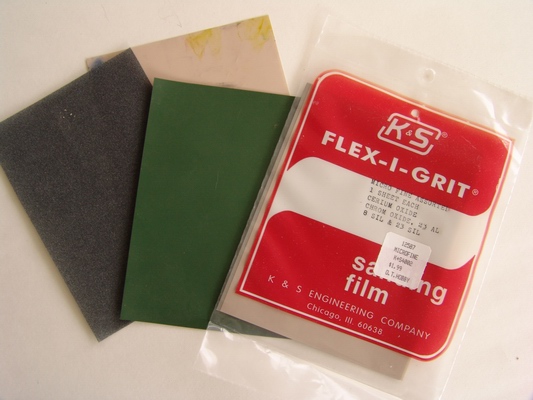
Sandpaper Variety
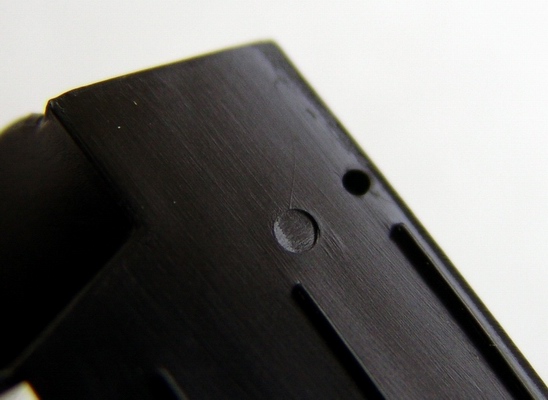
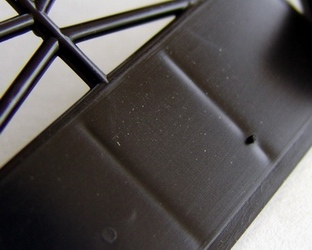
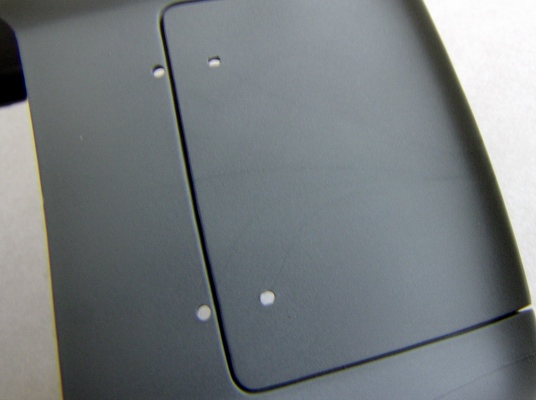
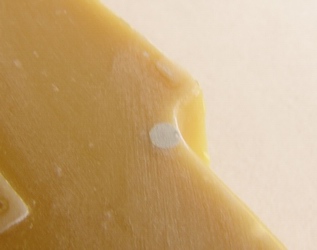
Pinholes are small round indentations in the plastic, introduced by the pins that push the part out of the mold/tool. Properly engineered kit will have most of the pin marks in inconspicuous places, but sometimes they are unavoidable. These can be annoying to fix, especially if there are a lot of them.
 |
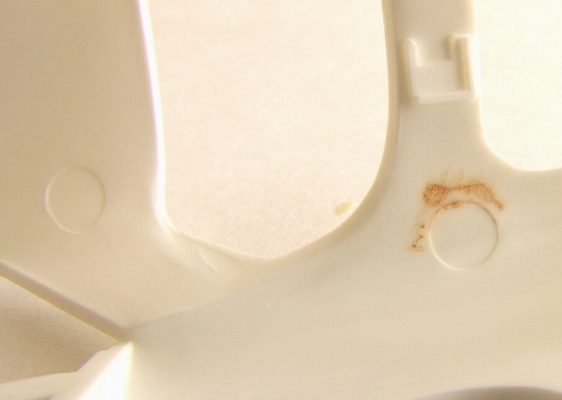 |
| Pinhole on the chassis plate | Pinhole inside the body shell |
Test fit the parts to see if the pinhole will be visible. If it is, sand the surface smooth. If it is deep enough, fill it with putty or body filler, and then sand smooth once the filler is dry.
 |
 |
| Sanding the pinhole smooth | Filling pinhole with filler |
 |
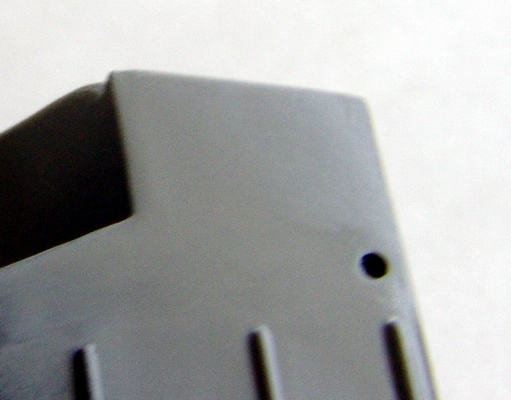 |
| Filler is sanded off to reveal smooth surface | Primed pinhole |
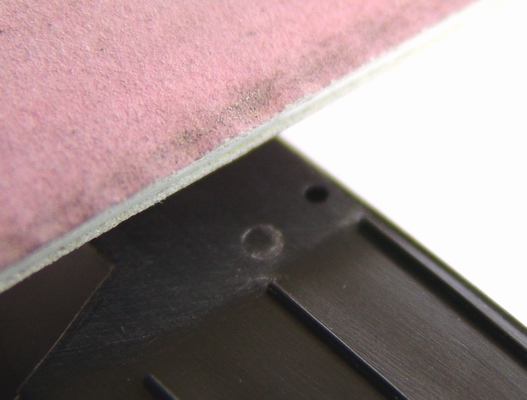
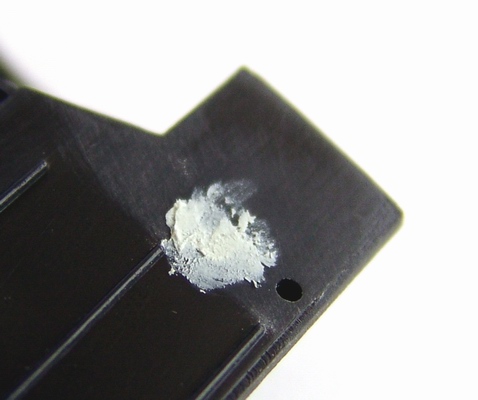
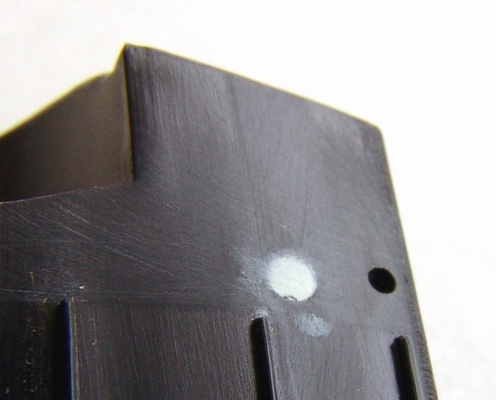
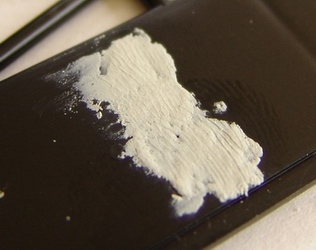
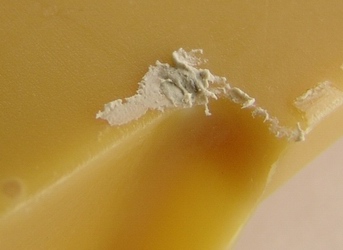
Sink marks are barely noticeable depressions in the plastic surface caused by plastic shrinkage while it’s cooling. These are very similar to pinholes, but can be any shape or form, usually small, but sometimes can be quite sizeable. These should be filled and carefully block-sanded before spraying primer.
 |
 |
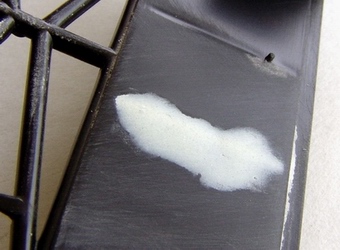 |
| Two long sinkmarks on the chassis plate | Filled sinkmark | Sanded sinkmark |
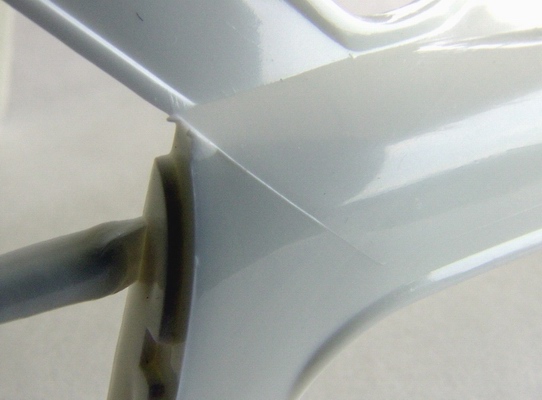
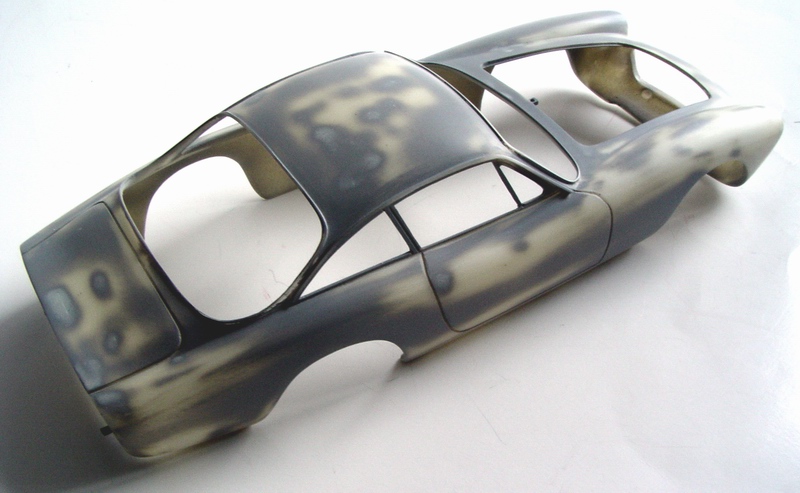
Similar to sink marks, there are other plastic imperfections called swirl marks. Swirl looks like a really faint spider web on the plastic surface, very often discolored, and it is created when molten plastic is injected into the tool from different sides. When it meets at some point, it creates a “swirl”. Surface of the swirl may look perfectly fine until you spray a coat of primer on it. Solvent in the primer reacts with the plastic, and swirl re-surfaces, creating a “ghost” image of the swirl on the primer. The only way to get rid of the swirl is to sand it with fine sandpaper, and spray a light coat of surface sealer before spraying first primer coat. If the swirl somehow surfaced in the primer, lightly sand it and recoat with primer, but go very lightly, several very “mist” coats.
 |
 |
| "Beautiful" swirl on the trunk lid | "Ghost" image after few coats of primer |
Warpage occurs when hot plastic parts are thrown in the box and deformed under their own weight or weight or other parts, or due to something else. Basically, it’s a part that has wrong shape. If the warpage is minimal, you can try to fix it with hot air from the hair dryer. Warm the part by blowing hot air on it, and carefully and slowly bend it into correct shape, then wait till plastic cools off. It should hold new shape. When the body is seriously warped, you can try the following (and this is not recommended for children under 14 or should be supervised by adults) method: boil some water, take it off the fire, and let it sit for few minutes. Then briefly dip warped part in the water, and quickly remove it. Then bend it to shape, and hold until plastic cools off. Keep in mind that after you pull the part out of the (almost) boiling water, it will be extremely hot. Please wear gloves or other hand protection while handling the part.
Same exact method works very well for fixing warped resin bodies and parts. Resin is stronger than plastic, and can be literally boiled in water and then bent into shape. I saved few bodies this way. Also keep in mind that some of the parts cannot be saved because they are warped beyond repair. No amount of heating or boiling will make them look (and most importantly - fit) right.
Flash is the most common defect on plastic parts (especially on old tools), but it is easily fixed. Just cut off the flash with sharp hobby knife, and sand the remains with sandpaper, sanding stick, or needle files.
Severe flash around the taillight area
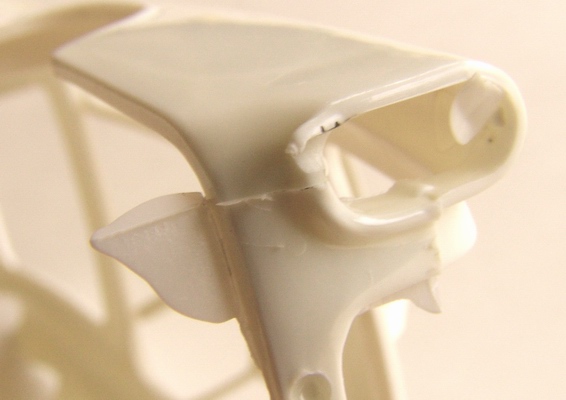
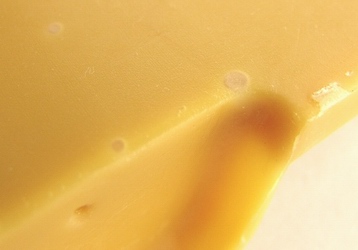
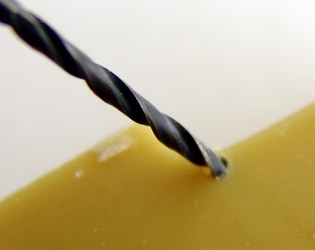
Bubbles are mainly seen on resin kits. Poorly mixed resin, air trapped in the mold – things like that introduce bubbles into the part. Bubbles plagued early resin kits, but latest kits have gotten really good, I don’t see bubbles very often anymore. The only way to get rid of the bubble is to fill it with something. If the bubble is really small, a drop of superglue will take care of it. It the bubble is relatively big, you have a bigger problem. In order to fill an average size bubble, you need to drill lit out, enlarge the hole so putty or body filler have something to hold on to. After you drill a bubble, fill it with epoxy filler, or putty, wait till dry, then sand smooth.
 |
 |
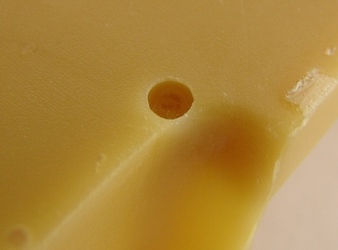 |
| Bubble in resin casting | Drilling out the bubble | Drilled out bubble |
 |
 |
| Filled bubble | Bubble sanded smooth |
Another good filler for bubbles is baking soda mixed with slow drying super glue. Just fill the bubble with baking soda, put a drop of superglue on top, then carefully mix it all together with a toothpick. Add more baking soda if necessary. This mixture fills bubbles perfectly, and dries almost instantly because soda sucks the moisture out of glue and turns is into very hard substance.
Speaking of fillers – I tried many different fillers, and finally settled on Tamiya putty – it works very well for filling small imperfections. It dries fast, can be sanded smooth, and comes lightly colored for easy overspray with primer. Recently Tamiya introduced new epoxy putty to the market, and I found it an excellent product for almost any application – highly recommended for any type of filling/putty work. Bondo glazing putty is not bad for resin, but it is a bit too thin and cracks and shrinks when it dries. Squadron putty is another superb product that dries fast, sands smooth, and comes in white and green colors.
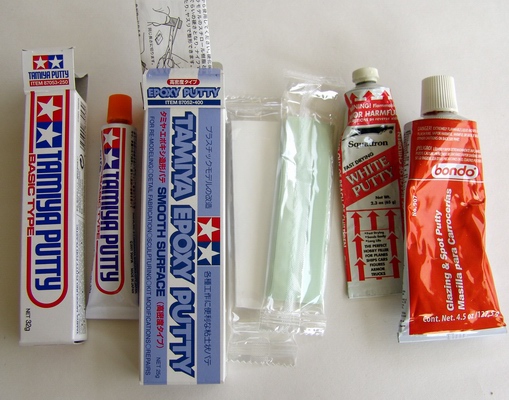
Fillers variety
Once all the small imperfections are fixed, it is time to put the primer on, right? Not exactly. In order for primer to stick to the plastic, it needs something to hold on to. The entire part needs to be lightly sanded, but before we go into detail here, I’d like to mention one more thing. I usually deepen the panel lines before spraying my first primer coat, at least on all big panels such as hood, trunk, doors and bumpers. This makes the body look more realistic, and prevents filling panel lines with paint. Panel lines on many plastic kits are really faint nowadays and can be easily flooded with paint or even primer.
I use the back of the knife blade to scribe the lines, but there are few scribers made specifically for this purpose. I heard dentist’s picks work great too, but haven’t tried it so far. Be careful when scribing – one slip and you’ll have to fill that “extra” panel line! Do not rush, go lightly in the beginning and make the line deeper with each additional pass.
Now, when you have all the flaws filled and sanded off and panel lines re-scribed, its time to lightly wet-sand entire body with fine (800-1000 grit) sandpaper. Another alternative is to sand the body with toothpaste (just like you would brush your teeth). It will introduce less deep scratches than sandpaper, but still give enough “tooth” for the primer to hold on to.
Cleaning and sanding body with the help of toothpaste
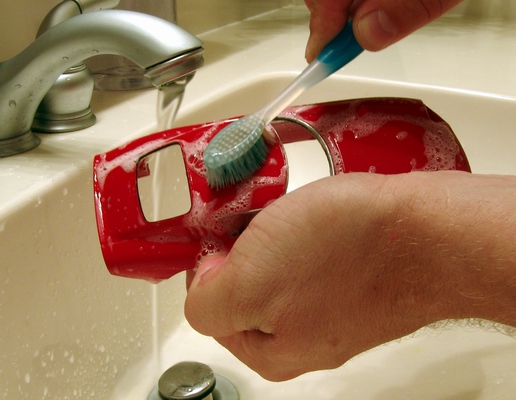
Make sure you wash the body and every nook thoroughly with soapy water and old soft toothbrush. Then rinse it for a few minutes under running water, and shake as much water as you can off. You can blow leftover water drops off with a hairdryer, or brush them off with soft brush (I prefer hairdryer method - faster). This prevents creation of water spots on the surface, especially if tap water is really hard (you can also rinse the body in bottled distilled water).
Now let the body air-dry for a few hours. Put it in a box, or a Tupperware container to keep airborne dust off it. Do not close the lid completely though, let the air escape. Once the body is dry, attach it to your favorite paint stand, and we are ready to put some primer on.
You can use any primer you want, but if you want to paint your model with automotive lacquer paints, make sure the primer will withstand automotive lacquers. I use Tamiya gray and white primers – they are the finest (grain) and fastest drying primers I have used so far. Even very thin layer covers really well. I always start with gray primer because it shows all the imperfections very well. This is very important, especially if you fixed a lot of imperfections or did some bodywork.
Quick tip: after shaking primer can for a few minutes, place it in a cup with warm water for a minute or so. This accomplishes two things – settles primer from shaking, and warms it up so it atomizes better and flows easier from the nozzle. This in its turn prevents orange peel and other texture problems. One warning: do not put primer can in boiling or hot water – it might explode. Hot tap water is more than enough.
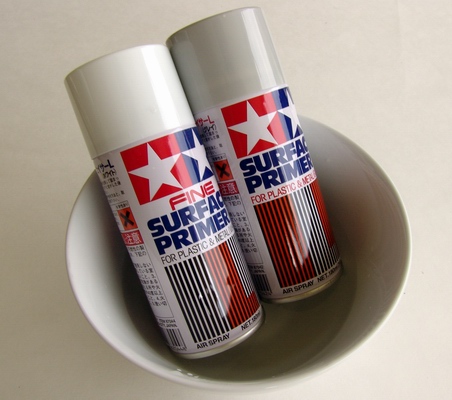
Warming primer cans in hot water
Mist some gray primer on the body trying to cover all the puttied and sanded areas. Go lightly. If you first coat reveals any flaws – let the primer dry completely, then fix the problem, sand the area smooth, wash it, dry, etc…. Then spray the spot that you just fixed to check for flaws. If everything looks good, you can now spray another coat of gray primer that will cover entire body. This is only necessary of your body is molded in any color but white. If it is molded in white, you can spray it directly with white. Let the second coat of primer completely dry (I leave it for a day just to make sure).
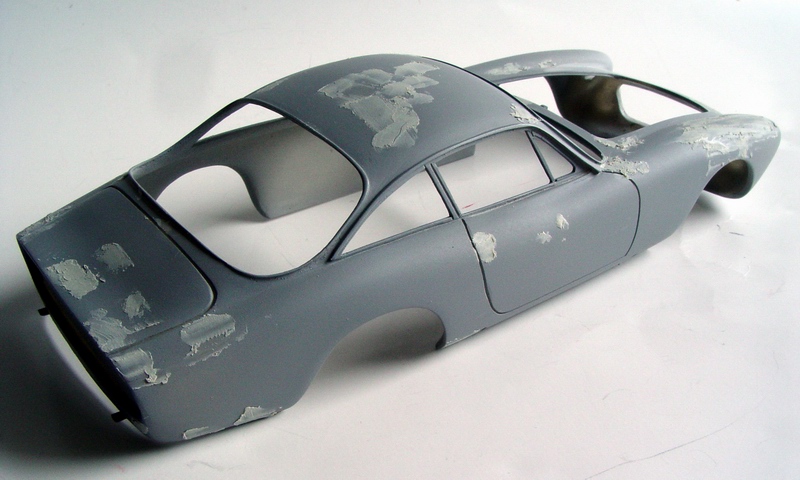
Fixing imperfections after first coat of gray primer
If you managed to put some dust or debris in the primer coat, carefully wet sand them off with 1500 or higher grit paper, and then repeat toothpaste sanding – this smoothes out primer texture and prepares it for the final primer coat (I usually spray 3 coats of primer). Once the body is completely dry again, spray final coat of white primer, and let it dry for a few hours. And then just like the first time, wet sand any imperfections, then sand with toothpaste to smooth the texture for the final paint coats. After the body dries, you should have a nice white bodyshell with hard white surface.
All imperfections fixed - ready for another coat of primer
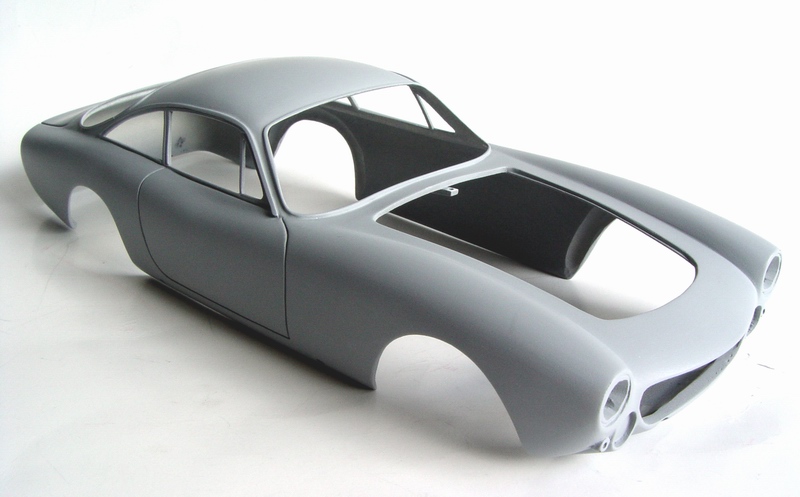
Ready for paint!
One final note: it is not always necessary to spray white primer on top of gray – if your final body color will be dark – like black, dark blue, or very opaque metallic – you may get away with just gray primer. This will save you some work and time. All other colors will require white primer – gray undercoat will significantly darken the color. Hope this will help you prepare your bodies well for showstopper paint jobs.
Copyright 2006 Alex Kustov. No copying or reproduction in any shape or form without written permission of the author.