How to Enhance Kit Seats
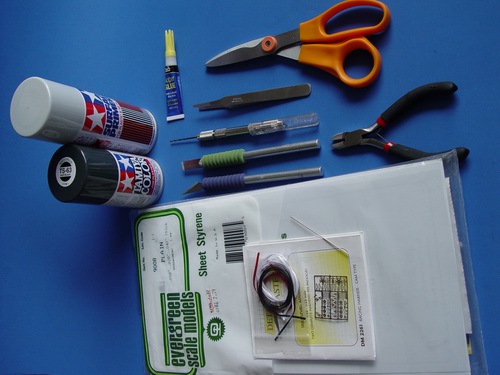
Materials and Tools Needed:
There are several basic tools you will need to perform the enhancements: couple of hobby knives (regular and chisel tips), pin vise and drill bits, tweezers, scissors, sandpaper (or sanding sticks), and cutters. You will also need some primer, paints, glue (I recommend CA glue), 0.015 steel rod (or wire), and couple of aftermarket supplies - 1/32 inch cloth ribbon and some photoetched seatbelt hardware.

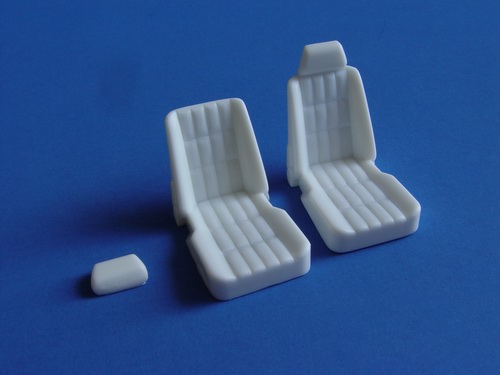
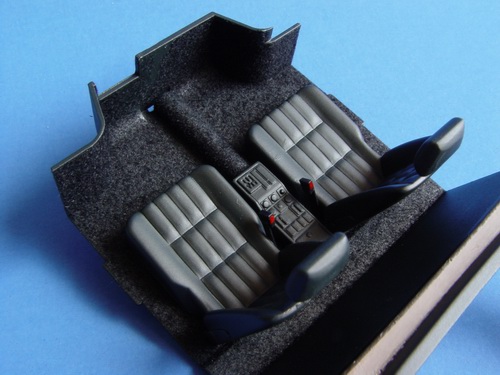
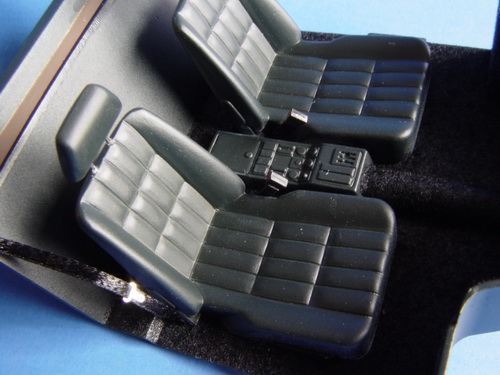
Here is our object - a typical kit seat from a Hasegawa Ferrari 328GTS. Although it looks good without any enhancements, little work will help us to turn this part into a very life-like piece. This is especially important for an open top or convertible model!
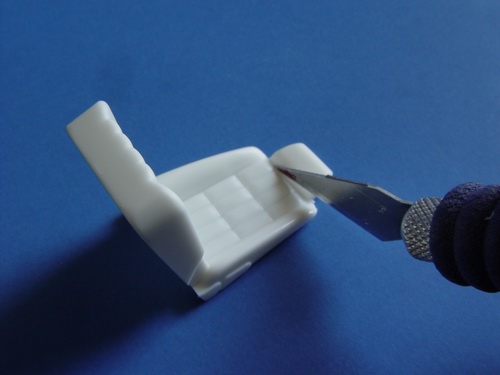
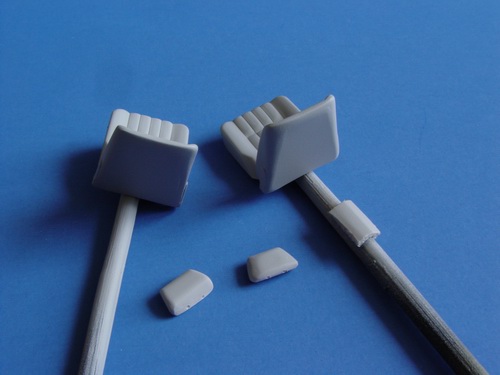
Lets begin by cutting the headrest off the seat back. Make several cuts with sharp blade from both sides, and then break the headrest from the back.
Smooth both pieces with sanding stick. Cut the headrest from the second seat as well, make sure the height and shape of both seats is the same (or at least visibly similar) after sanding.
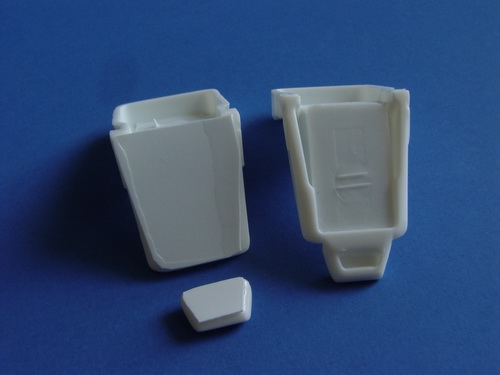
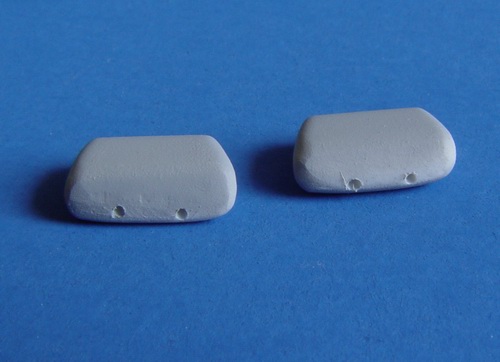
Many seats come without backs - this is really detracts from an open top model. It is easier for the kit manufacturer, but looks very toy-like. To fix this, cut some 0.010 thick sheet styrene and glue it to the seat back and headrest back. Once glue completely dried, cut off the excess plastic and sand the edges with sanding stick, then smooth the surface. If the gap is still noticeable, you may use some putty.
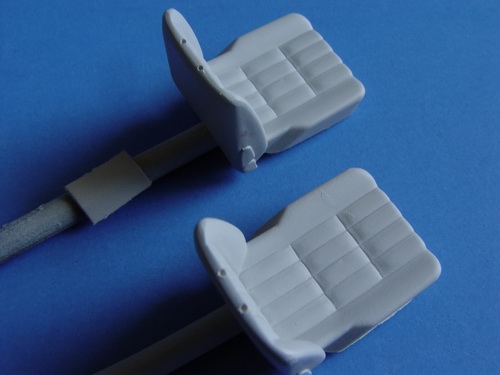
Spray a thin coat of gray primer on the parts to check for irregularities. Primer coat will reveal bad spots - fix with fine sandpaper or sanding stick and prime again. Repeat until surface is completely smooth.
Drill two holes in each headrest with your pin vise and #78 drill bit. Make sure holes are on the same line.
Measure the gap between holes on the headrests, and drill mirror holes in the seat backs. You may want to mark seats with corresponding headrests (Left and Right) so you know which headrest belongs to which seat.

Paint the seats with color you like, and cut two small pieces from the metal rod with your cutters. Holding tiny metal pieces with tweezers, glue them inside the headrest. Be careful, make sure the rods are parallel and of the same length. Length depends on how high you want the headrest to be positioned.
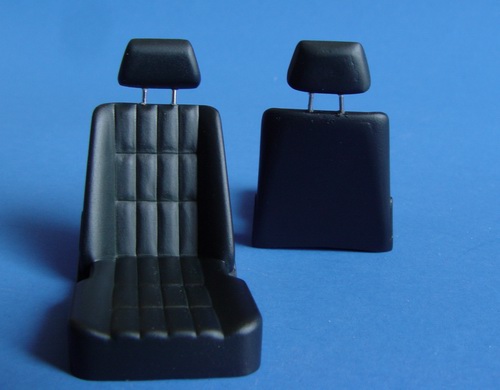
Glue the headrests to the seats. For additional realism, I suggest you glue them at a different angle, and make rods different lengths - usually driver adjusts his seat differently from the passenger seat and that will add more realism to finished interior.
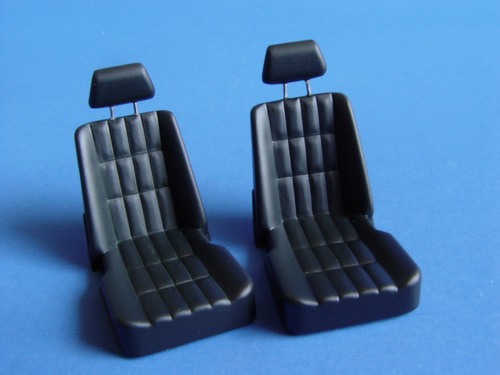
Now we have two great looking seats, with realistic looking headrests and seatbacks. But let's continue with the enhancements.
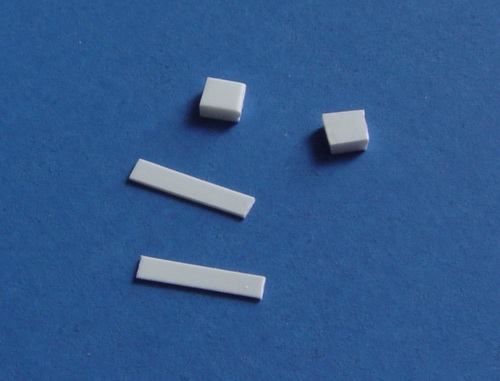
All cars have seatbelts, and all seatbelts have seatbelt holders (catches). Its a small detail that always neglected by kit manufacturers, but it is very important for the right look of the interior. Cut two 1/64 or wider strips from .010 styrene, and then two 1/20 squares from .040 styrene (see picture).
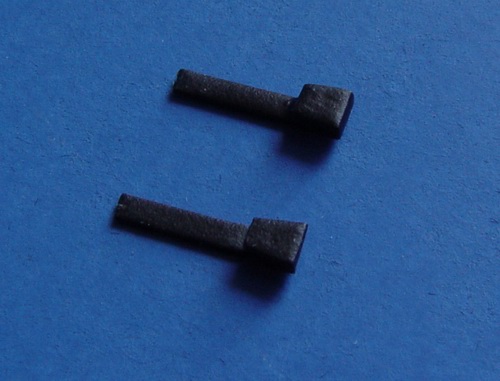
Glue them together as shown, then carefully sand with the sanding stick to the shape preferred (refer to real car pictures), and paint the color you like.
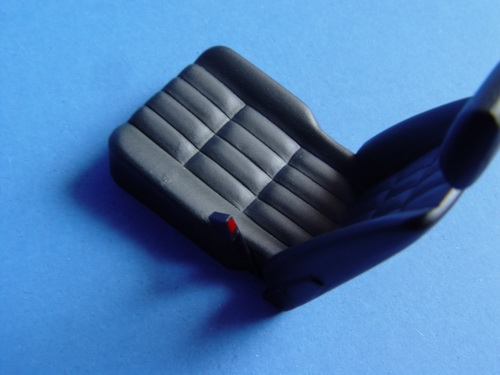
Glue the catch to the seat, and using fine brush, apply some red paint to simulate release button. Repeat for the other seat. You may use this technique for the rear seats too, just make the catches slightly shorter. You can also make a cut at the top with you knife blade to simulate slot for the seatbelt buckle.
When installed to the interior bucket, seats with the catches look much better than plain seats. But this is not all - if we have seatbelt catches now - we need something to put into them - right?
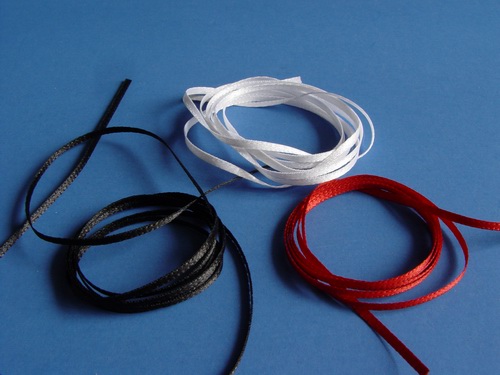
To make realistic looking seatbelts, I recommend to make a trip to the nearest craft store and get some 1/32 ribbon. It is perfect scale and looks exactly like the real thing. It comes in many colors, I usually buy some black (for most cars), red (for race cars) and white (so I could paint it any color I like).
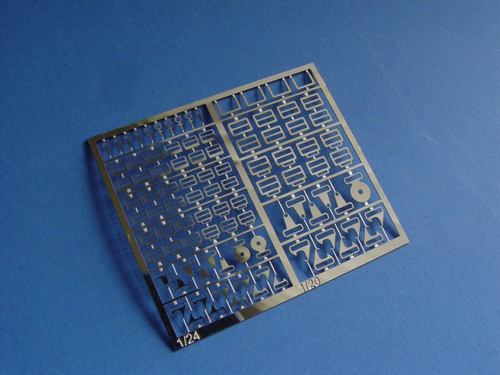
Making seatbelts is simple, but you will need to get your hands on some photoetched buckles, unless you want to scratchbuild them from aluminum sheet. Its very time consuming to make those buckles from scratch, so I think its worth investing $5-6 into photoetched buckle set.
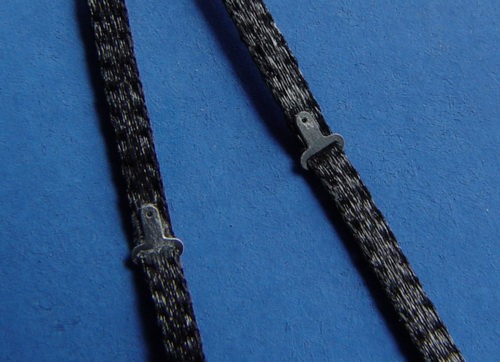
Remove the buckles from the fret, and file them with sanding stick. Put the ribbons into the buckles like the thread in the needle. Cut both ribbons to required length.
Refer to the pictures of the real car for the correct position and attachment points of the seatbelts. Use superglue to attach them to the model. Make sure buckles and seatbelts are visible inside the interior.
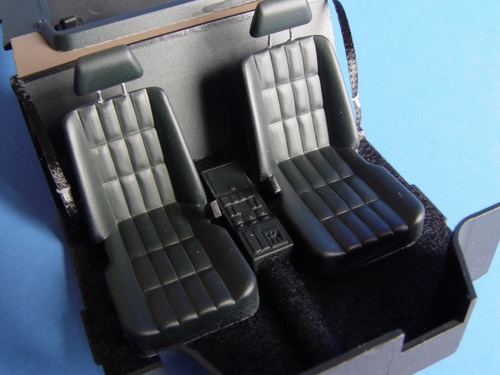
Now, look how much better this interior looks with just little bit of work! Full seatbacks, headrests, seatbelts with buckles and seatbelt catches enhance the model interior tremendously, and they will definitely improve your models too!
Happy modeling!
Copyright 2003 Alex Kustov. No copying or reproduction in any shape or form without written permission of the author.