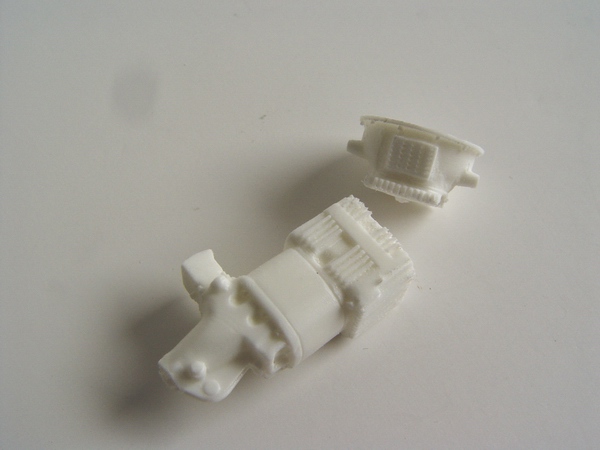
I chose Replicas and Miniatures Company of MD 250 SWB engine for the heart of this Cavallino, since its almost identical with the Lusso powerplant. In order to avoid drilling out the central tunnel in the chassis, I had to cut most of the gearbox, and leave only the bell housing.
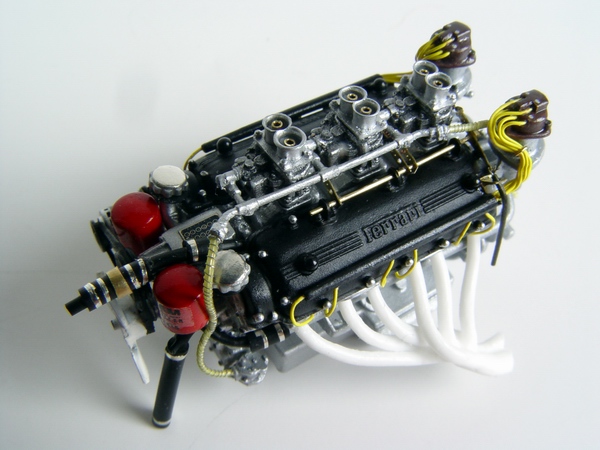
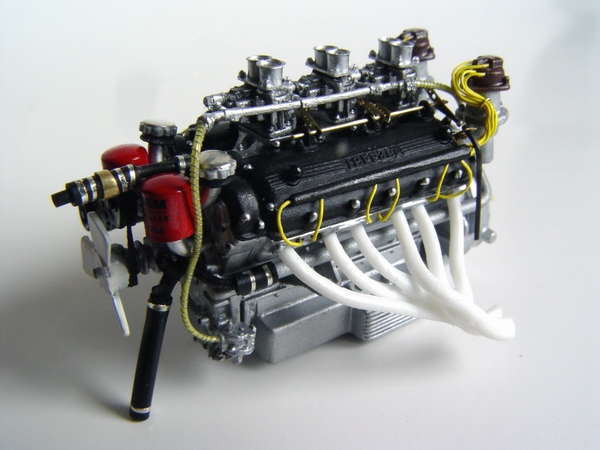
As a last touch, I picked out all nuts and bolts with different metalizers. Completed engine looks great!

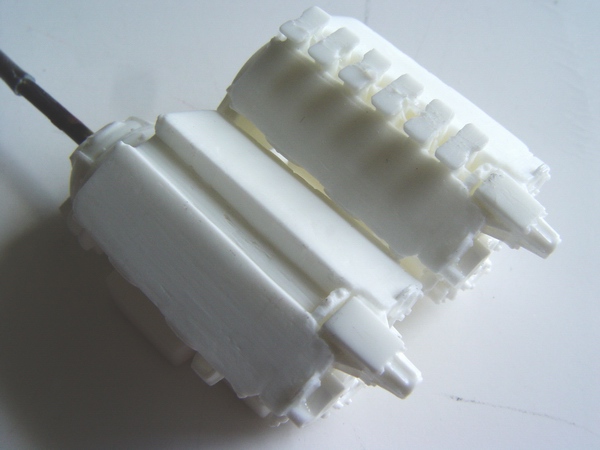
Before continuing with engine assembly, I wanted to make sure it could be fitted in the chassis. I temporarily assembled the engine block and test-fitted it inside the chassis. You can see that I used part of the Scale Kraft transmission instead of original box.
Finally, the engine was installed into the chassis, and lower and upper water hoses connected to the radiator.
Replicas engine is a huge and beautiful model in itself, and it is one of the most detailed Ferrari V12 engines in this scale. Engine block is originally made to accommodate six Weber carburetors, but I needed only three for Lusso, so the whole thing was cut out and replaced with 3-carb stand provided in the kit.

Part of the Scale Kraft transmission was glued to the bell housing. It is almost impossible to tell its not a single piece!
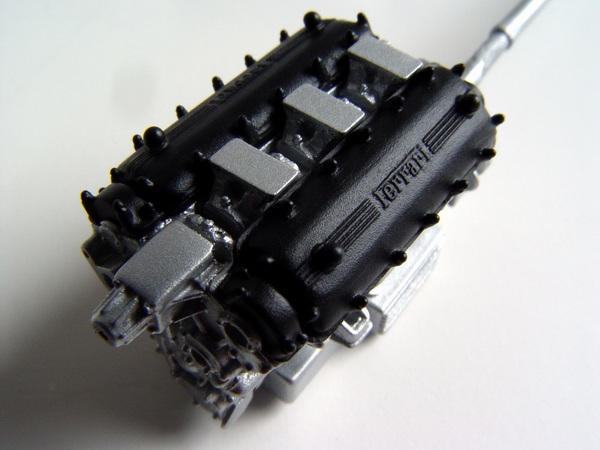
Block was fitted with front cover, bell housing, oil pan, and few other small parts and, after careful cleaning and sanding, painted with aluminum metalizer. To prevent rubbing-off I lightly dull-coated the entire block. Cam covers were painted satin black and glued to the block.
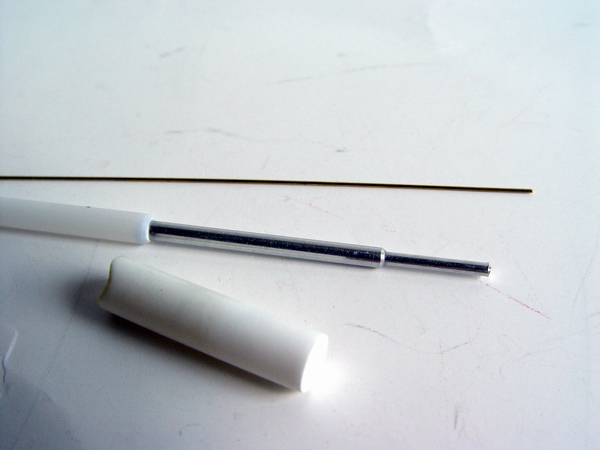
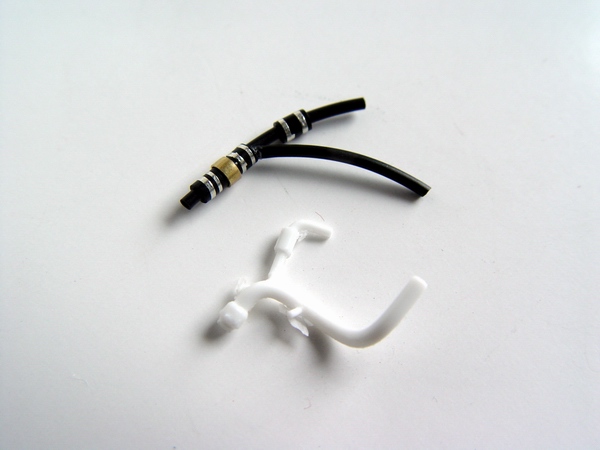
I couldn't find a brake master cylinder in my spare box that was similar to the Ferrari cylinder. The only way was to build my own. After studying several pictures I glued together some tubing pieces...

Then I glued previously cleaned, drilled, and weathered carburetors with tiny throats made from bronze tubing. Front pulley was painted black and added to the block, together with firing plate. Cam covers were detailed with silver paint.
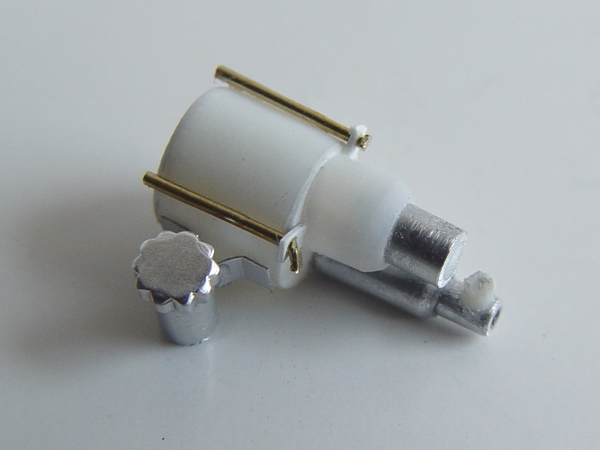
...and built my own cylinder that was really accurate. Brake fluid reservoir was made from aluminum tubing. The cap was sourced from Tamiya 360 Modena kit.
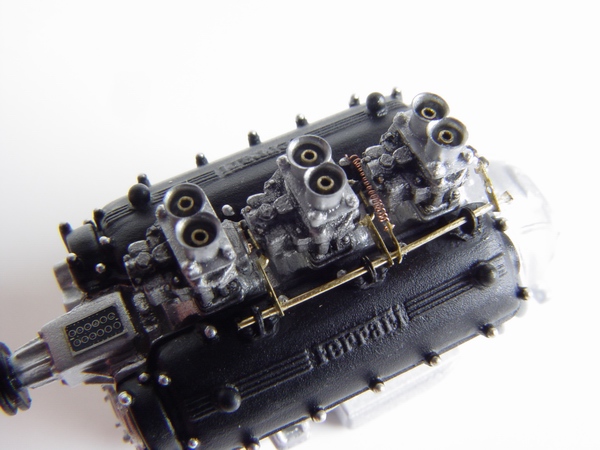
After a lot of cursing, I assembled and installed throttle linkage for the carburetors. You really need to build one of these linkages to appreciate the amount of work (and parts) that went into this assembly!
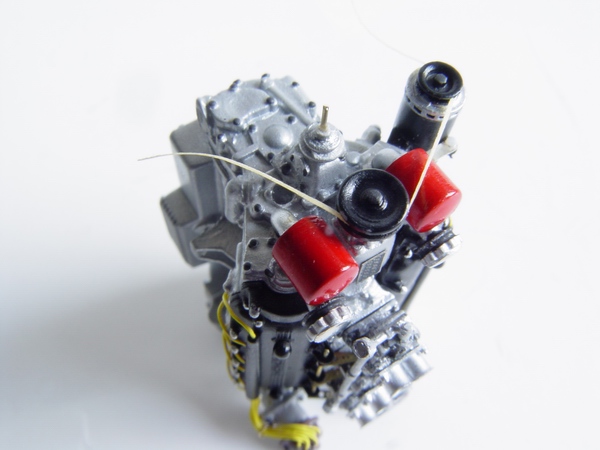
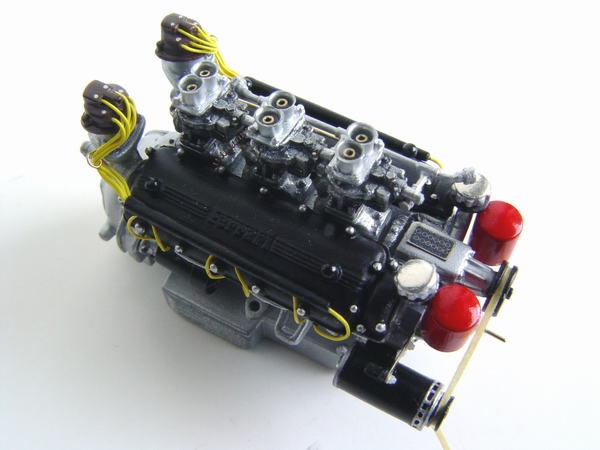
Air horns were made from modified truck horns. I carefully drilled them out and smoothed insides with fine sandpaper. Capacitor was made from aluminum tubing with plastic core.
Twelve small wires with small boots made from black wire insulation (to simulate spark plug boots) were cut...
Horns were wired to the capacitor and painted blue. Capacitor was detailed with a clamp made from soda can. I also painted and wired a pair of distributor coils, and added BMF clamps.
... and attached to the cam covers that were drilled in advance. I also cleaned, drilled, painted, wired, and installed distributors with plug wires. Cam covers were also drilled for the exhaust manifolds.
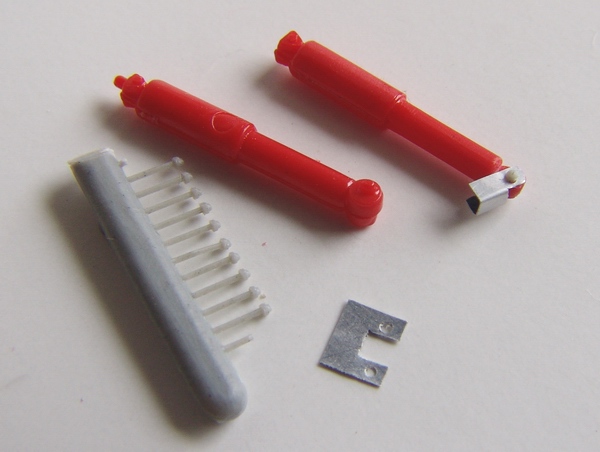
Front shock absorbers were made from couple of spare shocks, and fitted with scratch built flanges/frames made from aluminum cans. Flanges were fitted to the frames with plastic bolts supplied with the engine kit.
Dashboard was modified and new firewall was built from sheet styrene.
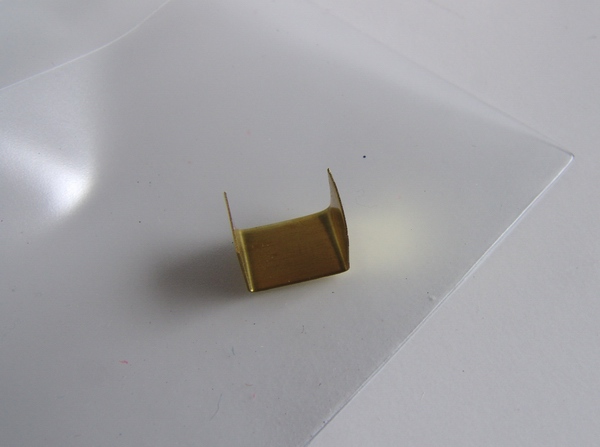
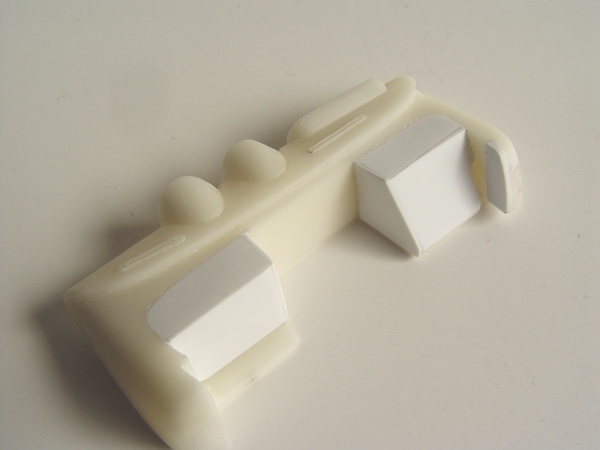
To make a clear washer bag, I used spare clear credit card pocket from my wallet. I made a template for the bag from the brass sheet...
The engine was test-fitted with the chassis, body, and dashboard to check for any interference. Minor changes were made. I also made sure carburetors were freely clearing the hood scoop.
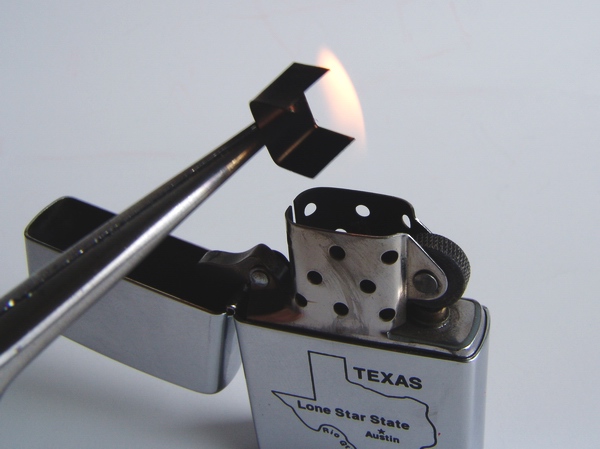
...then heated the brass piece...
Engine fit was satisfactory, and after making sure there was enough room for the distributors and coils, I continued with engine assembly.
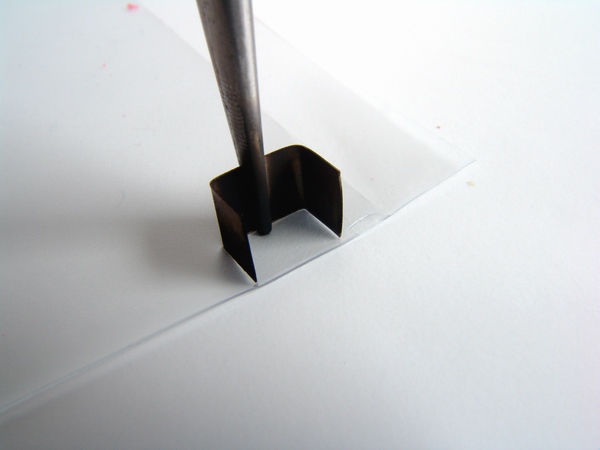
... and pressed it against the plastic.

Even though SWB and Lusso engines are very similar, some of the components are completely different. To update the engine to Lusso's specs, front cover was drilled to accept two oil filters, as well as two oil fillers and various water lines. Additional support for the engine fan was also made and added to the front cover.
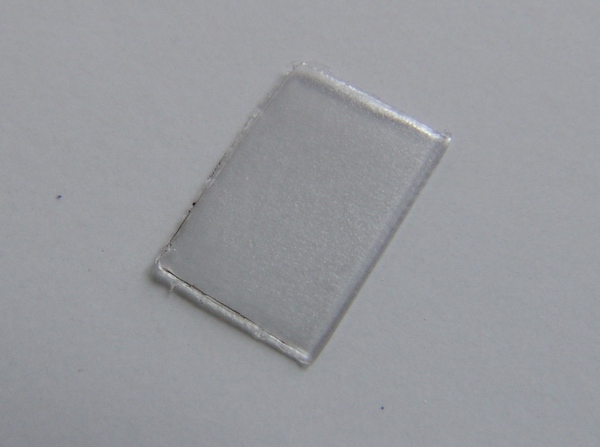
This resulted in a very realistic clear water bag, that was hollow inside and nicely sealed at the edges.
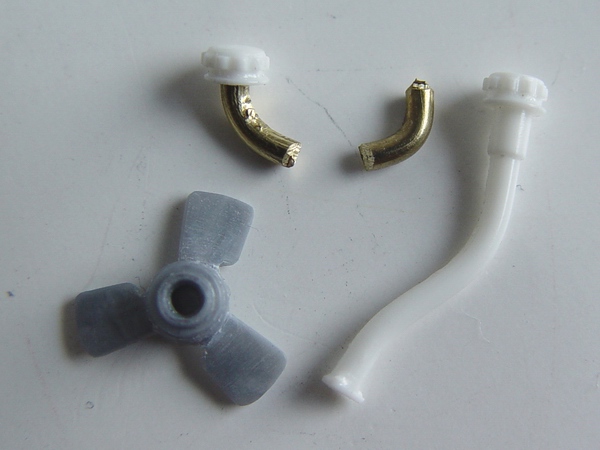
Since Lusso engine doesn't have long oil fillers like SWB, I cut off the caps off resin parts and glued them to the slightly curved brass rods. Engine fan was taken from AMT/ESCI Ferrari 250 SWB kit. I had to thin the blades though, they were really thick!

Then water bag was fitted with a mouth, and an overfill hose made from thin wire. I also added couple of brass hooks and detail painted everything.

Filler caps were covered with BMF, painted and glued to the block. I also added oil filters, generator with small p/e bracket, and started working on the drive belts.
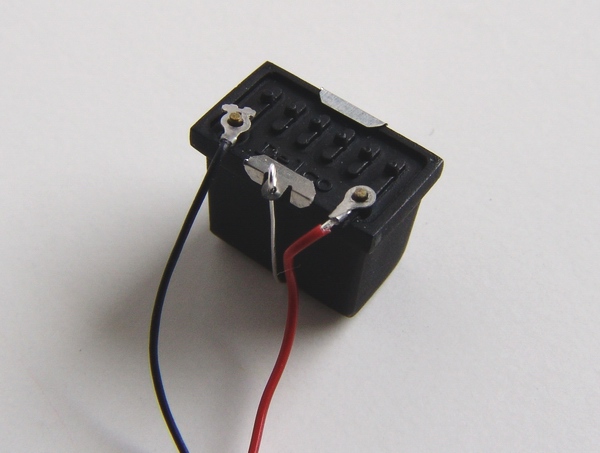
Battery was sourced from parts box, painted flat black, and detailed with clamps and wires from Detail Master battery detail set.
Fan support was drilled and fitted with a piece of brass wire (to hold the fan). Drive belt was made from Tamiya masking tape and painted flat black.
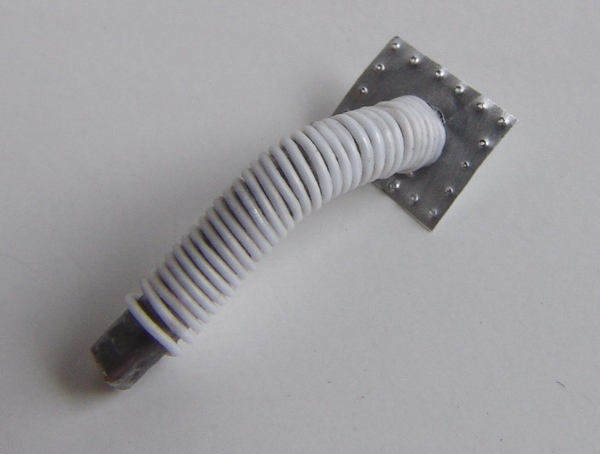
Airduct was scratchbuilt using a piece of solder with some wire wrapped around it to simulate ribbed hose used in Ferraris. Base was made from sheet aluminum.
Carburetor fuel lines were glued to the carbs, and entire engine was detail painted with different metalizers, and weathered with washes.
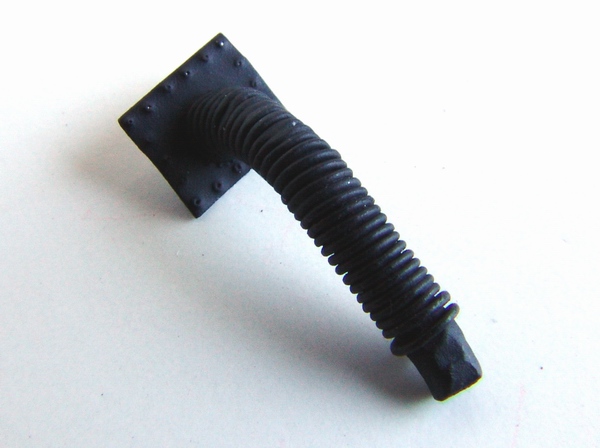
Airduct was primed, and painted flat black. The effect of the ribbed hose was very realistic once it was painted black.
Radiator water hoses were supplied as a resin piece in the kit, but I wanted to make them a bit more realistic. I used vinyl tubing, detailed with wires and BMF clamps.

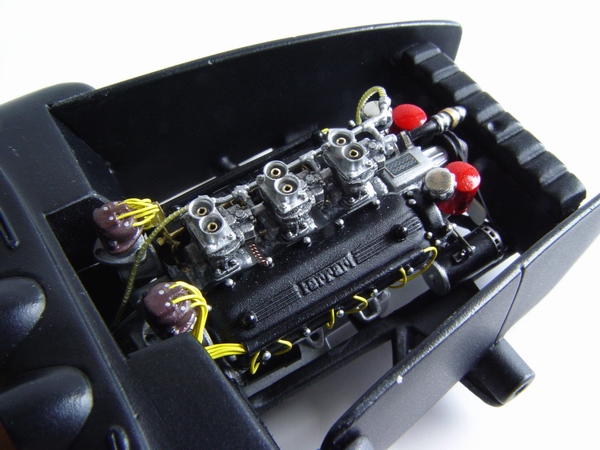
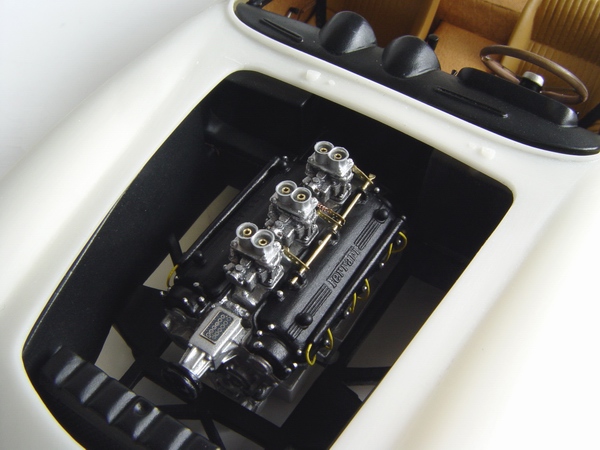
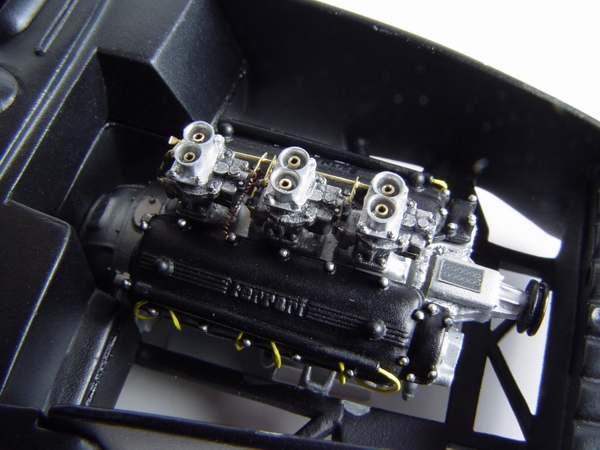
Finally all of the above components were glued onto their places in the engine bay: air horns, airduct and a battery on the right side...
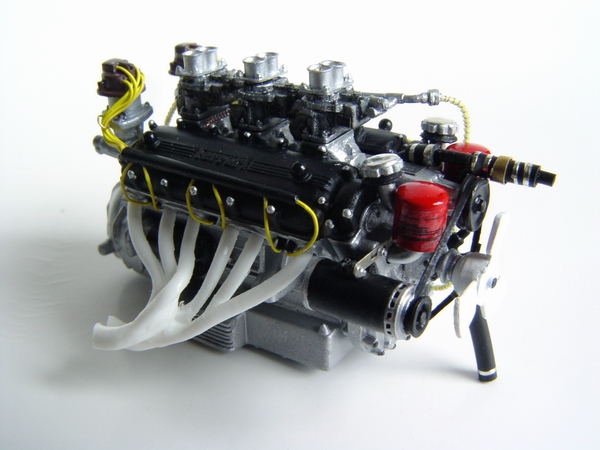
Engine fan and exhaust manifolds were painted flat white and attached to the engine. Then I added water lines, fuel lines, and FRAM decals to the oil filters.
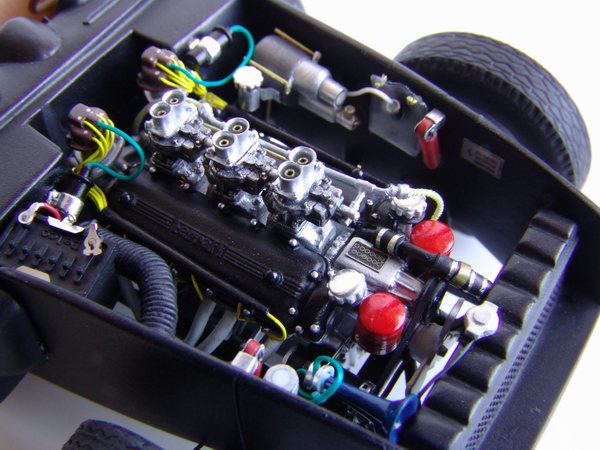
...and master cylinder and a washer bag on the left. I also added photoetched Ferrari chassis plate to the left inner fender. Shocks were also installed from both sides. Finally I added a radiator cap and an overfill hose.
Finally, I added lower water hose, rear water lines, and connected fuel lines to the fuel pump at the bottom of the engine.
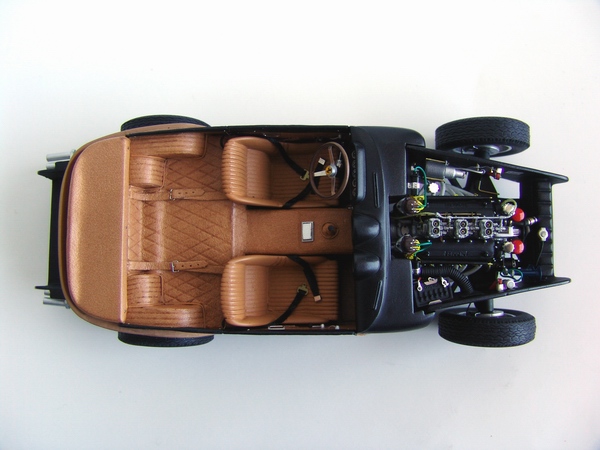
Now the chassis was absolutely complete - with fully detailed engine and engine bay, exhaust system, and leather-upholstered interior.